
cnb一键发布
一条cnb流水线,解放双手
实战-cnb一键发布版内容到teek网站-2025.4.1(测试成功)
目录
[toc]
版权
二丫讲梵指导,自己测试。
前言
全网最美博客-teek(知识库&博客二合一),你已经拥有了。最丝滑的markdown编辑器-typora你也在用。
此时,如果你只需要在本地仓库维护数据,一键提交后,就能触发流水线,自动构建,生成dist内容,然后自动传到你服务器nginx站点目录。
这个工作流是不是很丝滑,那么以下讲的cnb.cool将能完全满足你的需求。😜
前提
2025年4月3日测试成功。
前提条件:
- 具备git环境;
- 具有自己的云服务器;
- 具有teek网站环境;
官网
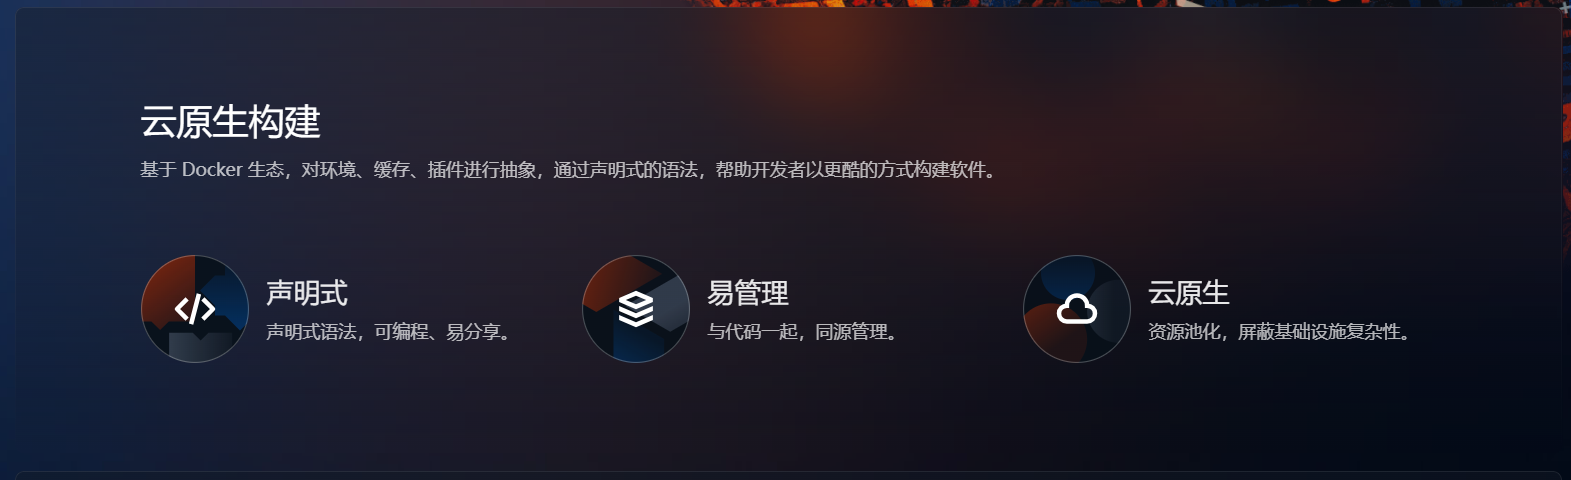
基于 Docker 生态,对环境、缓存、插件进行抽象,通过声明式的语法,帮助开发者以更酷的方式构建软件。
- 声明式:声明式语法,可编程、易分享。
- 易管理:与代码一起,同源管理。
- 云原生:资源池化,屏蔽基础设施复杂性。
最新代码
截止2025年4月3日:
(1).cnb.yml文件
详细代码:
master:
  push:
    - runner:
        cpus: 16
      services:
        - docker
        - git-clone-yyds
      docker:
        image: docker.cnb.cool/znb/images/node:18
        volumes:
          - /data/.cache:copy-on-write #声明式的构建缓存
      stages:
        - name: 🖨️ 打印环境
          if: |
            [ "$CNB_COMMIT_MESSAGE_TITLE" = "BUILD" ]
          script: |
            node -v && npm -v && yarn -v && pnpm -v
        - name: 📦️ 安装依赖
          if: |
            [ "$CNB_COMMIT_MESSAGE_TITLE" = "BUILD" ]
          script: |
            pnpm install

        - name: ⚗️ 编译项目
          if: |
            [ "$CNB_COMMIT_MESSAGE_TITLE" = "BUILD" ]
          script: |
            pnpm docs:build   # VitePress 专用命令
        - name: 🚚 发布制品
          if: |
            [ "$CNB_COMMIT_MESSAGE_TITLE" = "BUILD" ]
          image: tencentcom/rsync
          imports: https://cnb.cool/onedayxyy/vitepress-theme-teek-one-private/-/blob/master/env.yaml
          settings:
            user: ${SSH_USER}
            key: ${SSH_KEY}
            port: 22
            hosts:
              - ${ECS_IP}
            source: docs/.vitepress/dist/
            target: /root/rsync/rsync-vitepress/dist/
            delete: true
            prescript:
              - echo "prescript"
              - ls -l  /root/rsync/rsync-vitepress/dist/
            script:
              - echo "after script"
              - ls -l /root/rsync/rsync-vitepress/dist/
              - date
              - aliyun cdn RefreshObjectCaches --ObjectType File --ObjectPath "onedayxyy.cn/" #刷新阿里云cdn缓存

        #同步仓库到gitee
        - name: sync to gitee
          image: tencentcom/git-sync
          imports: https://cnb.cool/onedayxyy/vitepress-theme-teek-one-private/-/blob/master/env.yaml
          settings:
            branch: master
            auth_type: https
            username: ${GIT_USERNAME}
            password: ${GIT_ACCESS_TOKEN}
            target_url: https://gitee.com/onlyonexl/vitepress-theme-teek-one-private.git
# git_email: 'github-actions[bot]@users.noreply.github.com'(2)env.yaml文件
详细代码:
#gitee token
GIT_USERNAME: gitee账户登录名
GIT_ACCESS_TOKEN: gitee账户token
ECS_IP: 云服务器ip
SSH_USER: 云服务器登录用户
SSH_KEY: |
-----BEGIN RSA PRIVATE KEY-----
MIIEpAIBAAKCAQEAwWunMrptJsXbxx0M17w3qaHyJb9B/CN9PgeNE9KoyN26//nN
……
EqbXIgV6SEJtBLQlzkOS0BR2hGZl5Y99aA15vcub+AafBAzOeAL8ig==
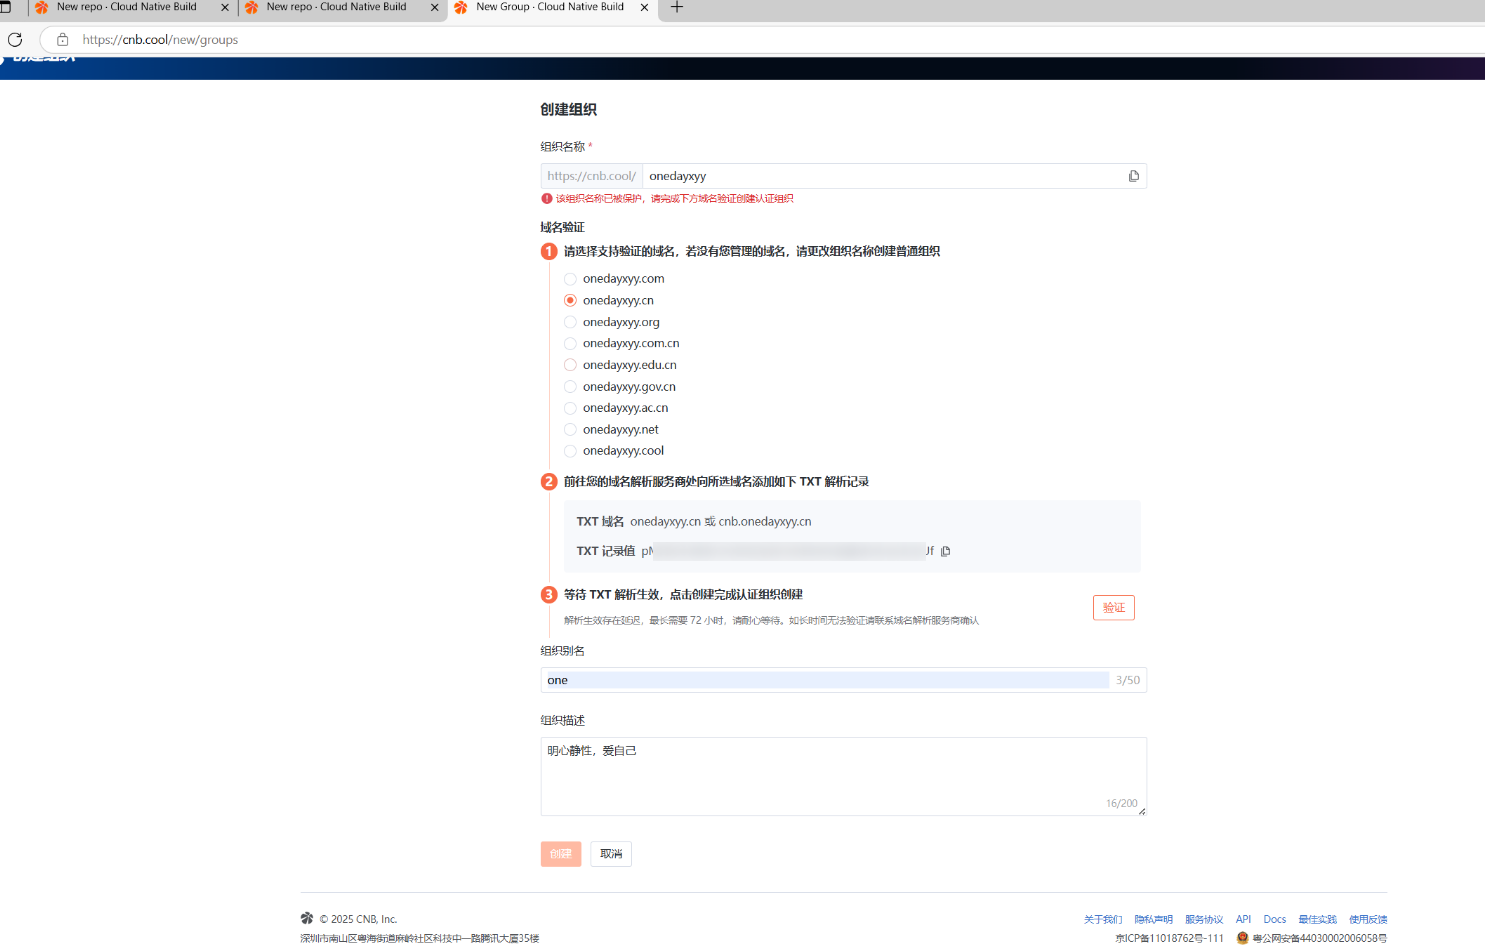
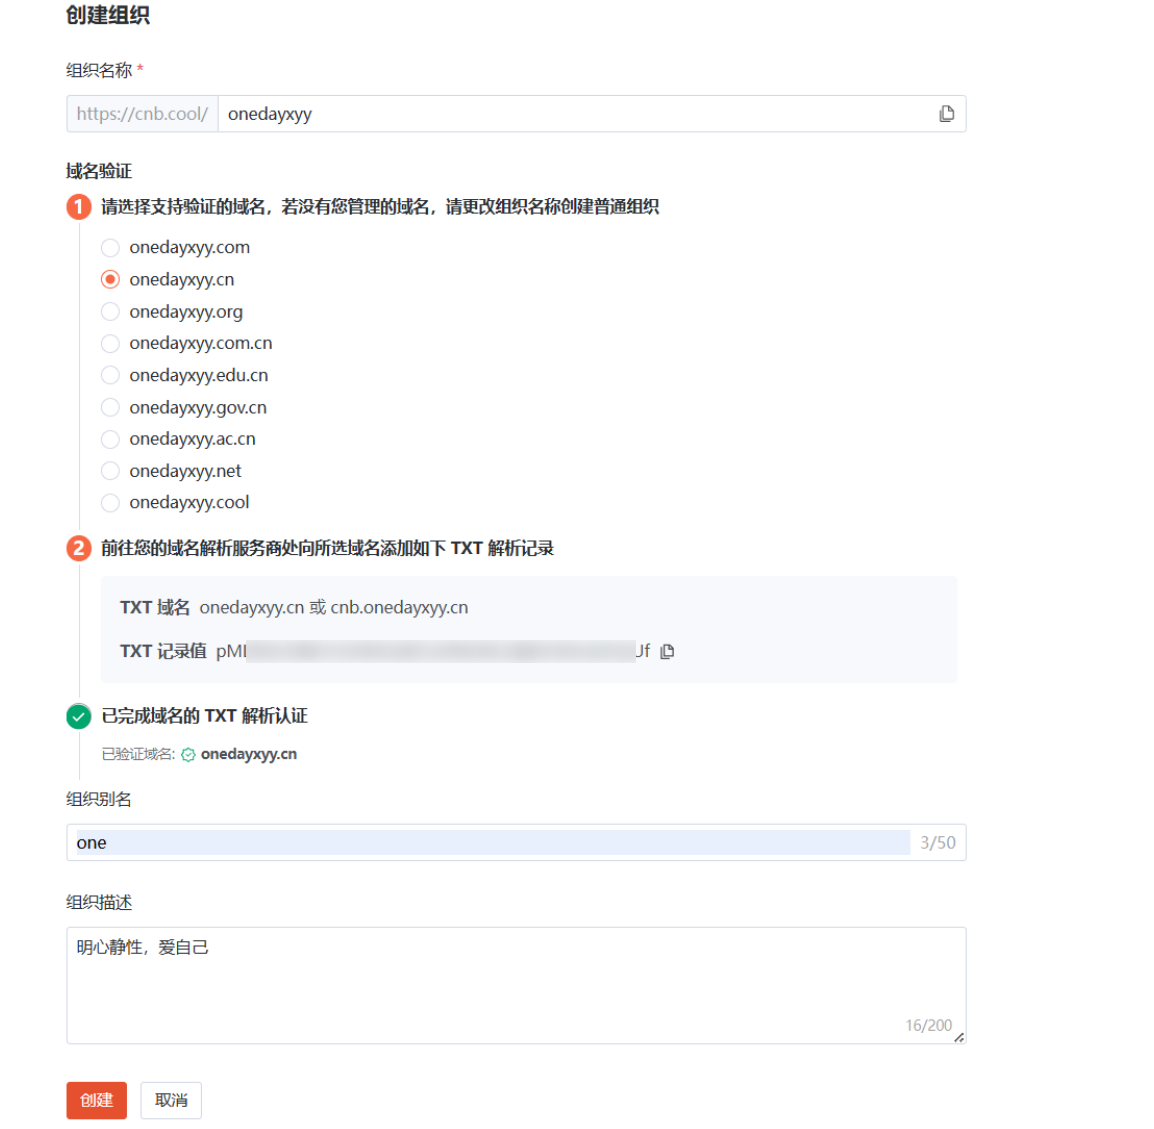
-----END RSA PRIVATE KEY-----1、创建组织
警告
这里好像是要拥有一个自己的域名来着……,然后验证域名归属,再给自己的组织起一个名称。
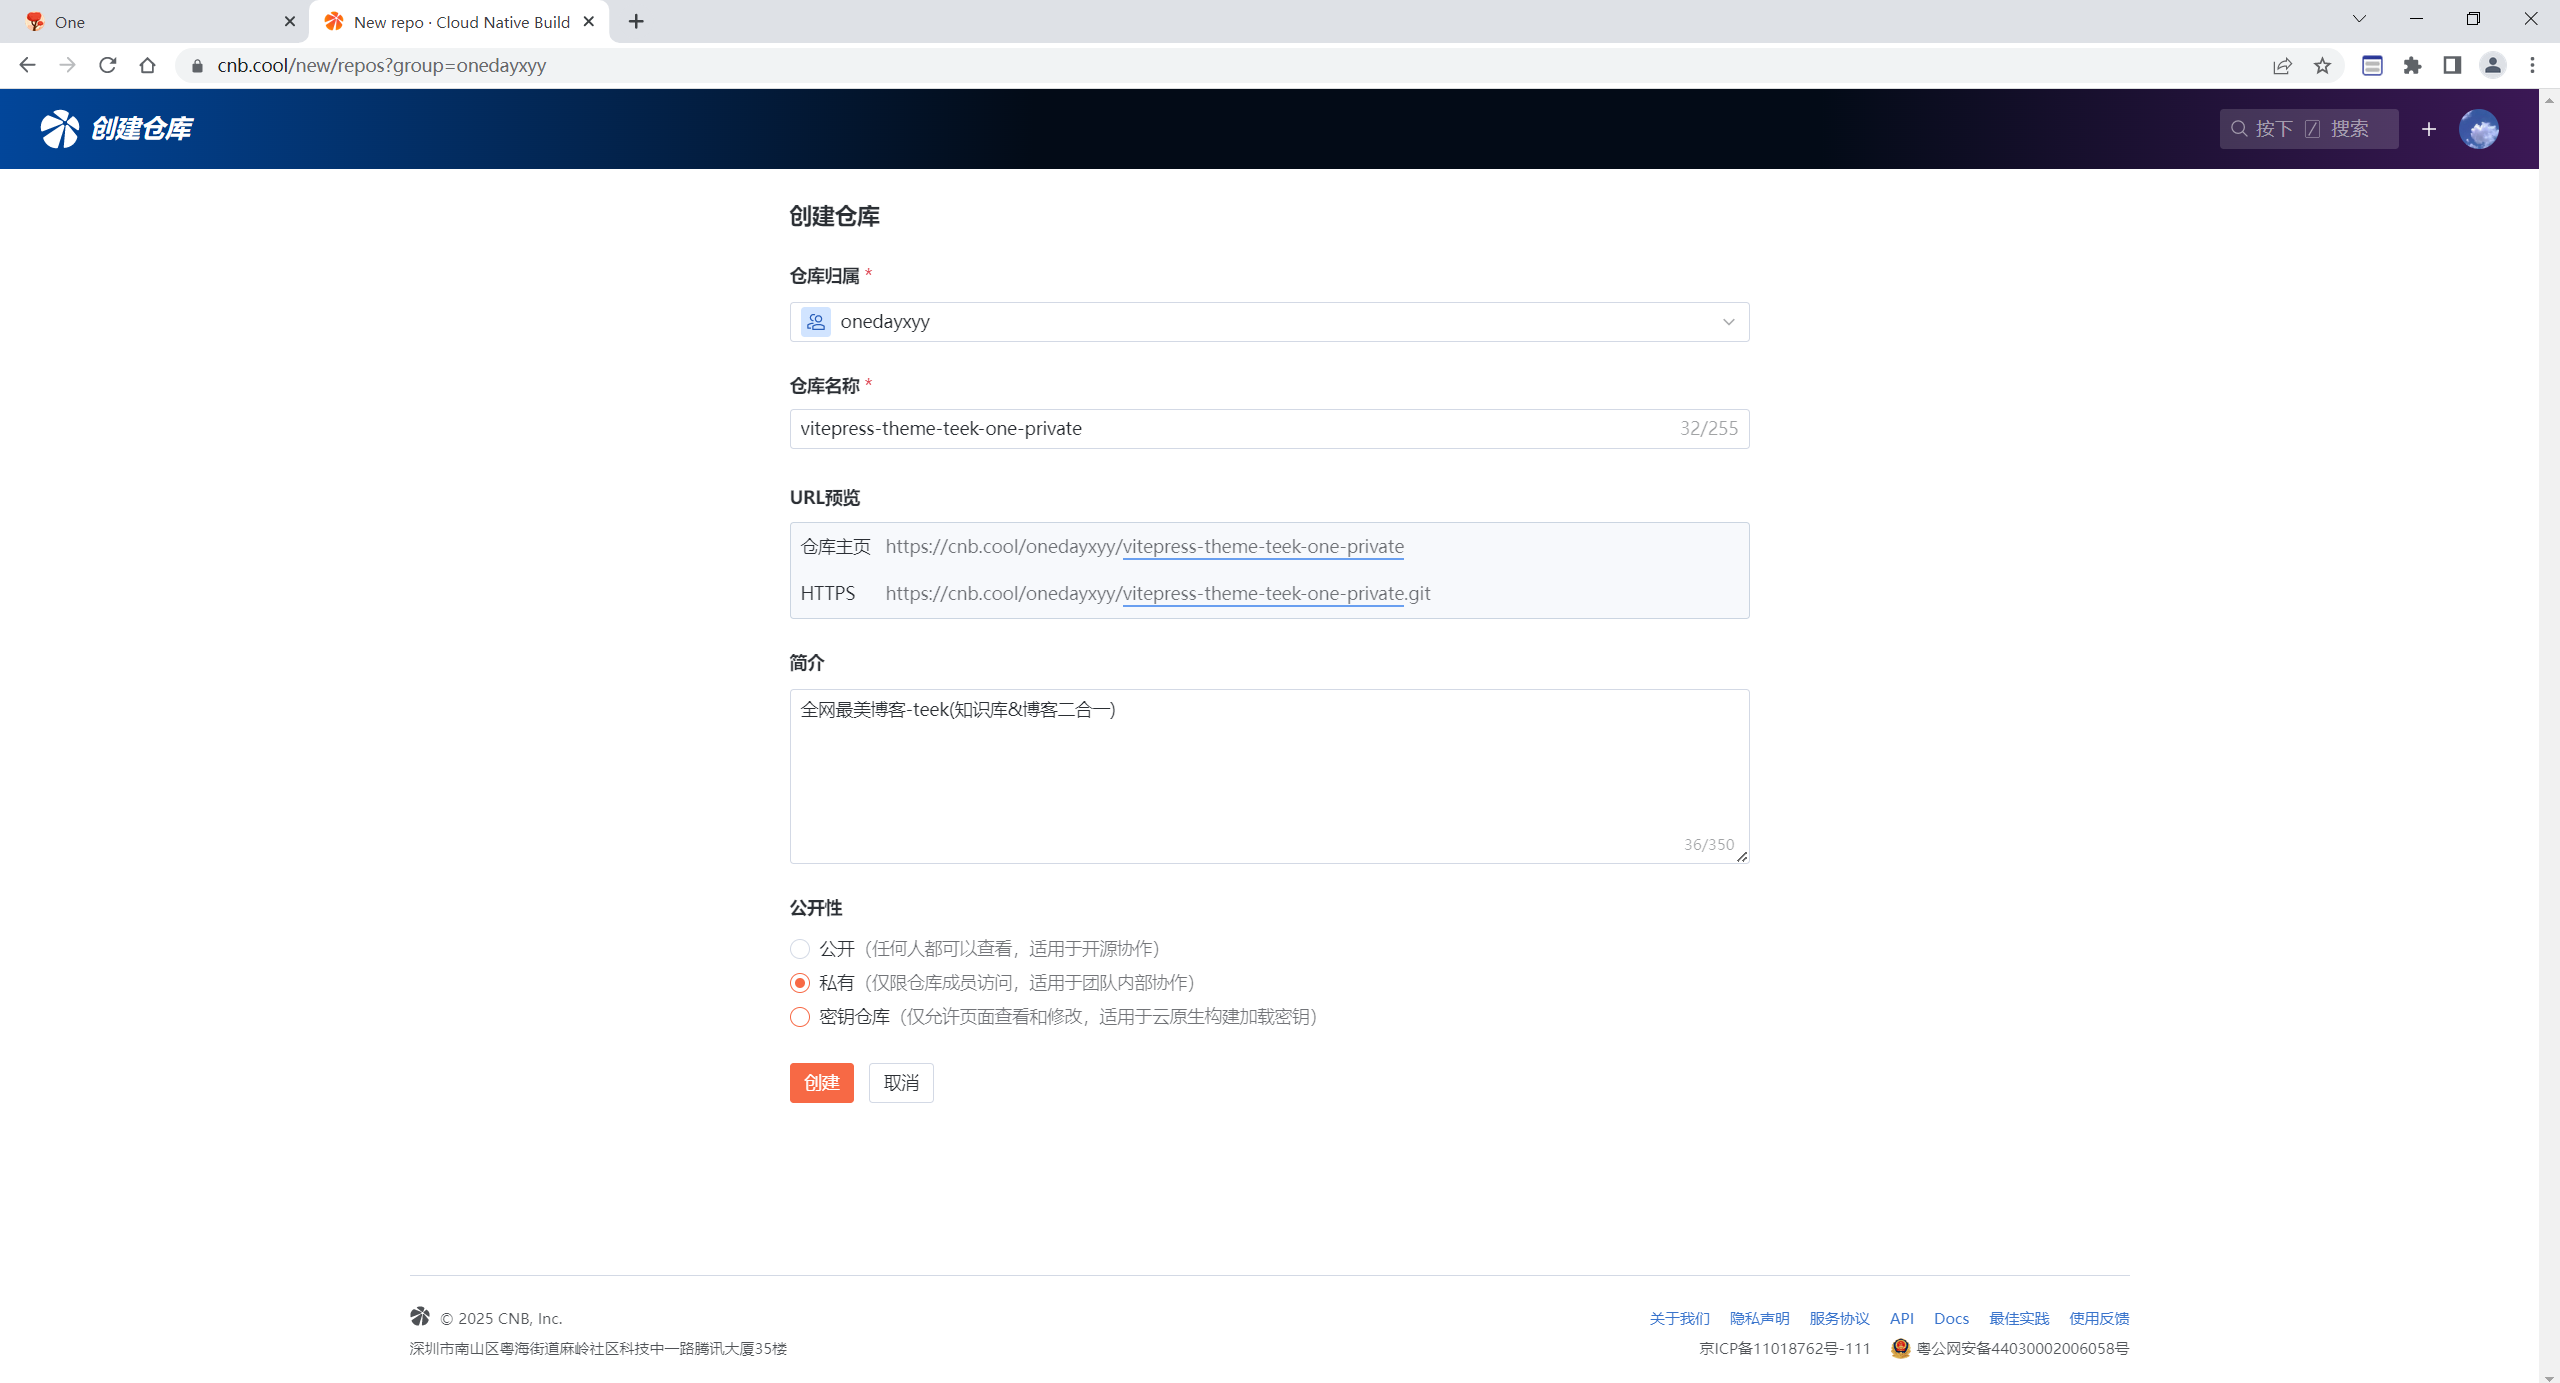
2、创建仓库
- (1)以上组织创建好后,我们开始创建一个仓库:(本次创建的是一个私有库)
https://cnb.cool/onedayxyy/vitepress-theme-teek-one-private.git
- 初始化本地仓库,并将自己本地库推送到cnb.cool远程仓库
本次按 方式 3:空仓初始化 来初始化自己的本地仓库:

git init .
git remote add origin https://cnb.cool/onedayxyy/vitepress-theme-teek-one-private.git
git config --local user.name cnb.aYHw4hqhwFA
git config --local user.email "Z0KUuiPxqUfIPDstra7UrF+cnb.aYHw4hqhwFA@noreply.cnb.cool"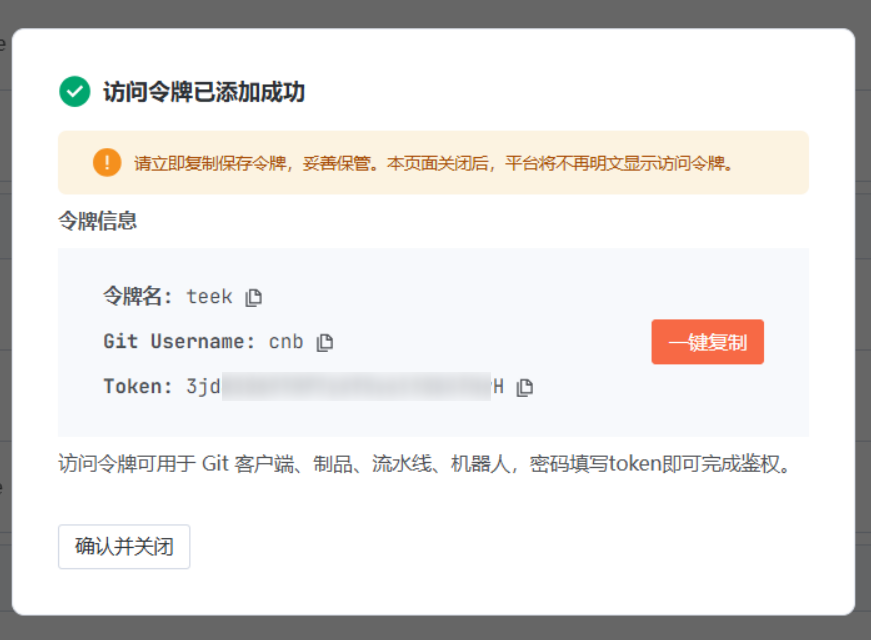
git config credential.helper store- (2)创建ssh令牌密钥:
自己先生成一个token:

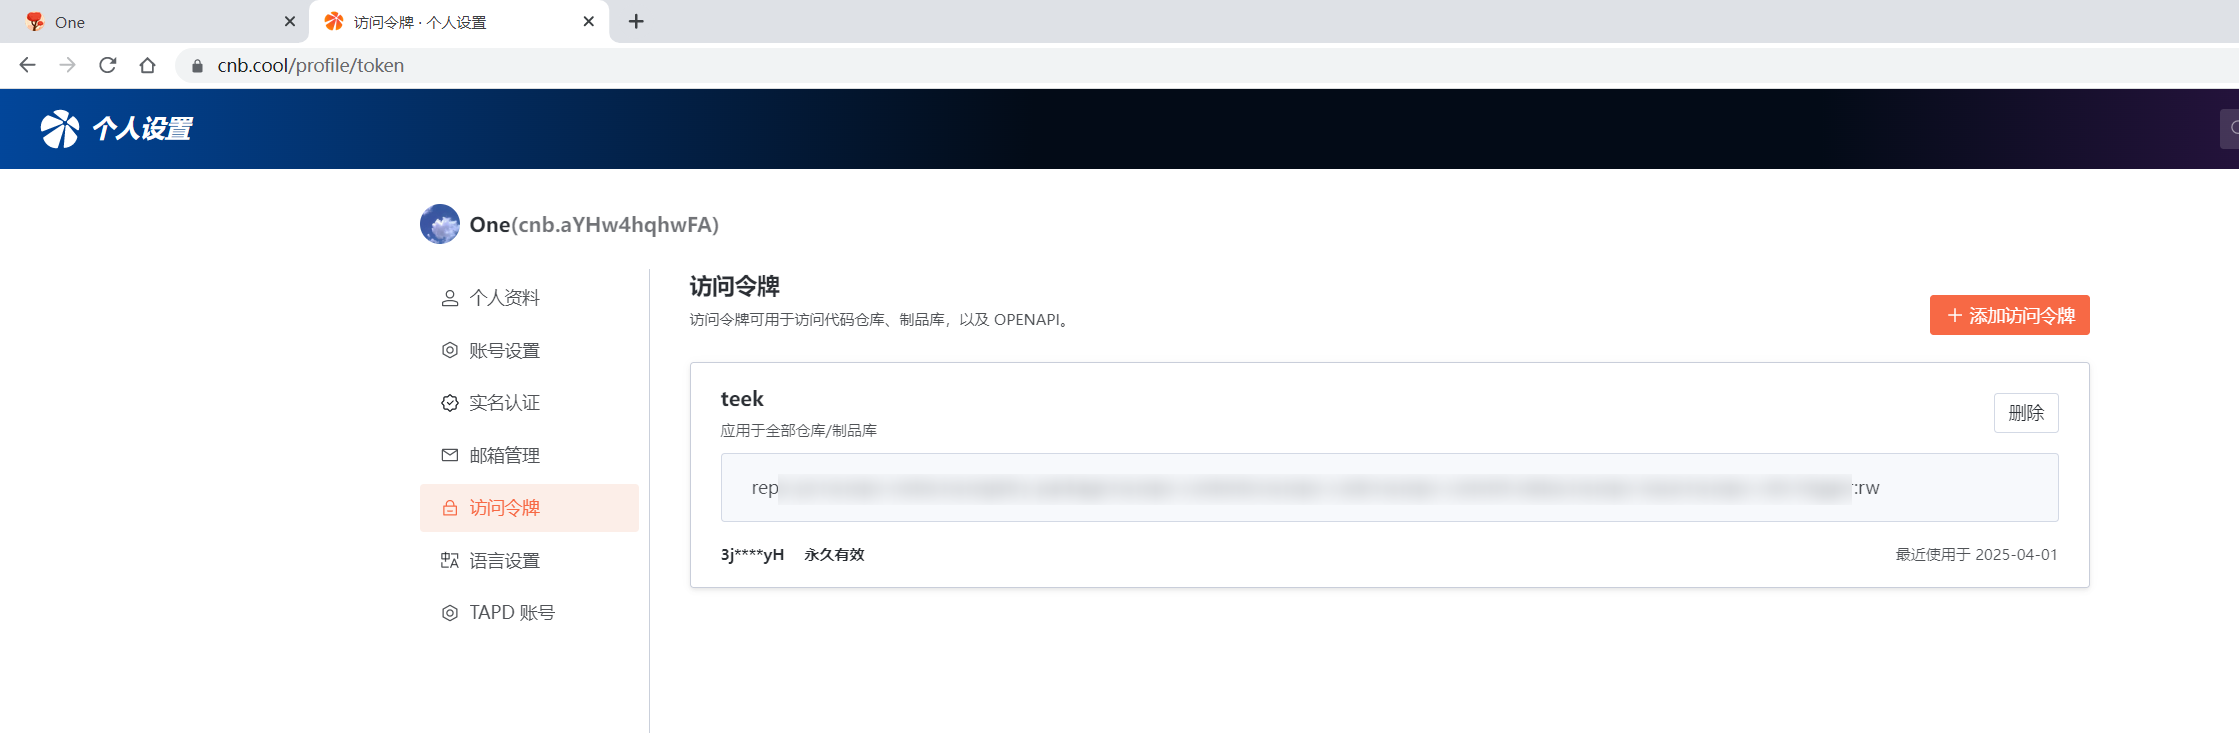
警告
自己一定要记录号刚才生成的密钥:(后续需要用到的)
- (3)推送本地现有仓库:
#因为自己本地已经有了teek仓库,这里我需要先删除仓库里的.git,再重新初始化仓库。
cd /d/vitepress-theme-teek-one-private
rm -rf .git
git init
git add -A
git commit -m"first commit"
git remote add origin https://cnb.cool/onedayxyy/vitepress-theme-teek-one-private.git
#git remote add origin git@gitee.com:onlyonexl/vitepress-theme-teek-one-private.git
#git push -u origin "master" --force
git config credential.helper store
# 作用:启用 Git 凭据存储,避免每次推送时重复输入账号密码。
# 关键点:
# 首次推送需输入用户名/密码,后续会自动保存在 ~/.git-credentials。
# 仅推荐在 安全环境 下使用(若为公共电脑,建议用 cache 临时存储)。

git push -u origin "master"特别注意:
执行git config credential.helper store后,会自动弹出一个git终端,此时输入前面创建好的密钥就好。

3、配置文件
以上代码推送到仓库后,在本地仓库里,编辑如下2个文件:
- (1)创建
.cnb.yml
具体代码:
master:
  push:
    - runner:
        cpus: 16
      services:
        - docker
        - git-clone-yyds
      docker:
        image: docker.cnb.cool/znb/images/node:18
        volumes:
          - /data/.cache:copy-on-write
      stages:
        - name: 🖨️ 打印环境
          script: |
            node -v && npm -v && yarn -v && pnpm -v
        - name: 📦️ 安装依赖
          script: |
            pnpm install
        - name: ⚗️ 编译项目
          script: |
            pnpm docs:build   # VitePress 专用命令
        - name: 🚚 发布制品
          image: tencentcom/rsync
          imports: https://cnb.cool/onedayxyy/vitepress-theme-teek-one-private/-/blob/master/env.yaml
          settings:
            user: ${SSH_USER}
            key: ${SSH_KEY}
            port: 22
            hosts:
              - 106.75.214.199
            source: docs/.vitepress/dist/
            target: /root/rsync/rsync-vitepress/dist/
delete: true- (2)创建
env.yaml
具体代码:
在自己云服务器上生成ssh密钥,将私钥拷贝到env.yaml的SSH_KEY里。
ssh-keygen

cat /root/.ssh/id_rsa.pub >> /root/.ssh/authorized_keys #还需要把公钥放到认证目录编辑内容:
SSH_USER: root
SSH_KEY: |
    -----BEGIN RSA PRIVATE KEY-----
    MIIEpAIBAAKCAQEAwWunMrptJsXbxx0M17w3qaHyJb9B/CN9PgeNE9KoyN26//nN
	……
    2Sf90wKBgQDPVD6ii2OWiXhSZbFHYOoRh7AyQYhQS+caF1BVU6H32GhCuVs2+vX4
    KCGx47oLS2Gn2gZFWgB+sngFqQZkB1NtkbuyCK4DUD5jTgZUsPkYjk2VXb2zjEQY
    EqbXIgV6SEJtBLQlzkOS0BR2hGZl5Y99aA15vcub+AafBAzOeAL8ig==
    -----END RSA PRIVATE KEY-----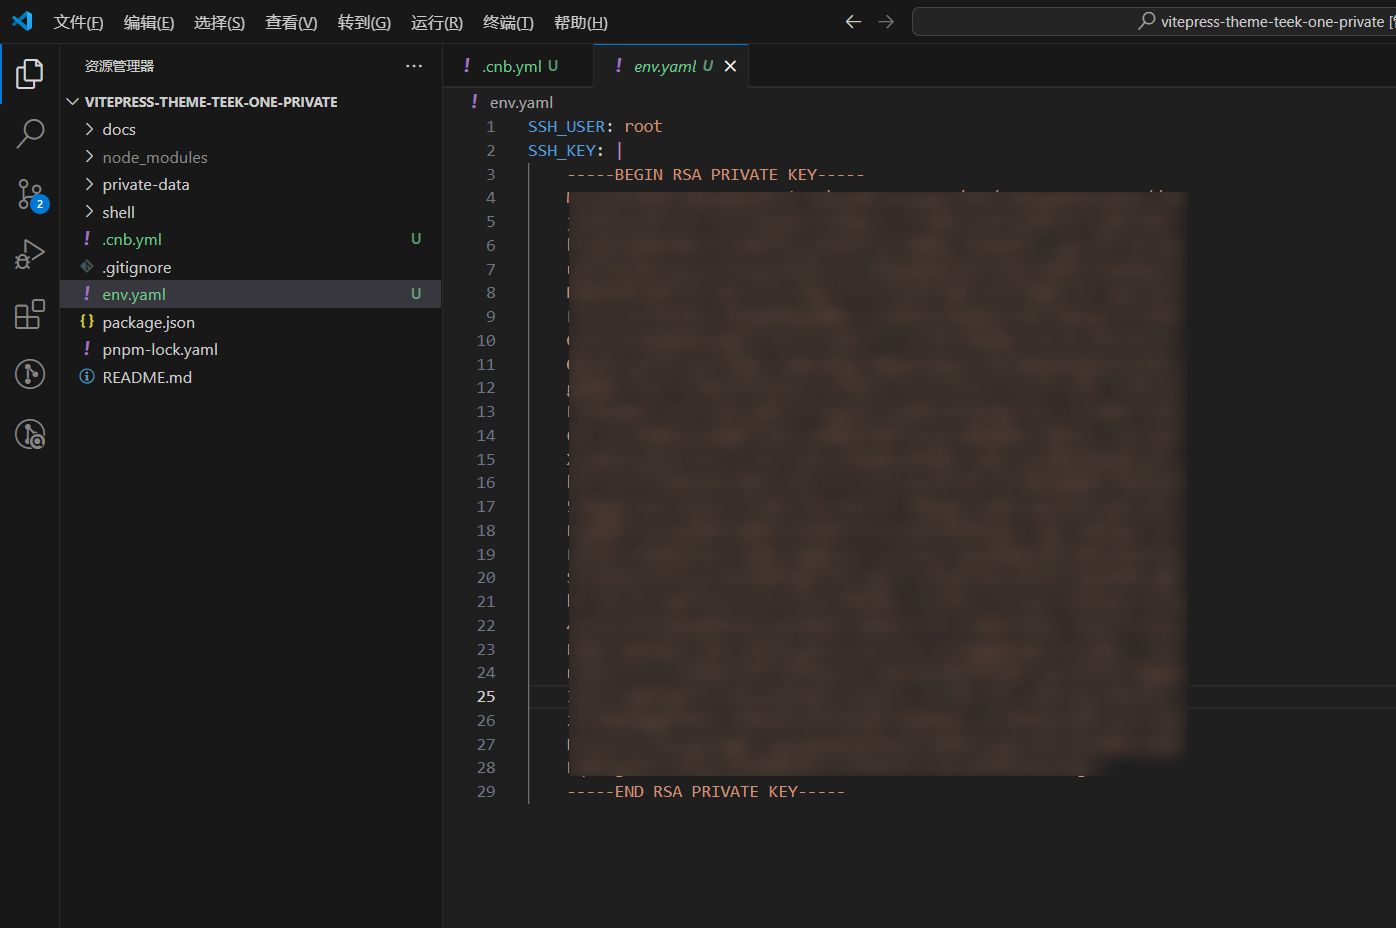
4、运行验证
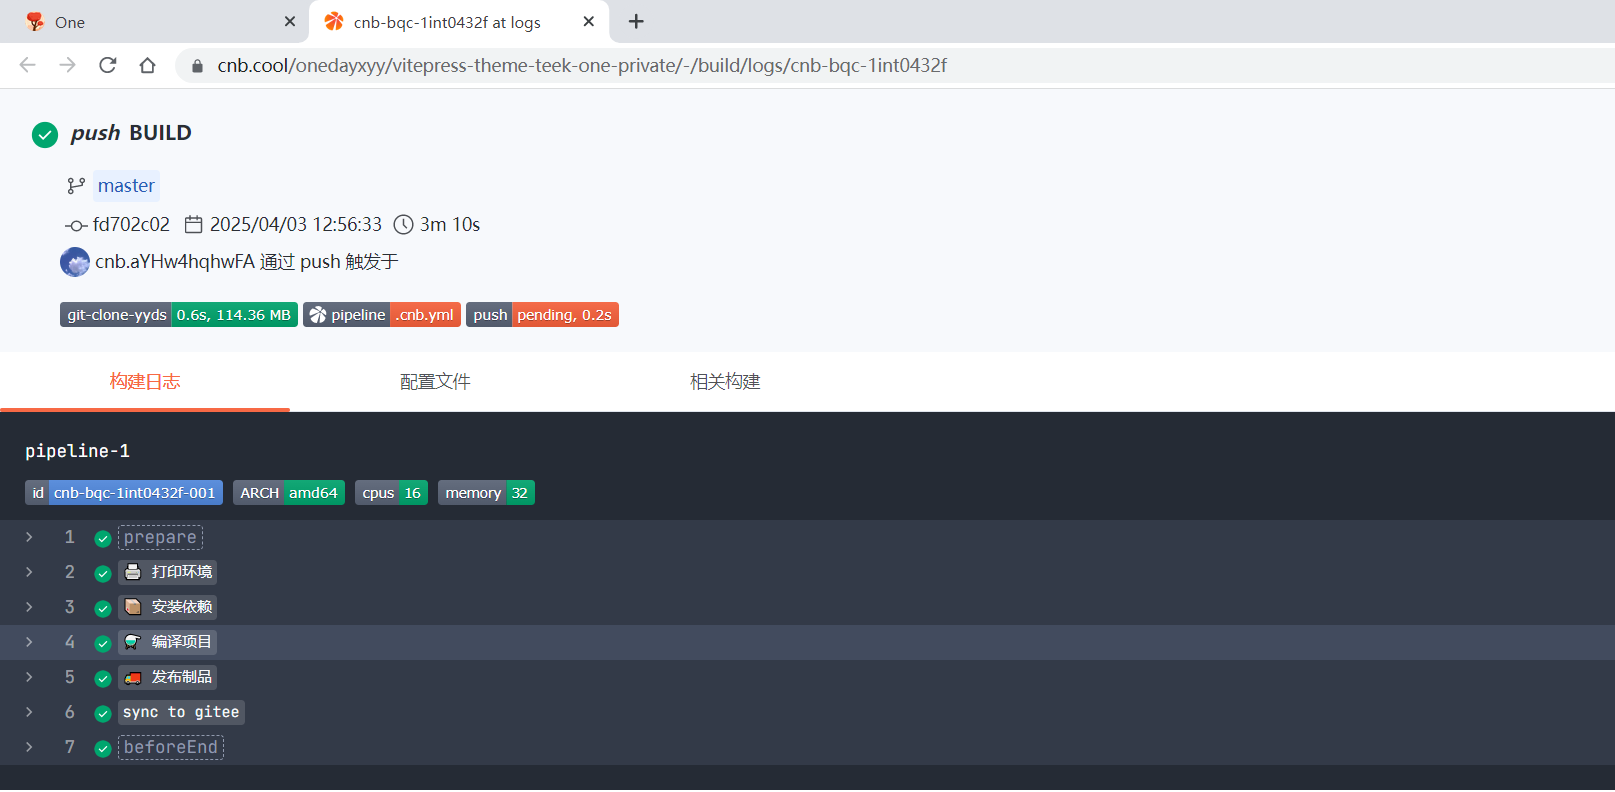
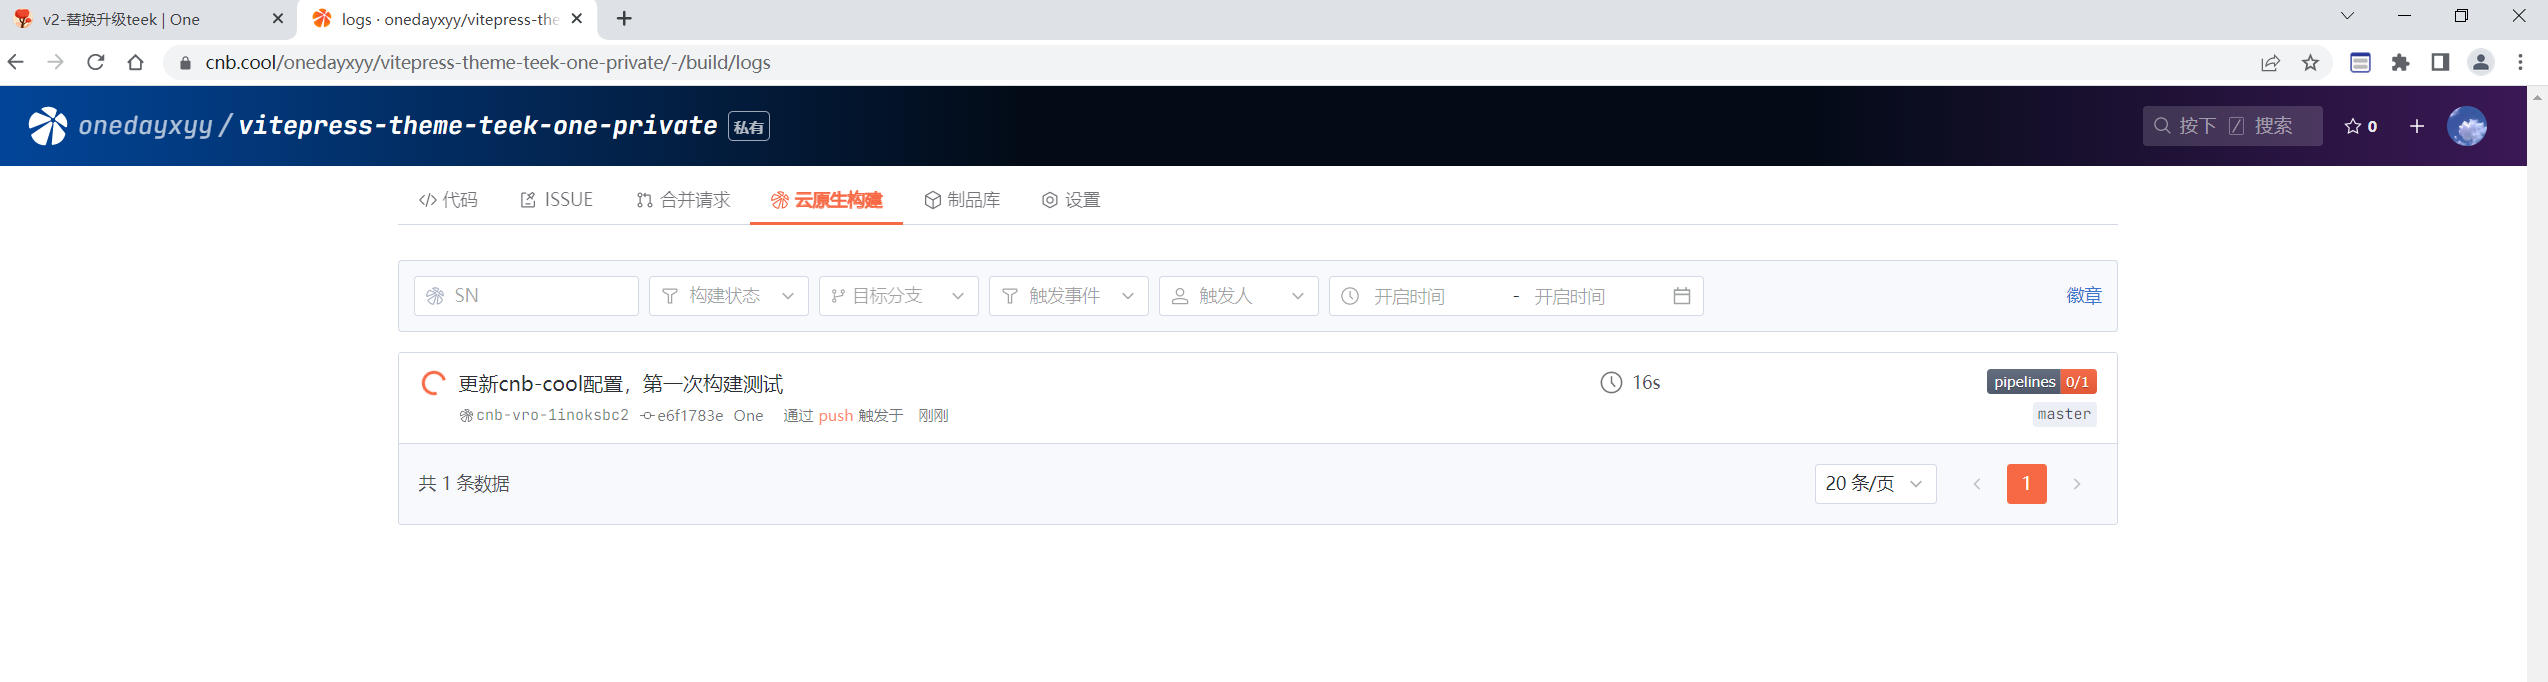
- 以上编辑完成后,提交代码,第一次提交后,就可以看到已经触达流水线了:
git add -A
git commit -m"更新cnb-cool配置,第一次构建测试"
git push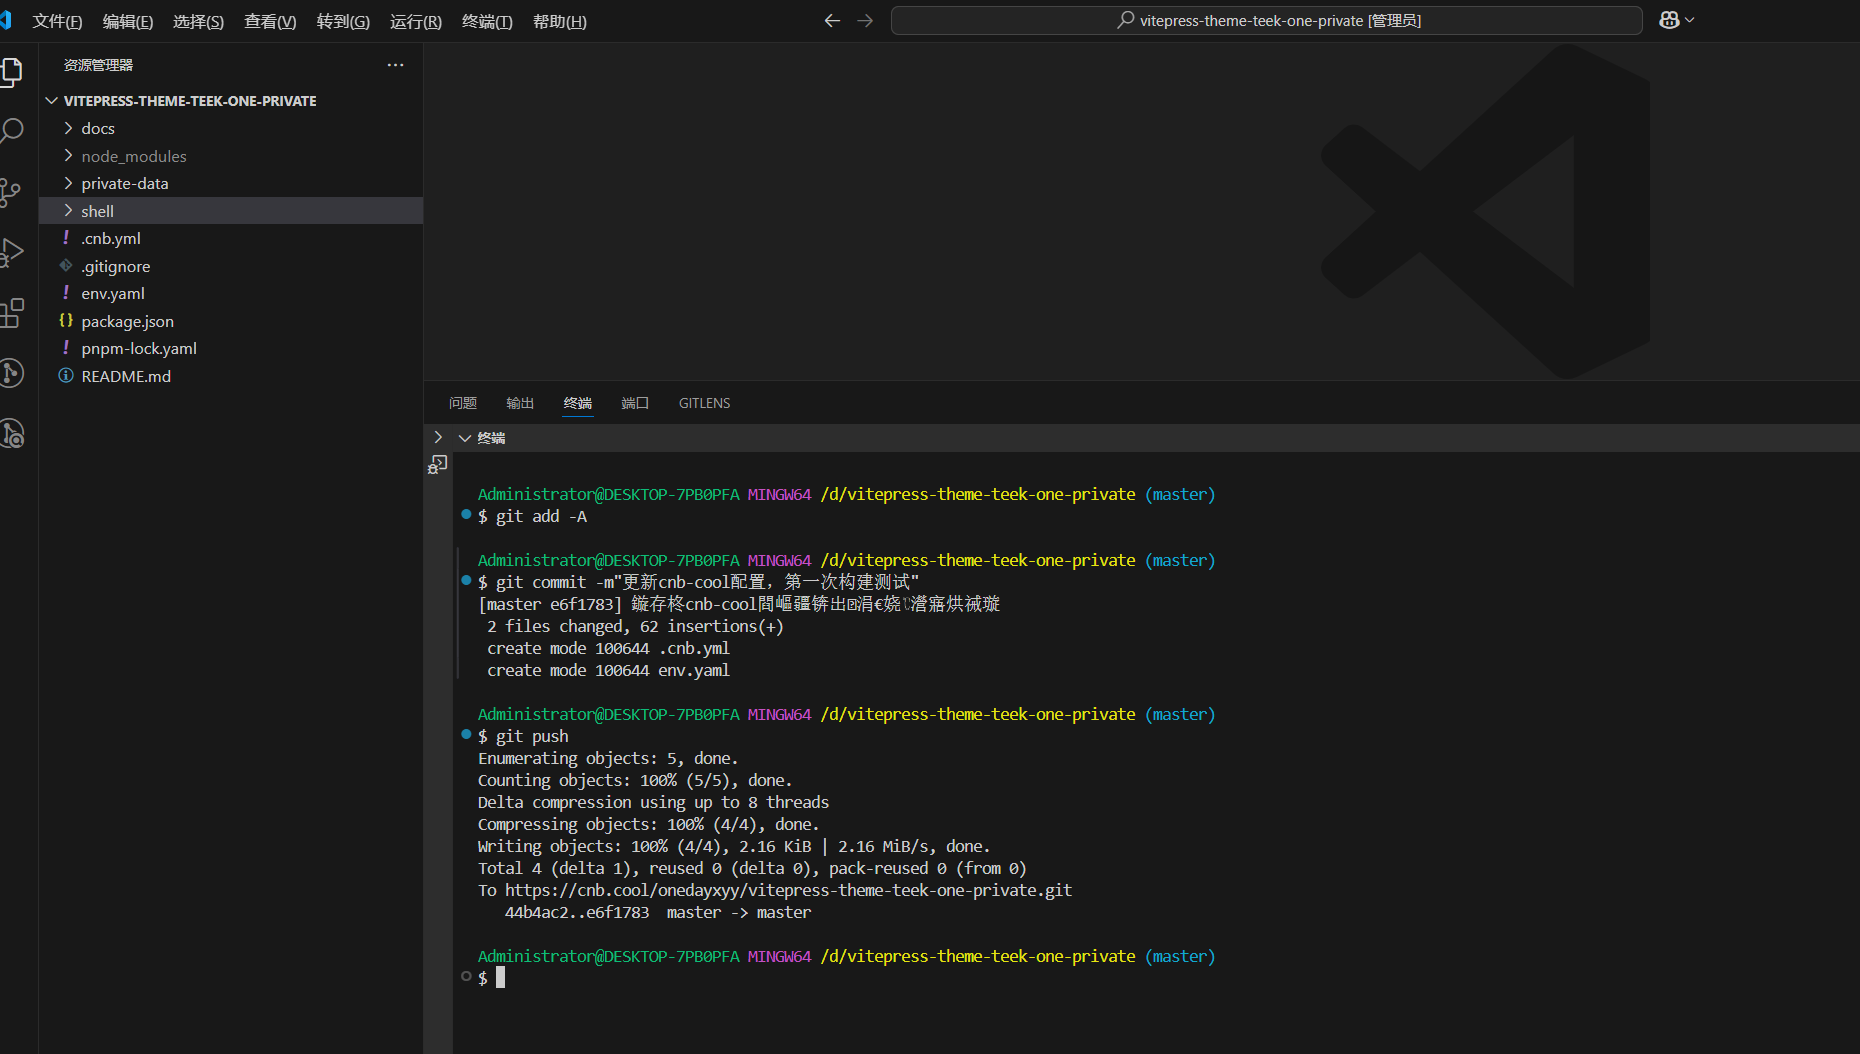
观察构建过程:
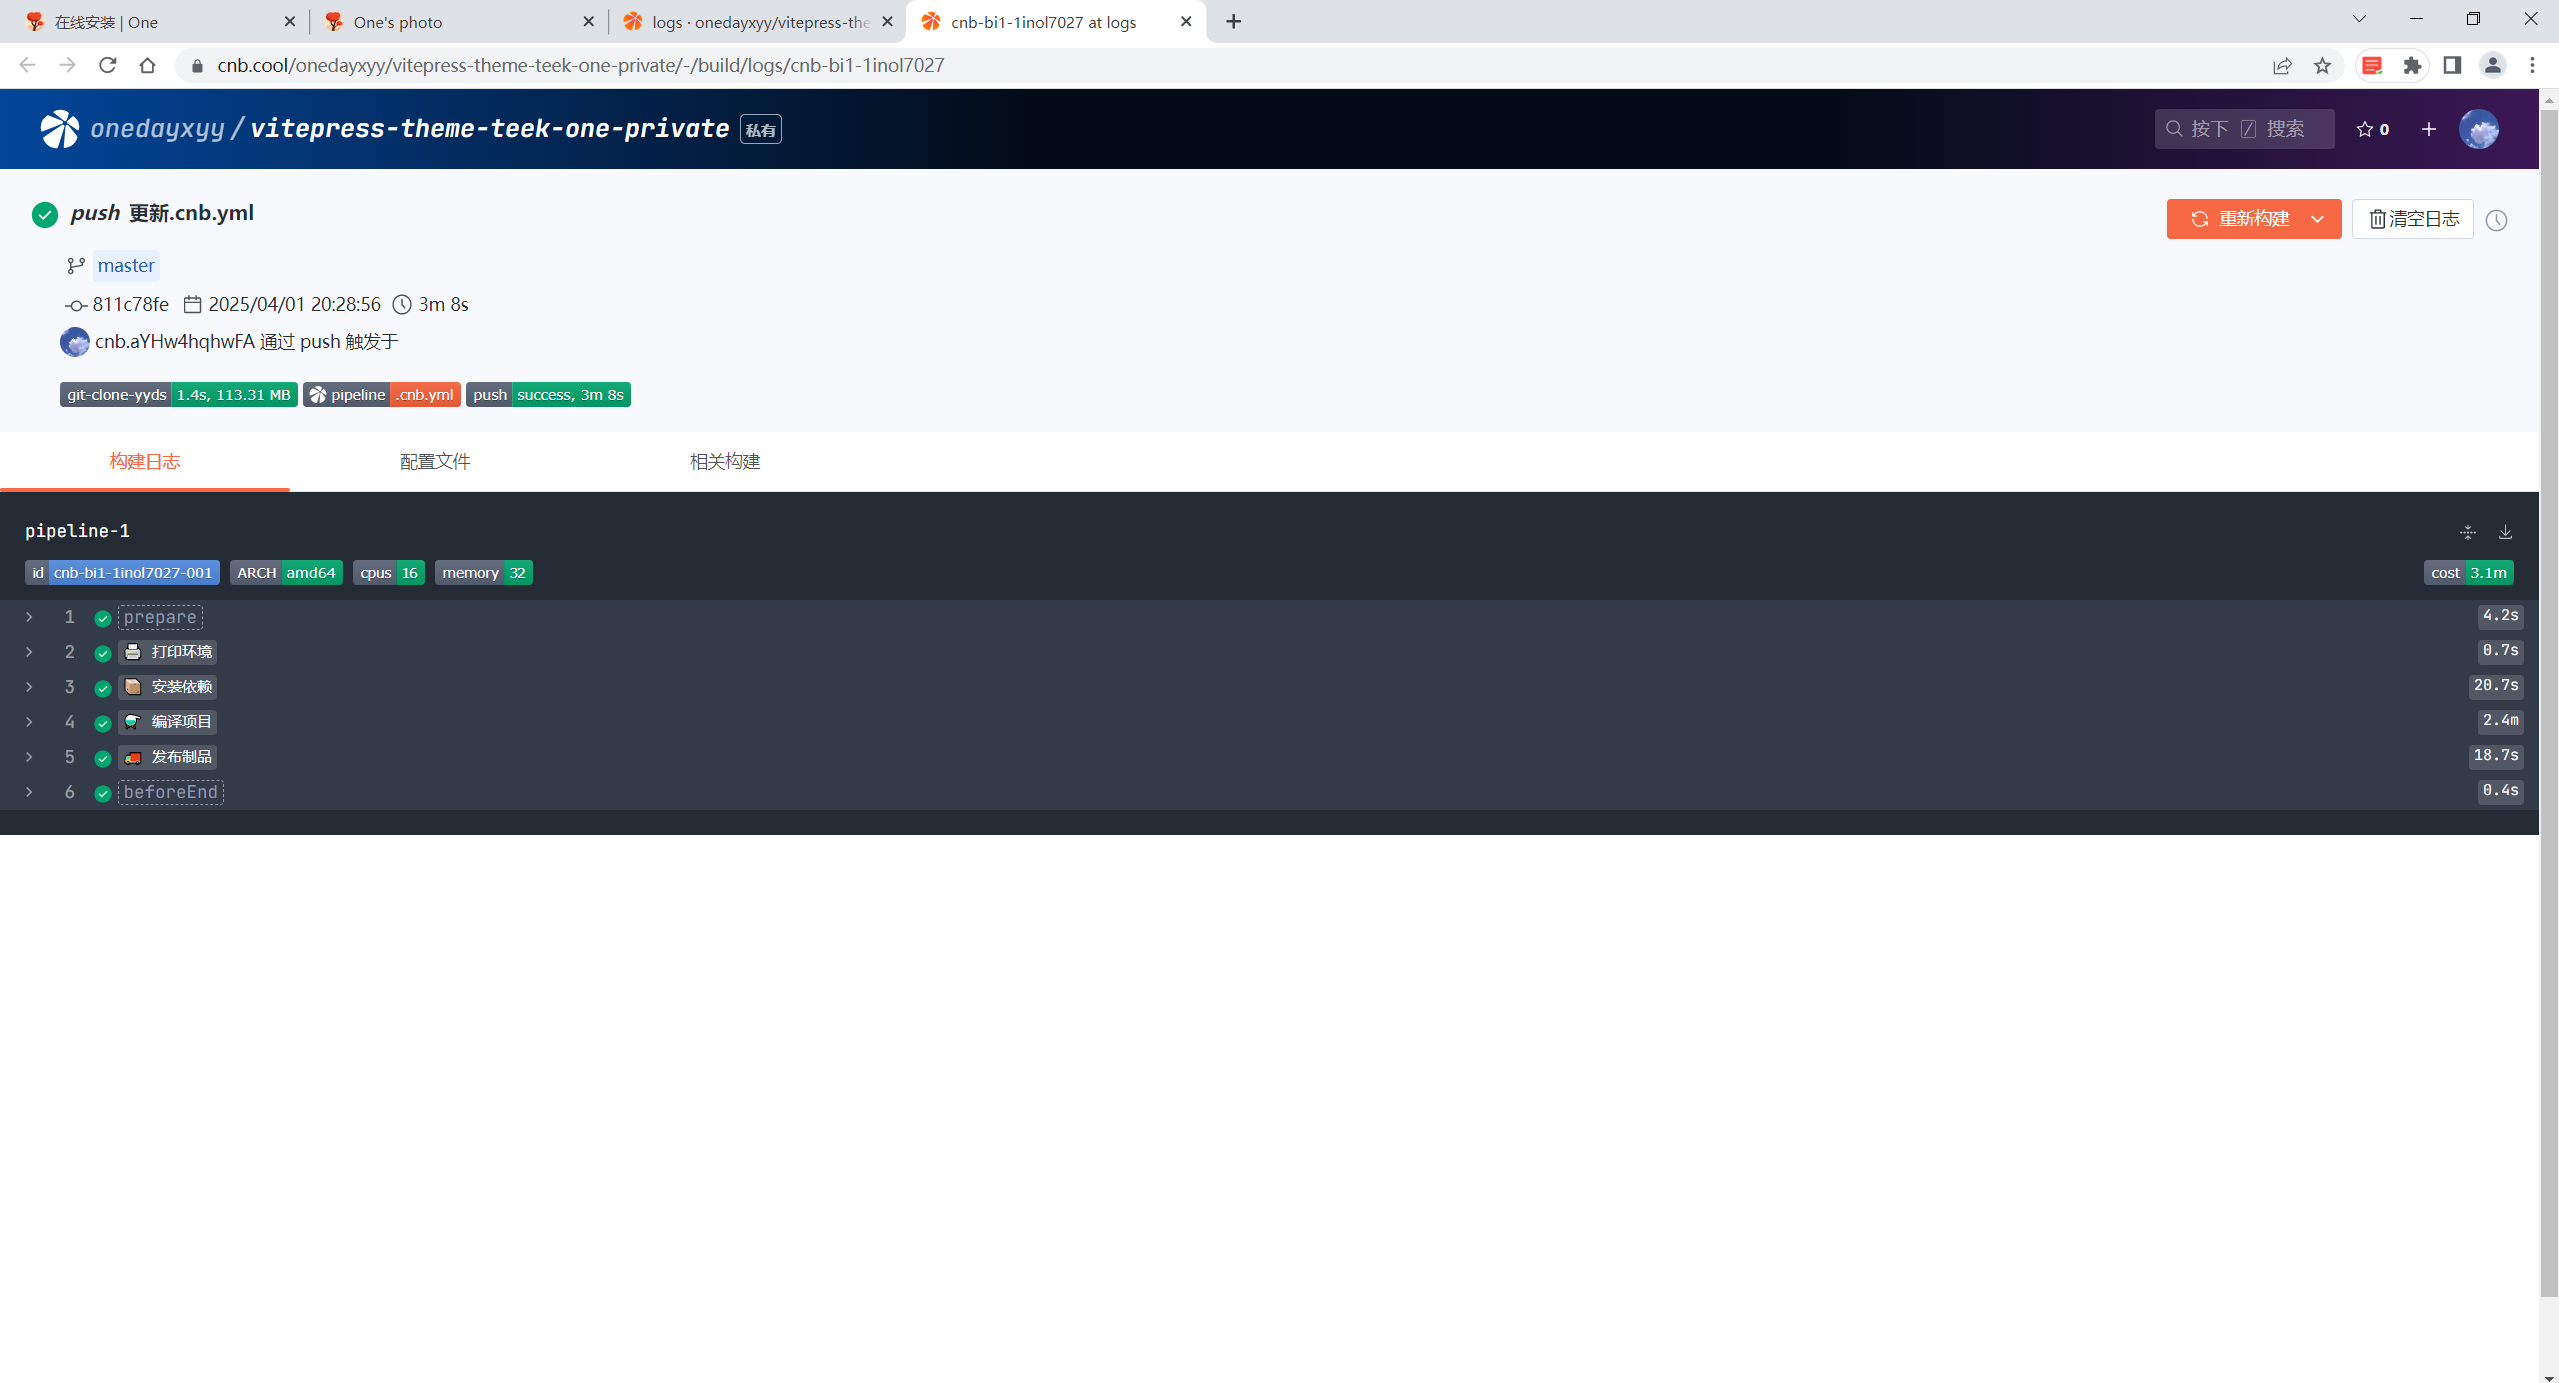
- 完美:
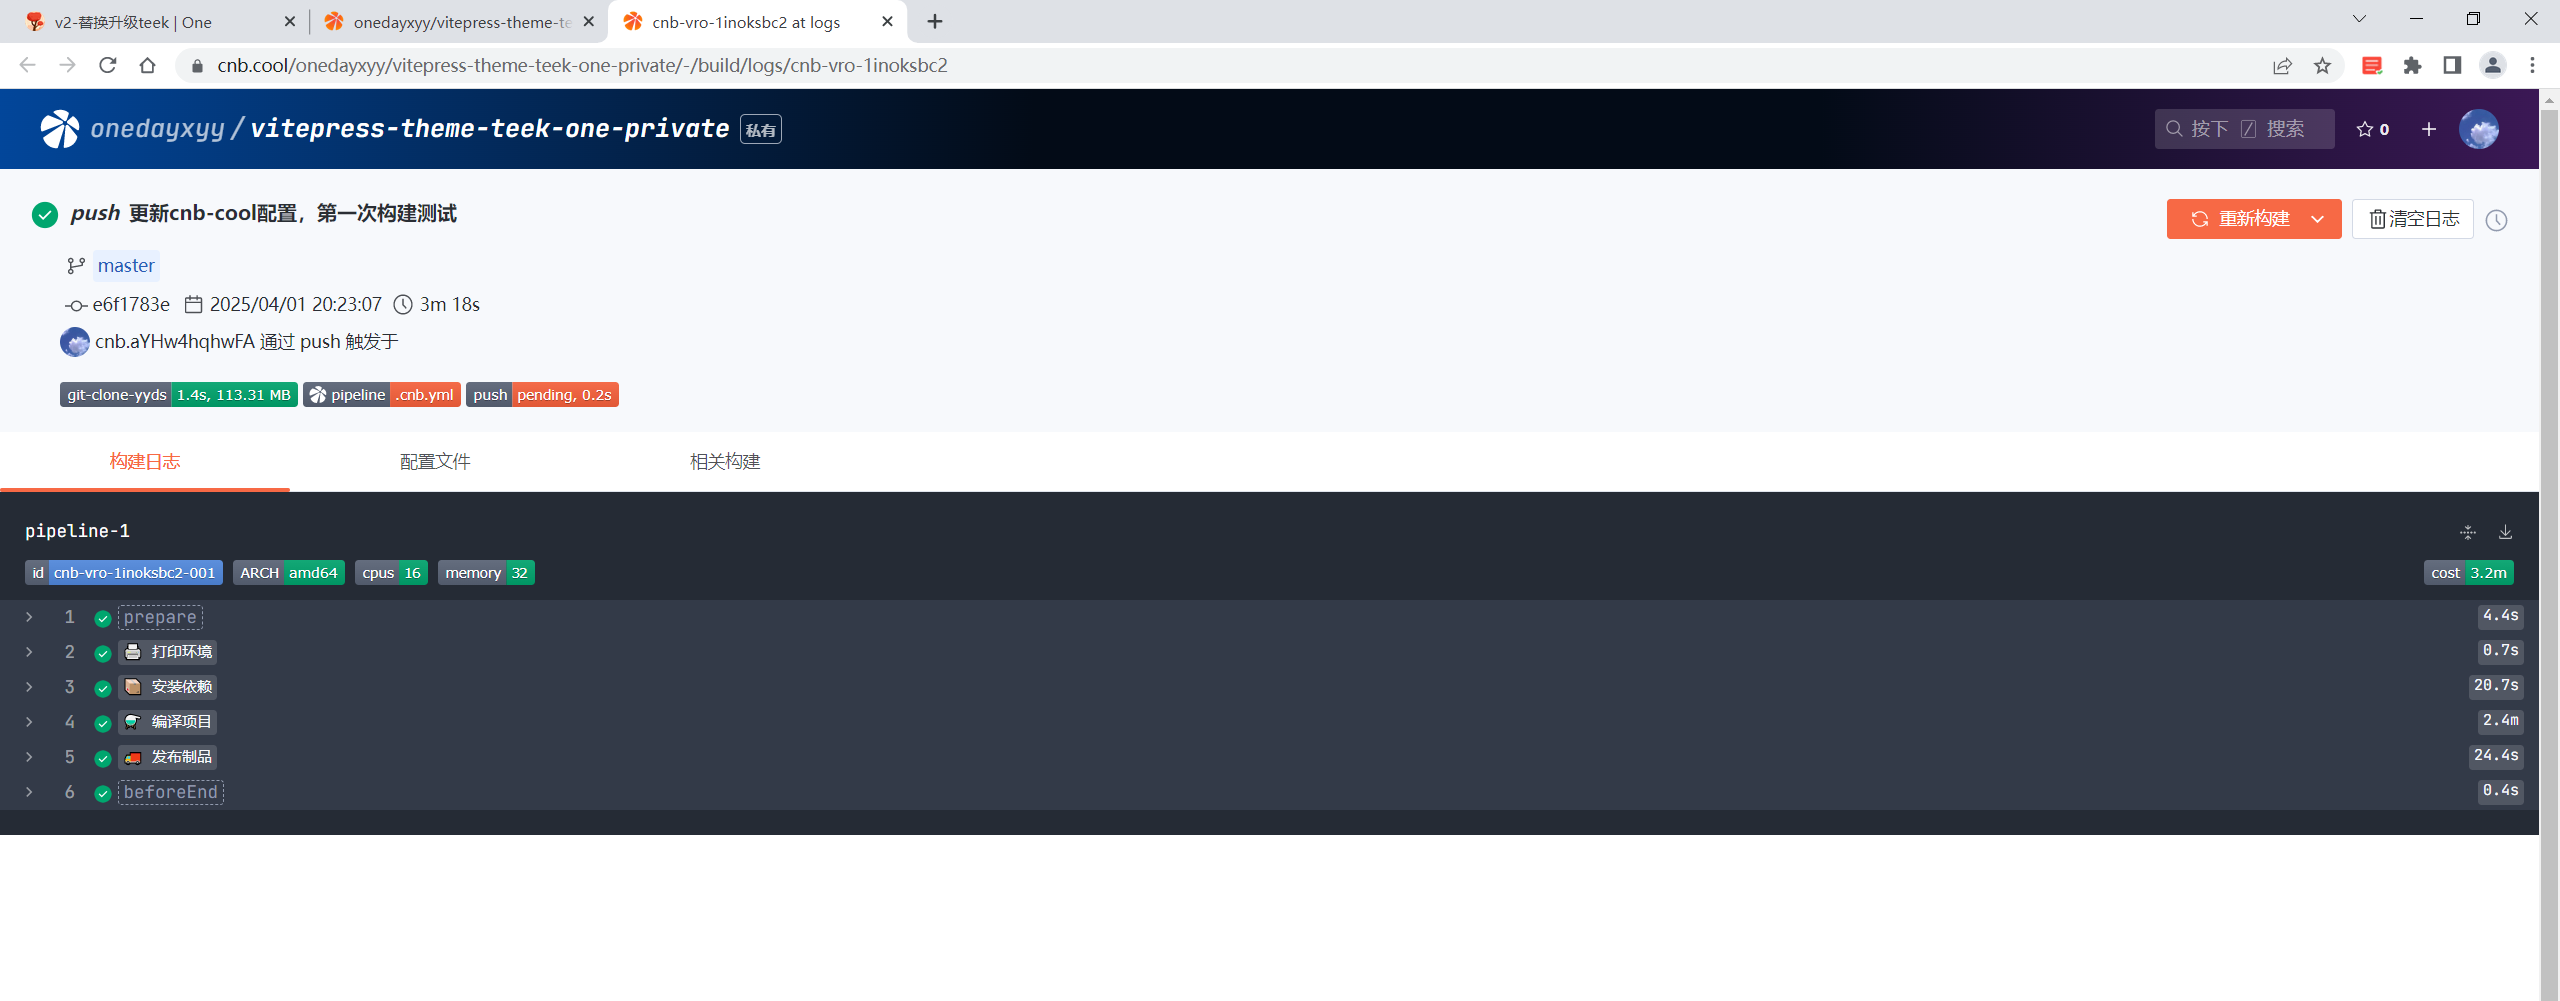
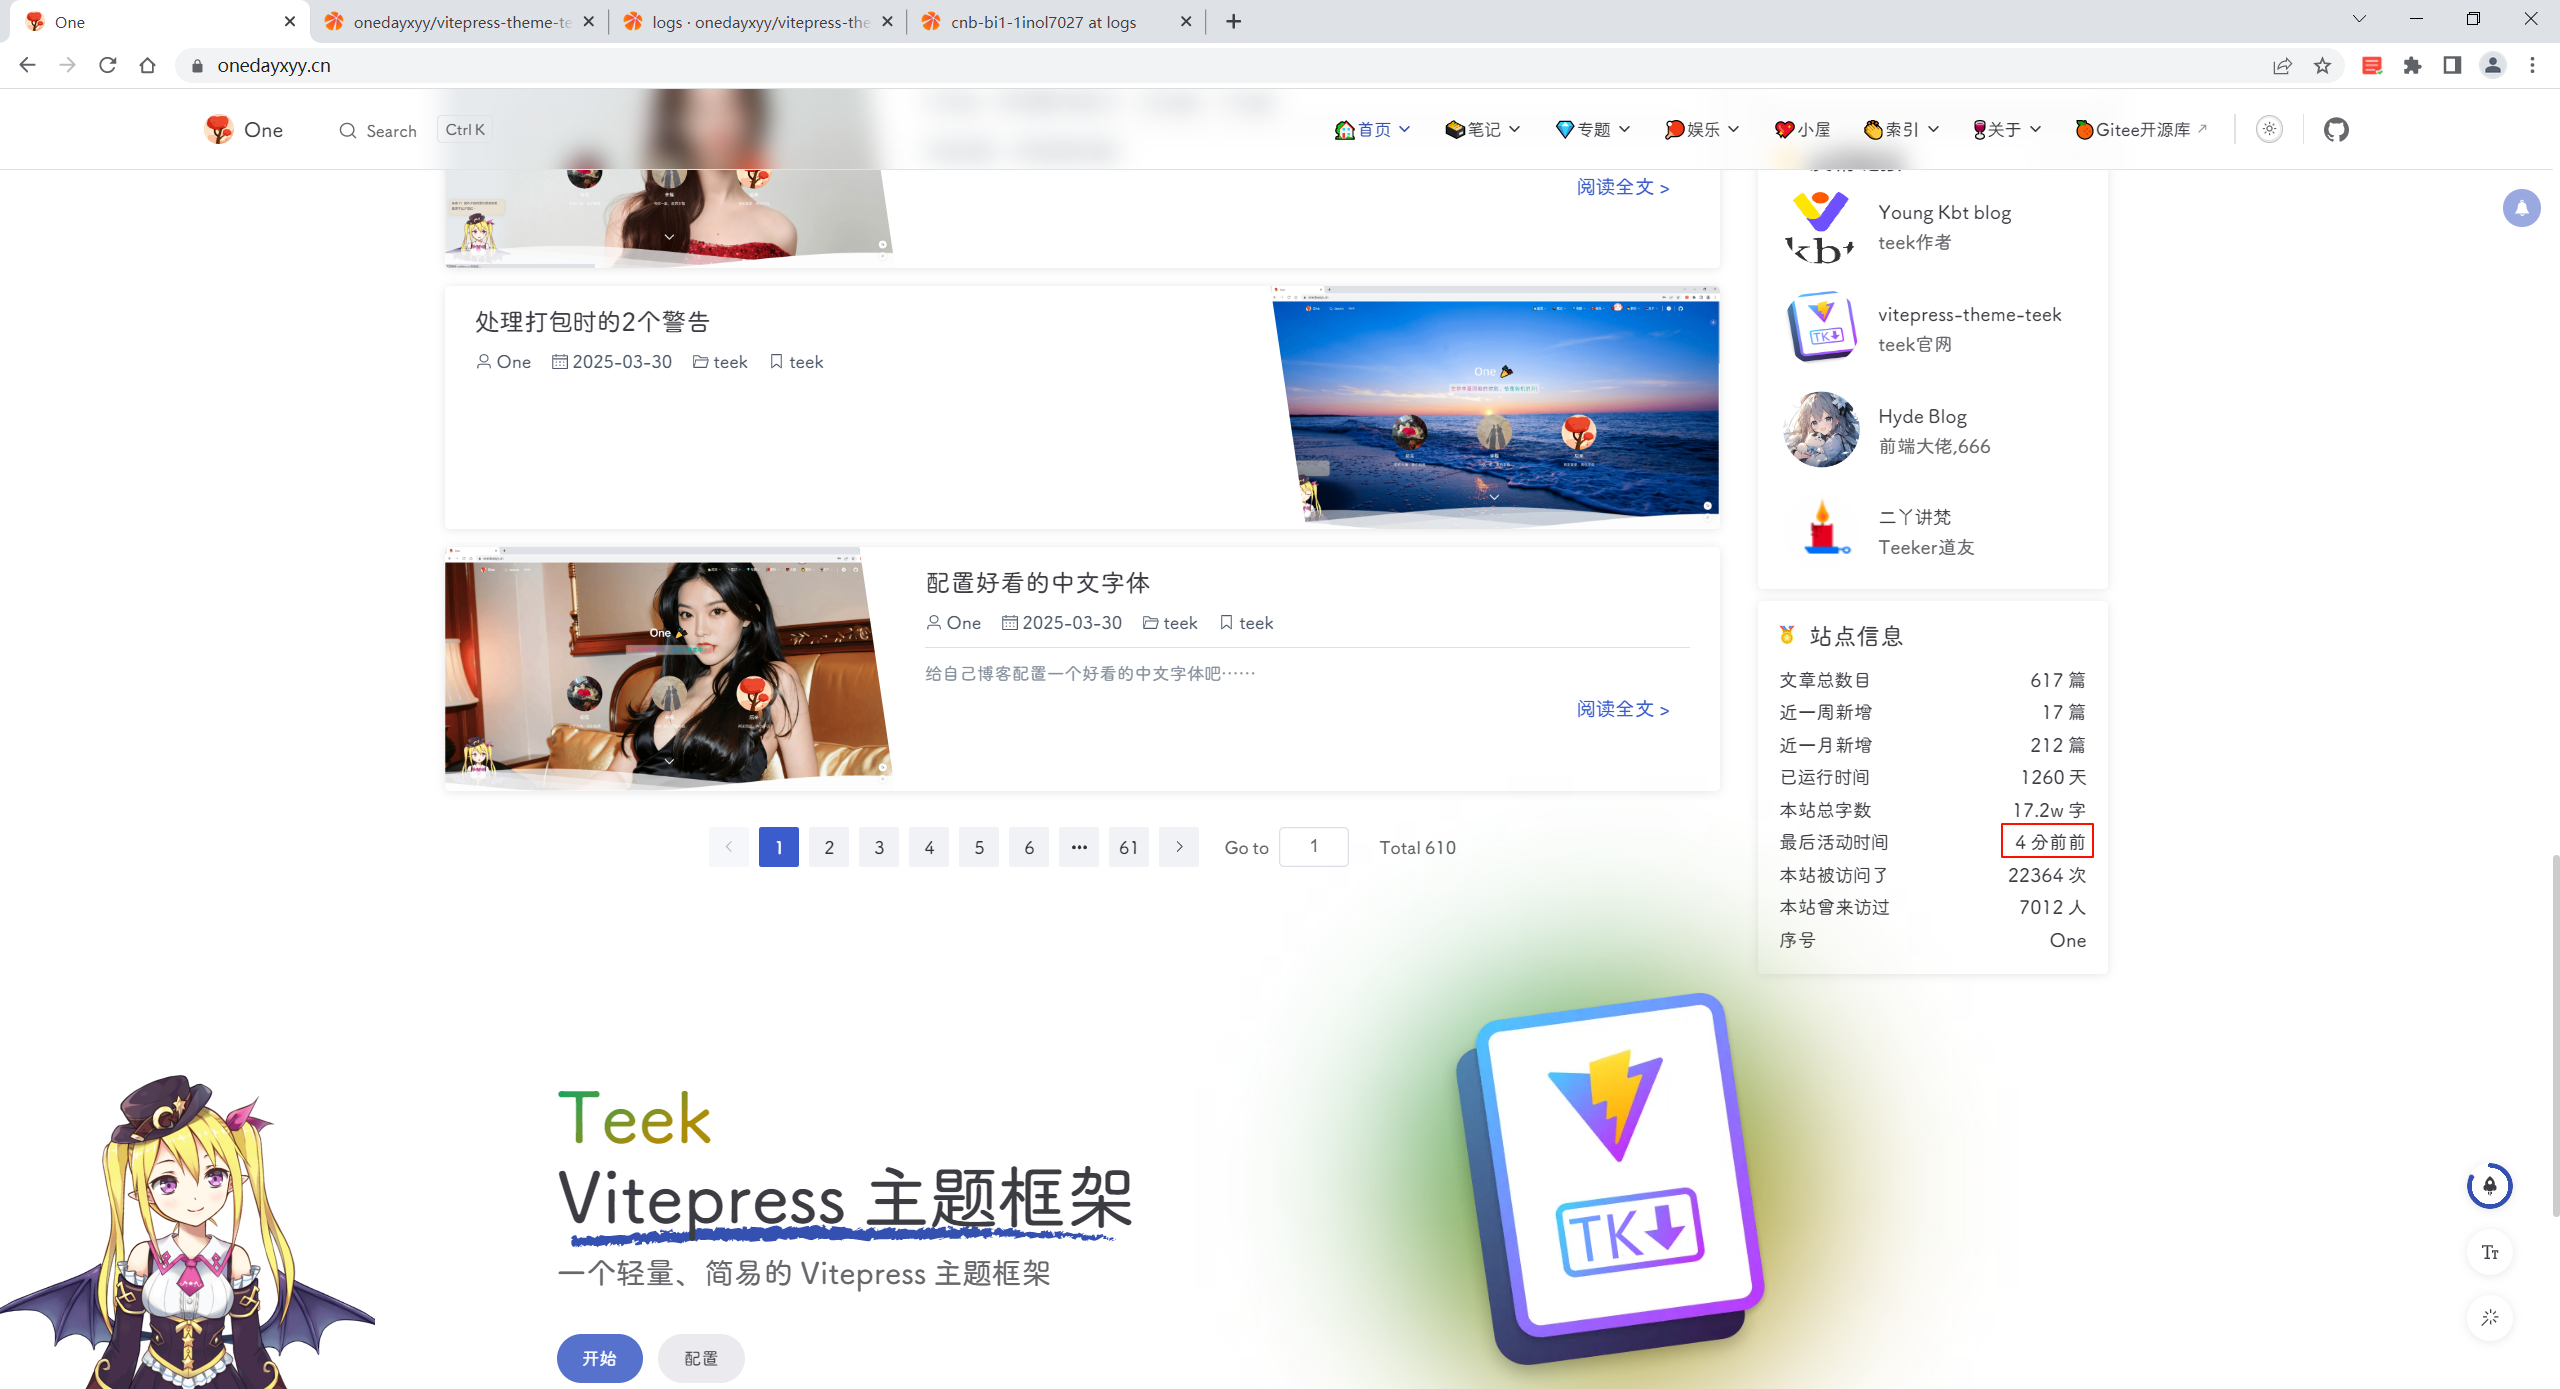
可以看到,自己网站也更新成功了,丝滑。😜
5、扩展
扩展1:条件触发自动构建
提示
次步骤是在上面步骤基础上操作的哦!
到此为止,上面流程已经很完美了,但是存在一个问题:
如何只推送仓库,且不构建?或者 如何推送时 加上某个参数后 才会进行构建?(频繁构建很不友好……)
哈哈,我已经准备好手把手文档了:
(1)编辑.cnb.yml
具体代码:
master:
  push:
    - runner:
        cpus: 16
      services:
        - docker
        - git-clone-yyds
      docker:
        image: docker.cnb.cool/znb/images/node:18
        volumes:
          - /data/.cache:copy-on-write #声明式的构建缓存
      stages:
        - name: 🖨️ 打印环境
          if: |
            [ "$CNB_COMMIT_MESSAGE_TITLE" = "BUILD" ]
          script: |
            node -v && npm -v && yarn -v && pnpm -v
        - name: 📦️ 安装依赖
          if: |
            [ "$CNB_COMMIT_MESSAGE_TITLE" = "BUILD" ]
          script: |
            pnpm install

        - name: ⚗️ 编译项目
          if: |
            [ "$CNB_COMMIT_MESSAGE_TITLE" = "BUILD" ]
          script: |
            pnpm docs:build   # VitePress 专用命令
        - name: 🚚 发布制品
          if: |
            [ "$CNB_COMMIT_MESSAGE_TITLE" = "BUILD" ]
          image: tencentcom/rsync
          imports: https://cnb.cool/onedayxyy/vitepress-theme-teek-one-private/-/blob/master/env.yaml
          settings:
            user: ${SSH_USER}
            key: ${SSH_KEY}
            port: 22
            hosts:
              - 106.75.214.199
            source: docs/.vitepress/dist/
            target: /root/rsync/rsync-vitepress/dist/
delete: true说明:
CNB_COMMIT_MESSAGE_TITLE 这个变量是你提交的message https://docs.cnb.cool/zh/build-in-env.html#CNB_COMMIT_MESSAGE_TITLE
可以结合这个if实现你的需求: https://docs.cnb.cool/zh/grammar/stage.html#if
(2)配置完成后,测试效果即可
##以下代码在vscode里执行,具体路径替换为你项目路径

#只推送代码
cat >>/etc/profile <<EOF
alias gg="
cd /d/vitepress-theme-teek-one-private/
git status
git pull
git add -A
git commit -m'commit data'
git push
git status
"
EOF


#推送代码同时触发自动构建
cat >>/etc/profile <<EOF
alias gg2="
cd /d/vitepress-theme-teek-one-private/
git status
git pull
git add -A
git commit -m'BUILD'
git push
git status
"
EOF


source /etc/profile执行gg效果:
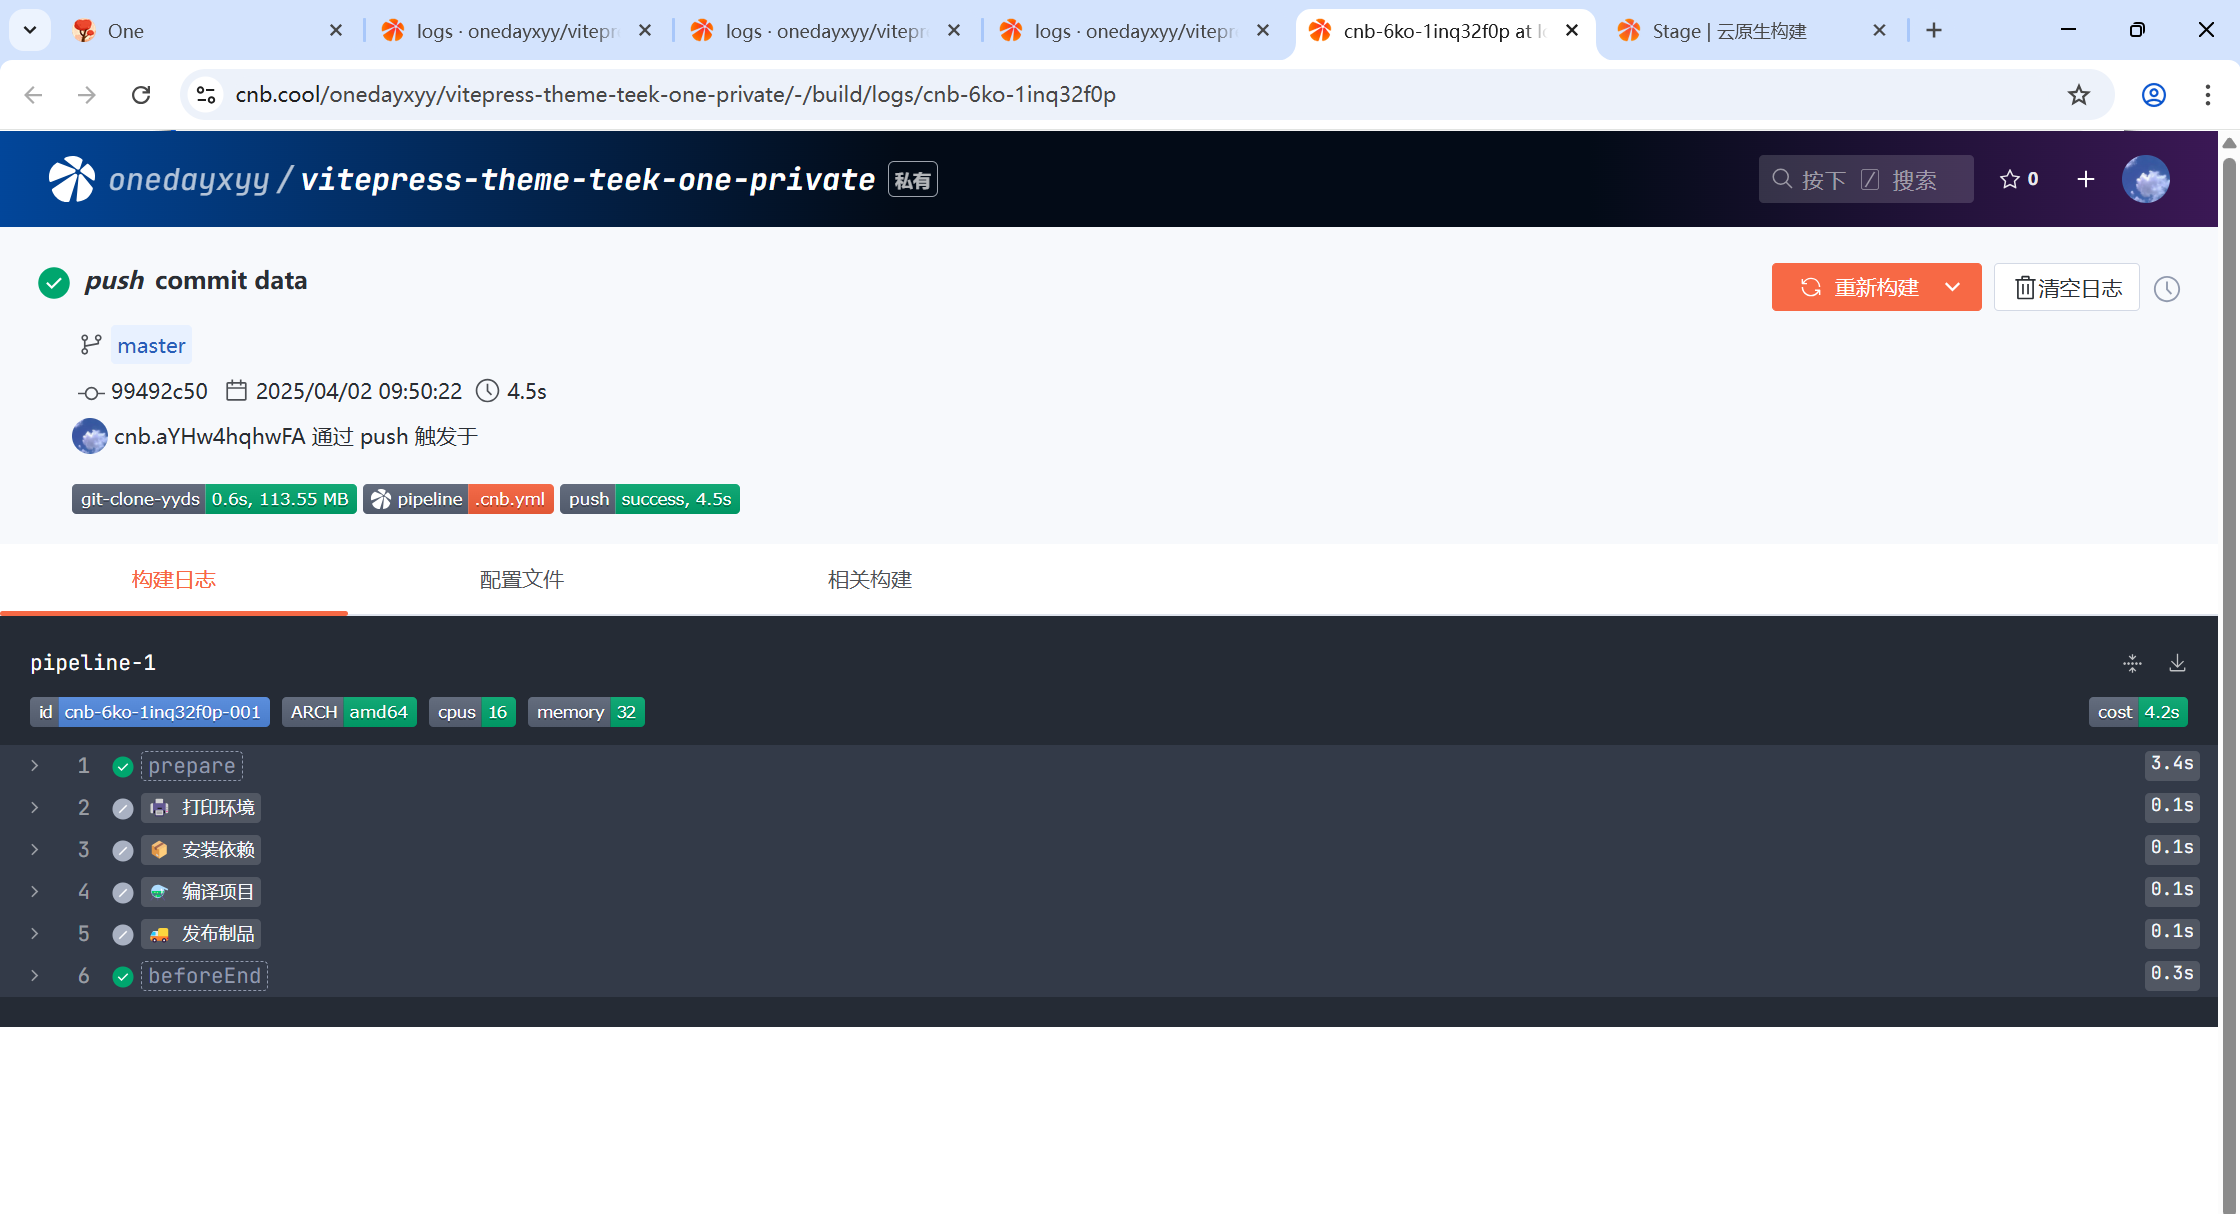
执行gg2效果:

完美。
扩展2:自动构建后刷新阿里云cdn、自动同步代码到gitee仓库
2025年4月3日测试成功。
本次代码更改,新增
自动构建后刷新阿里云cdn、自动同步代码到gitee仓库功能哦,这样,咋们的pipeline流水线更加丝滑了哦。😊
(1)编辑.cnb.yml
增加如下代码:
prescript:
- echo "prescript"
- ls -l /root/rsync/rsync-vitepress/dist/
script:
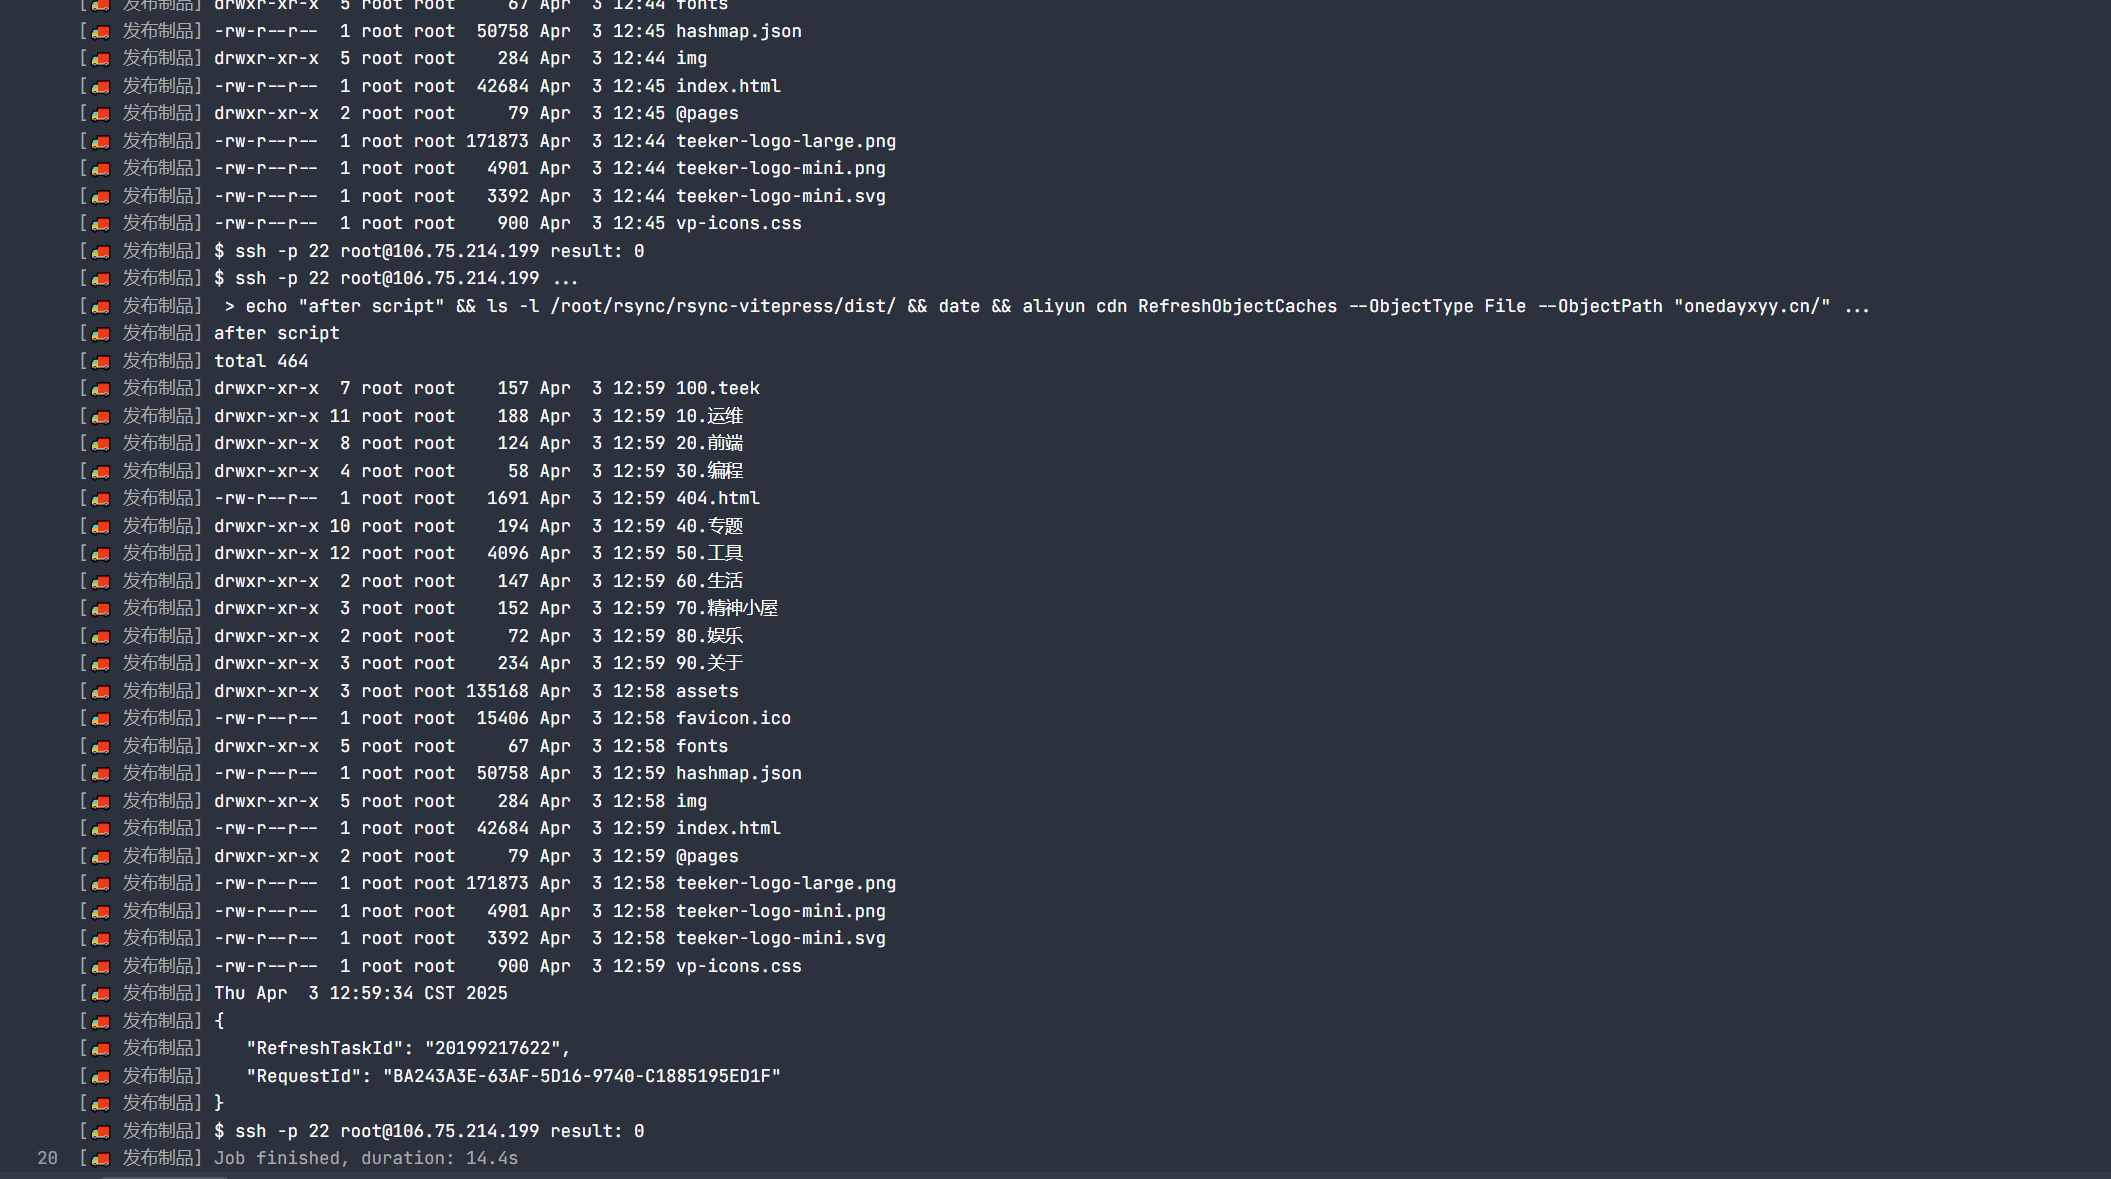
- echo "after script"
- ls -l /root/rsync/rsync-vitepress/dist/
- date
- aliyun cdn RefreshObjectCaches --ObjectType File --ObjectPath "onedayxyy.cn/" #刷新阿里云cdn缓存
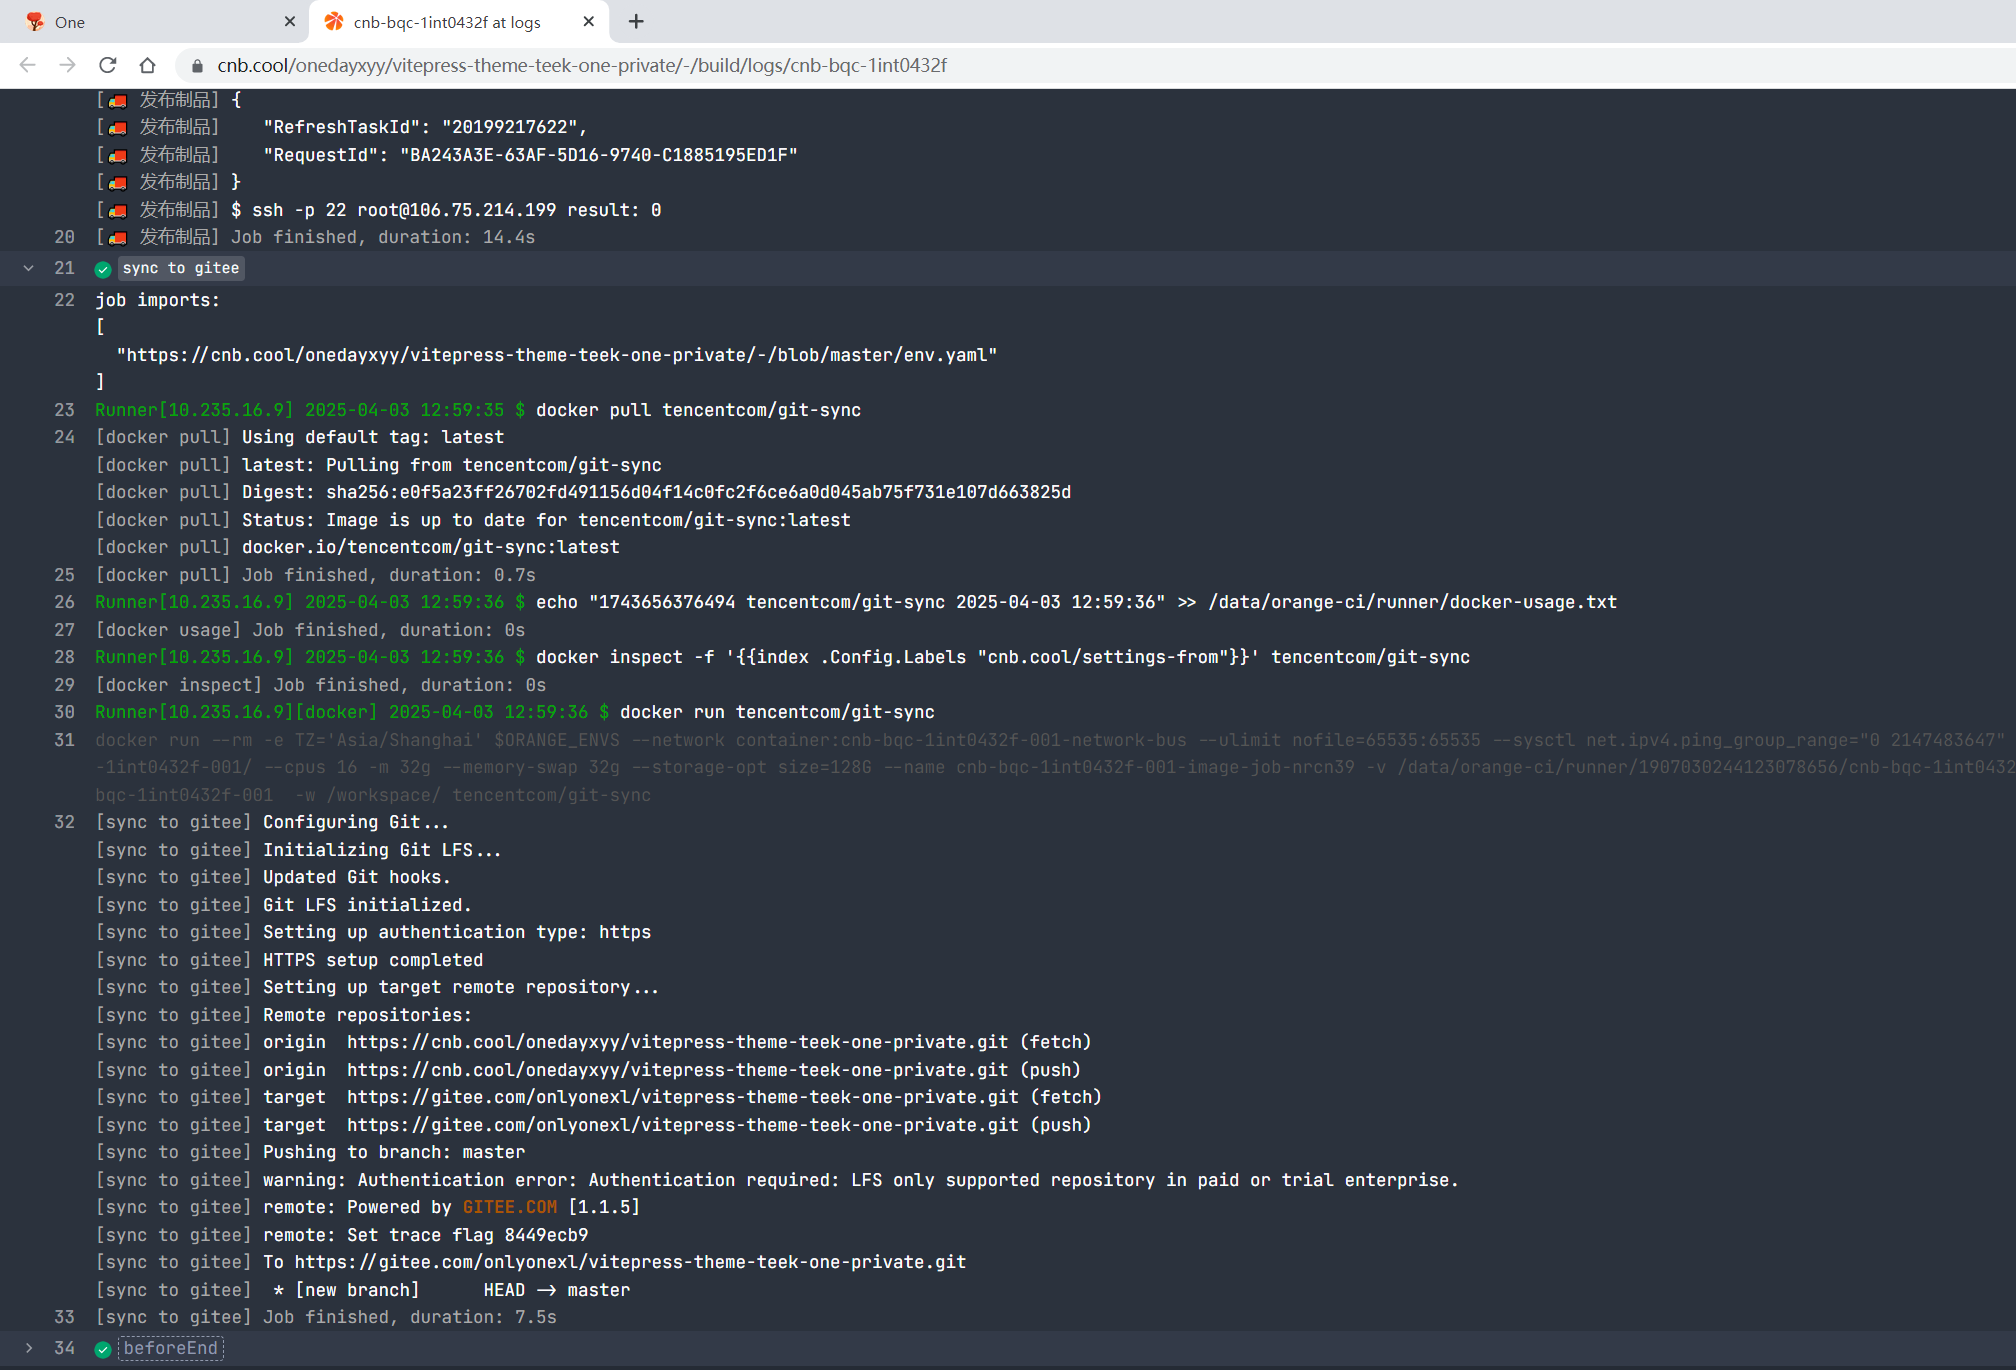
#同步仓库到gitee
- name: sync to gitee
image: tencentcom/git-sync
imports: https://cnb.cool/onedayxyy/vitepress-theme-teek-one-private/-/blob/master/env.yaml
settings:
branch: master
auth_type: https
username: ${GIT_USERNAME}
password: ${GIT_ACCESS_TOKEN}
target_url: https://gitee.com/onlyonexl/vitepress-theme-teek-one-private.git
# git_email: 'github-actions[bot]@users.noreply.github.com'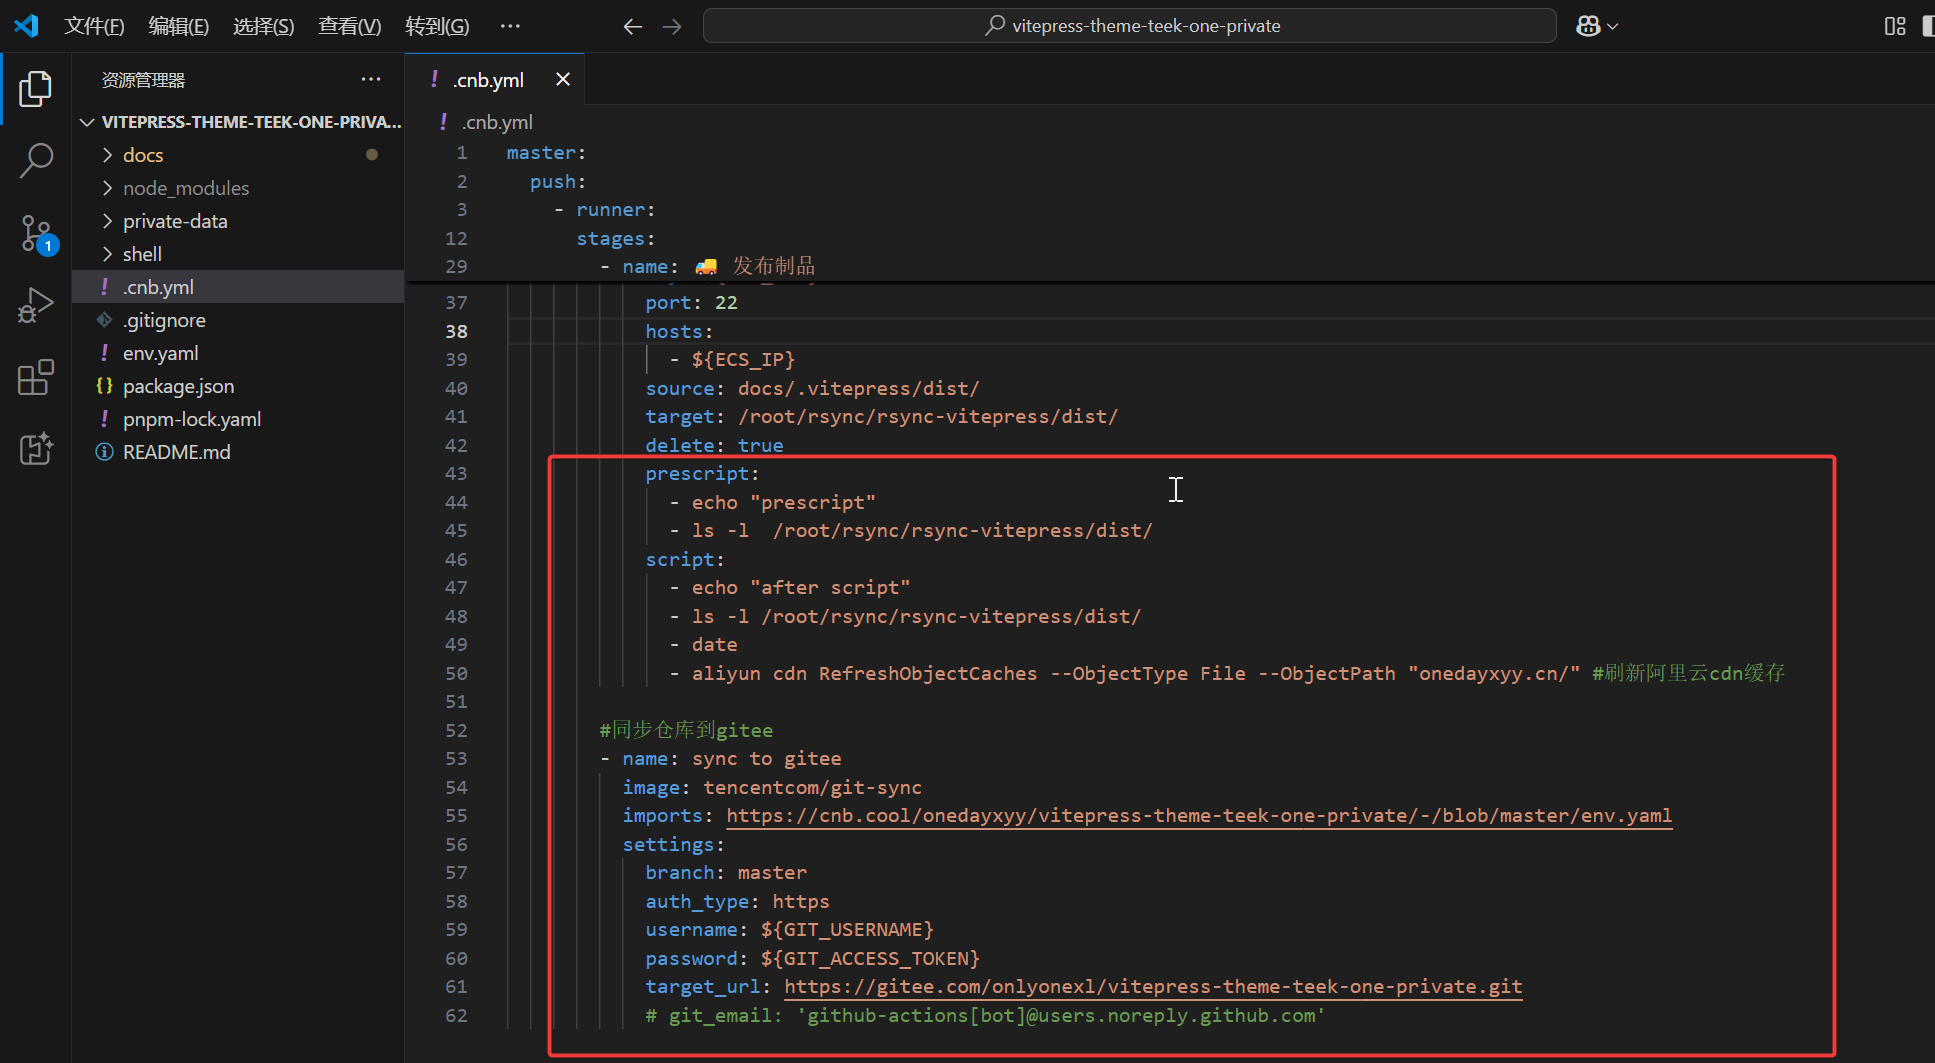
::: deatils 详细代码:
master:
  push:
    - runner:
        cpus: 16
      services:
        - docker
        - git-clone-yyds
      docker:
        image: docker.cnb.cool/znb/images/node:18
        volumes:
          - /data/.cache:copy-on-write #声明式的构建缓存
      stages:
        - name: 🖨️ 打印环境
          if: |
            [ "$CNB_COMMIT_MESSAGE_TITLE" = "BUILD" ]
          script: |
            node -v && npm -v && yarn -v && pnpm -v
        - name: 📦️ 安装依赖
          if: |
            [ "$CNB_COMMIT_MESSAGE_TITLE" = "BUILD" ]
          script: |
            pnpm install

        - name: ⚗️ 编译项目
          if: |
            [ "$CNB_COMMIT_MESSAGE_TITLE" = "BUILD" ]
          script: |
            pnpm docs:build   # VitePress 专用命令
        - name: 🚚 发布制品
          if: |
            [ "$CNB_COMMIT_MESSAGE_TITLE" = "BUILD" ]
          image: tencentcom/rsync
          imports: https://cnb.cool/onedayxyy/vitepress-theme-teek-one-private/-/blob/master/env.yaml
          settings:
            user: ${SSH_USER}
            key: ${SSH_KEY}
            port: 22
            hosts:
              - ${ECS_IP}
            source: docs/.vitepress/dist/
            target: /root/rsync/rsync-vitepress/dist/
            delete: true
            prescript:
              - echo "prescript"
              - ls -l  /root/rsync/rsync-vitepress/dist/
            script:
              - echo "after script"
              - ls -l /root/rsync/rsync-vitepress/dist/
              - date
              - aliyun cdn RefreshObjectCaches --ObjectType File --ObjectPath "onedayxyy.cn/" #刷新阿里云cdn缓存

        #同步仓库到gitee
        - name: sync to gitee
          image: tencentcom/git-sync
          imports: https://cnb.cool/onedayxyy/vitepress-theme-teek-one-private/-/blob/master/env.yaml
          settings:
            branch: master
            auth_type: https
            username: ${GIT_USERNAME}
            password: ${GIT_ACCESS_TOKEN}
            target_url: https://gitee.com/onlyonexl/vitepress-theme-teek-one-private.git
# git_email: 'github-actions[bot]@users.noreply.github.com':::
(2)编辑env.yaml
#gitee token
GIT_USERNAME: gitee账户登录名
GIT_ACCESS_TOKEN: gitee账户token


ECS_IP: 云服务器ip
SSH_USER: 云服务器登录用户
SSH_KEY: |
    -----BEGIN RSA PRIVATE KEY-----
    MIIEpAIBAAKCAQEAwWunMrptJsXbxx0M17w3qaHyJb9B/CN9PgeNE9KoyN26//nN
	……
    EqbXIgV6SEJtBLQlzkOS0BR2hGZl5Y99aA15vcub+AafBAzOeAL8ig==
-----END RSA PRIVATE KEY-----(3)修改完成后,提交代码,触发自动构建,观察效果
可以纵向丝滑哦。😍
关于我
我的博客主旨:
- 排版美观,语言精炼;
- 文档即手册,步骤明细,拒绝埋坑,提供源码;
- 本人实战文档都是亲测成功的,各位小伙伴在实际操作过程中如有什么疑问,可随时联系本人帮您解决问题,让我们一起进步!
🍀 个人网站

🍀 微信二维码
x2675263825 (舍得), qq:2675263825。

🍀 微信公众号
《云原生架构师实战》

🍀 csdn
https://blog.csdn.net/weixin_39246554?spm=1010.2135.3001.5421
🍀 知乎
https://www.zhihu.com/people/foryouone
最后
如果你还有疑惑,可以去我的网站查看更多内容或者联系我帮忙查看。
如果你有更好的方式,评论区留言告诉我。谢谢!
好了,本次就到这里了,感谢大家阅读,最后祝大家生活快乐,每天都过的有意义哦,我们下期见!