
Jenkins部署(部署成功)
title: 2、Jenkins部署(部署成功) id: devops8-jenins-install slug: /devops8-jenins-install
01-Jenkins部署
目录
[toc]
前提条件
此文档依赖于基础环境配置文档, 运行K8s集群并配置NFS存储。
参考文档:
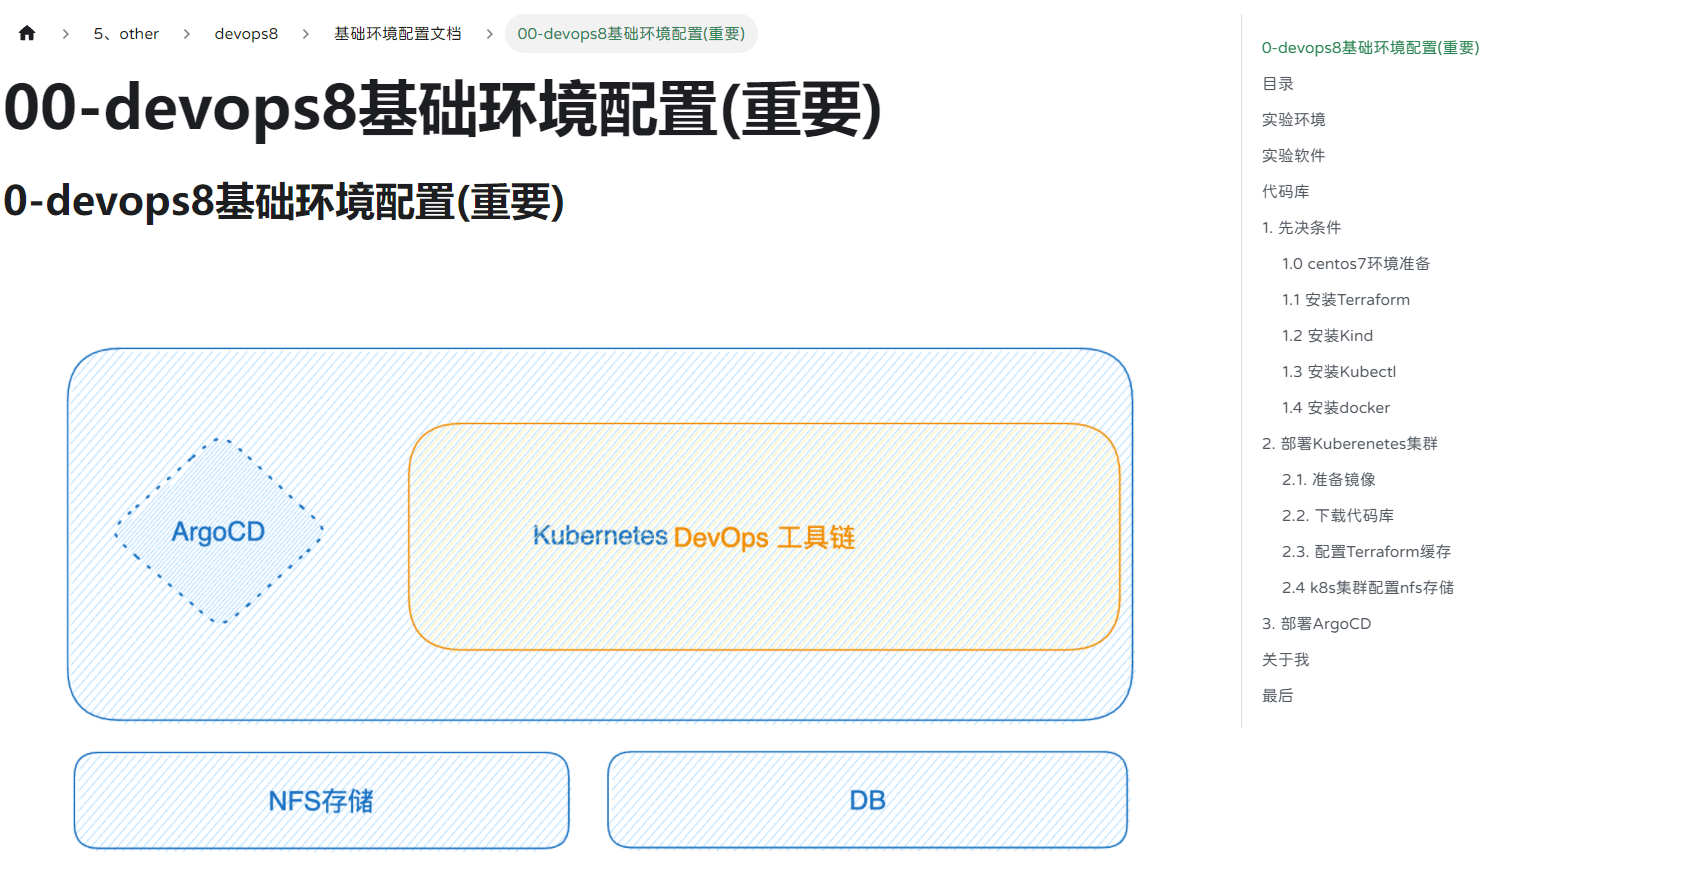
《00-devops8基础环境配置(重要)》 http://localhost:3000/docs/devops8-basic-test-environment
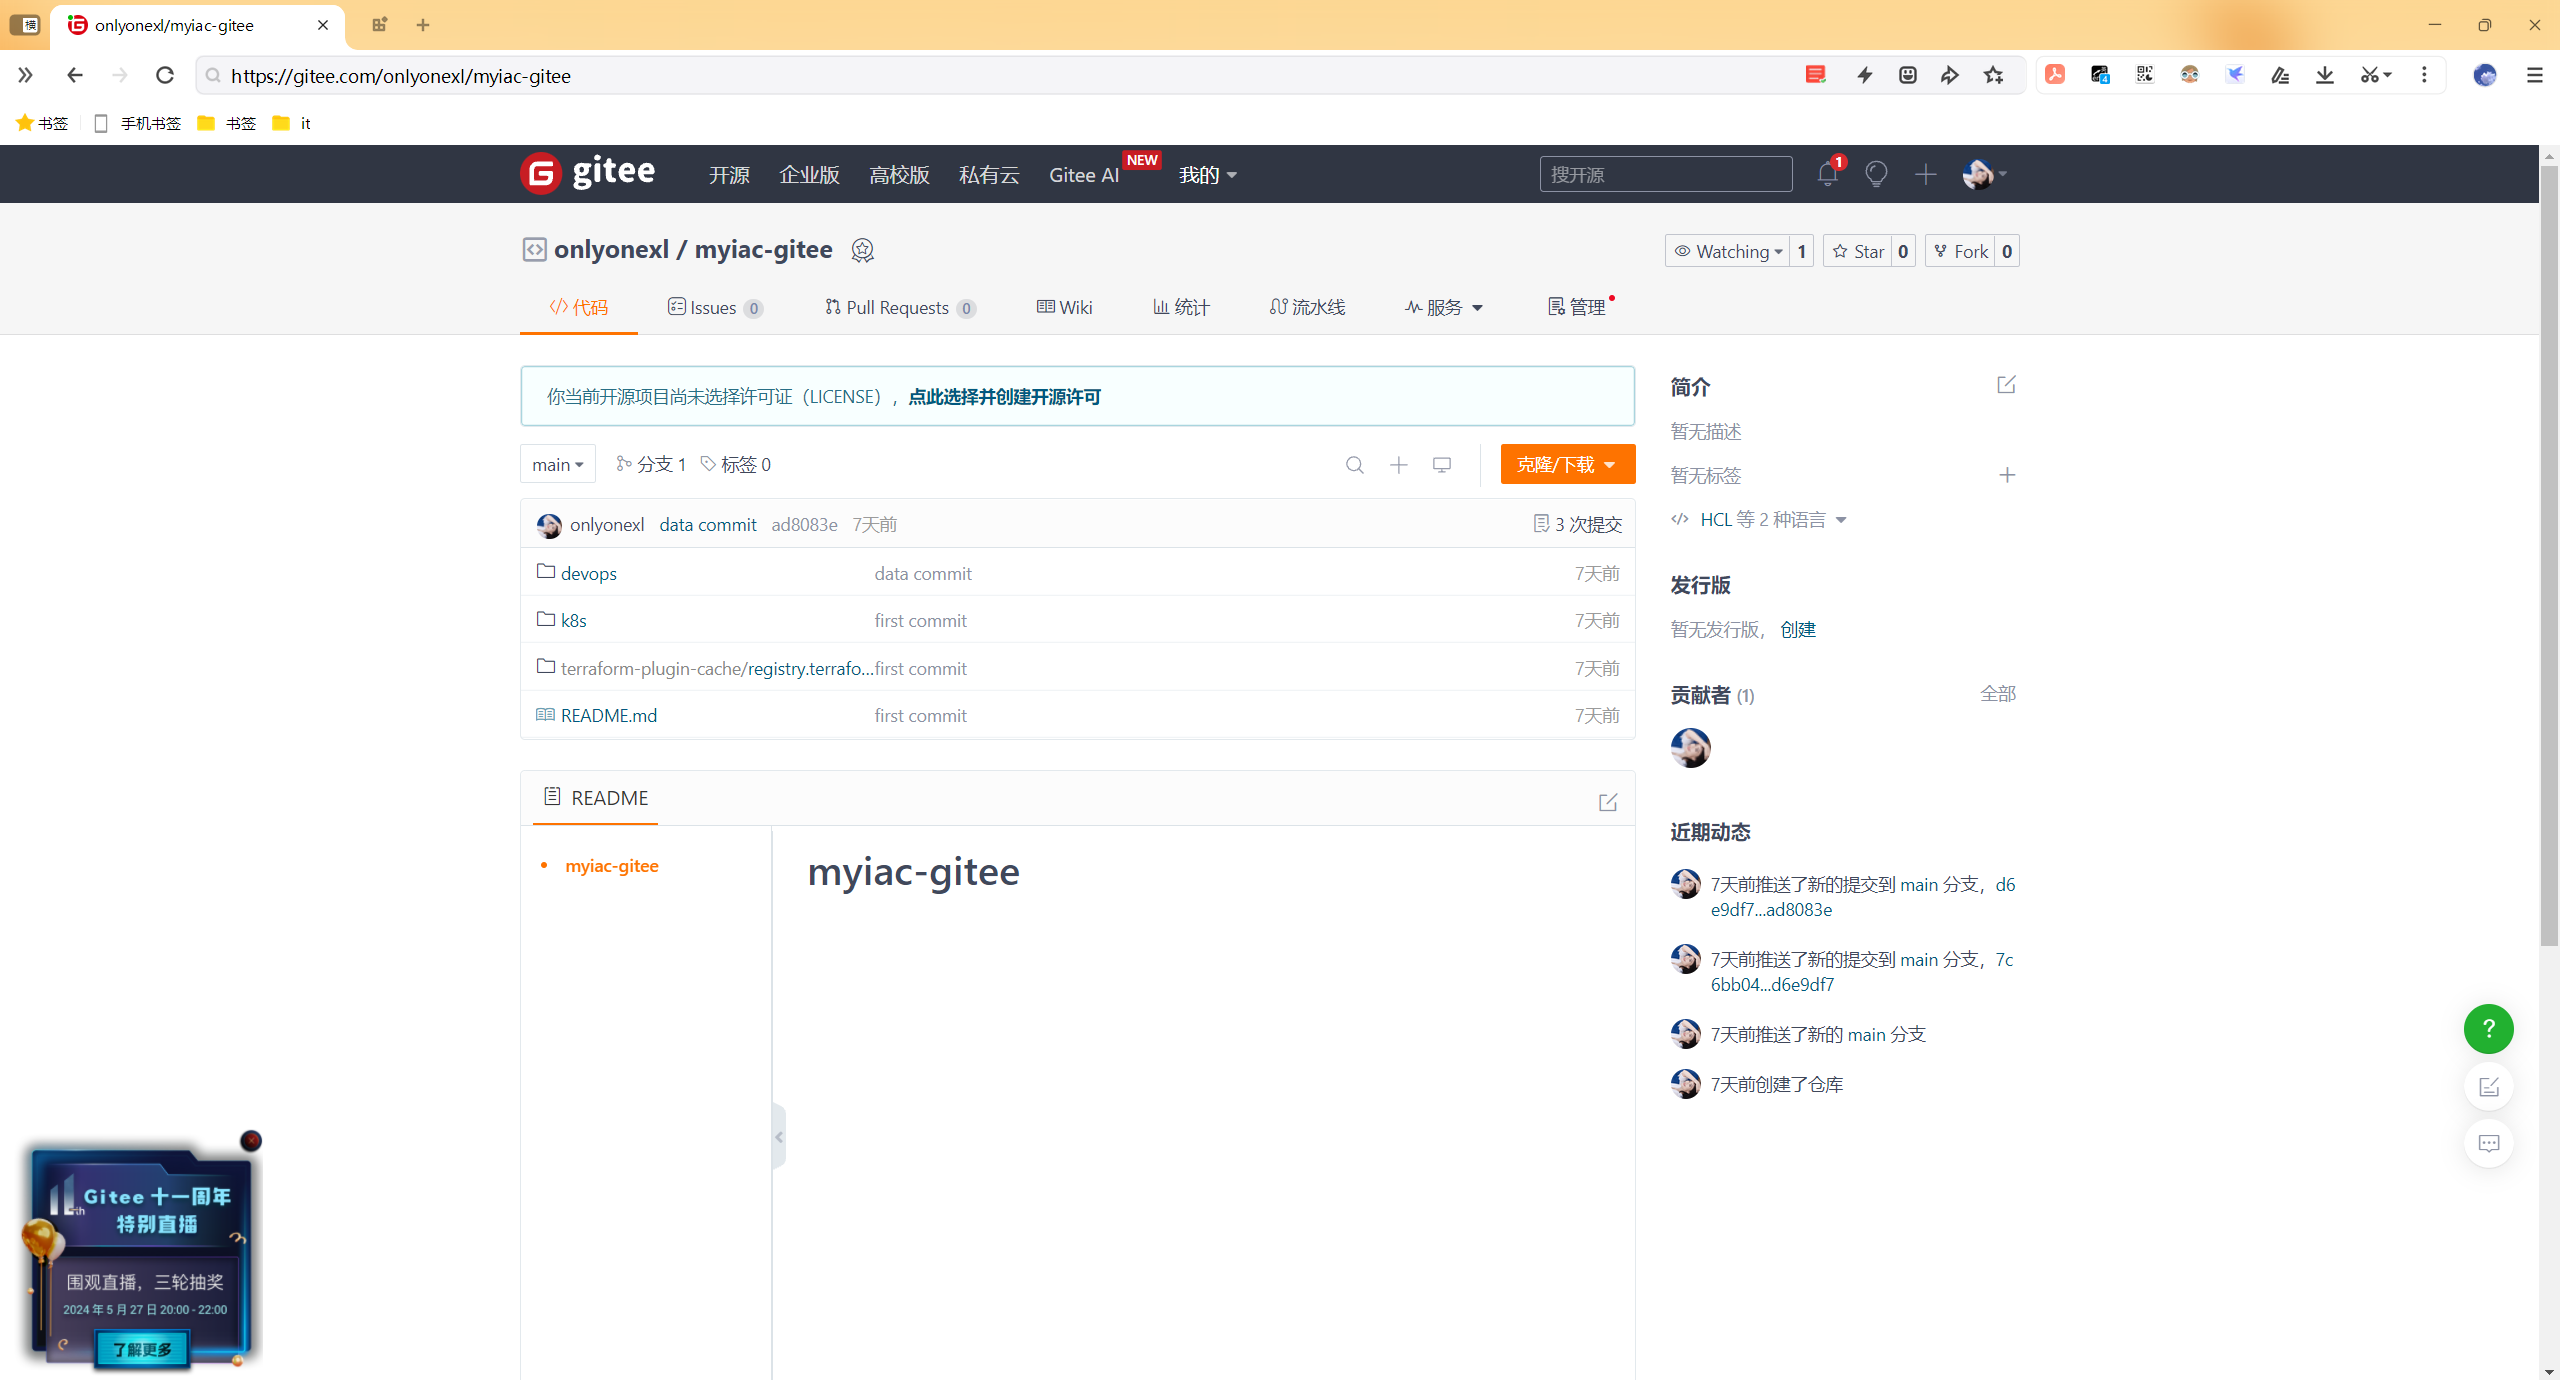
代码库地址:https://gitee.com/onlyonexl/myiac-gitee
Step1 镜像配置
- Docker镜像:
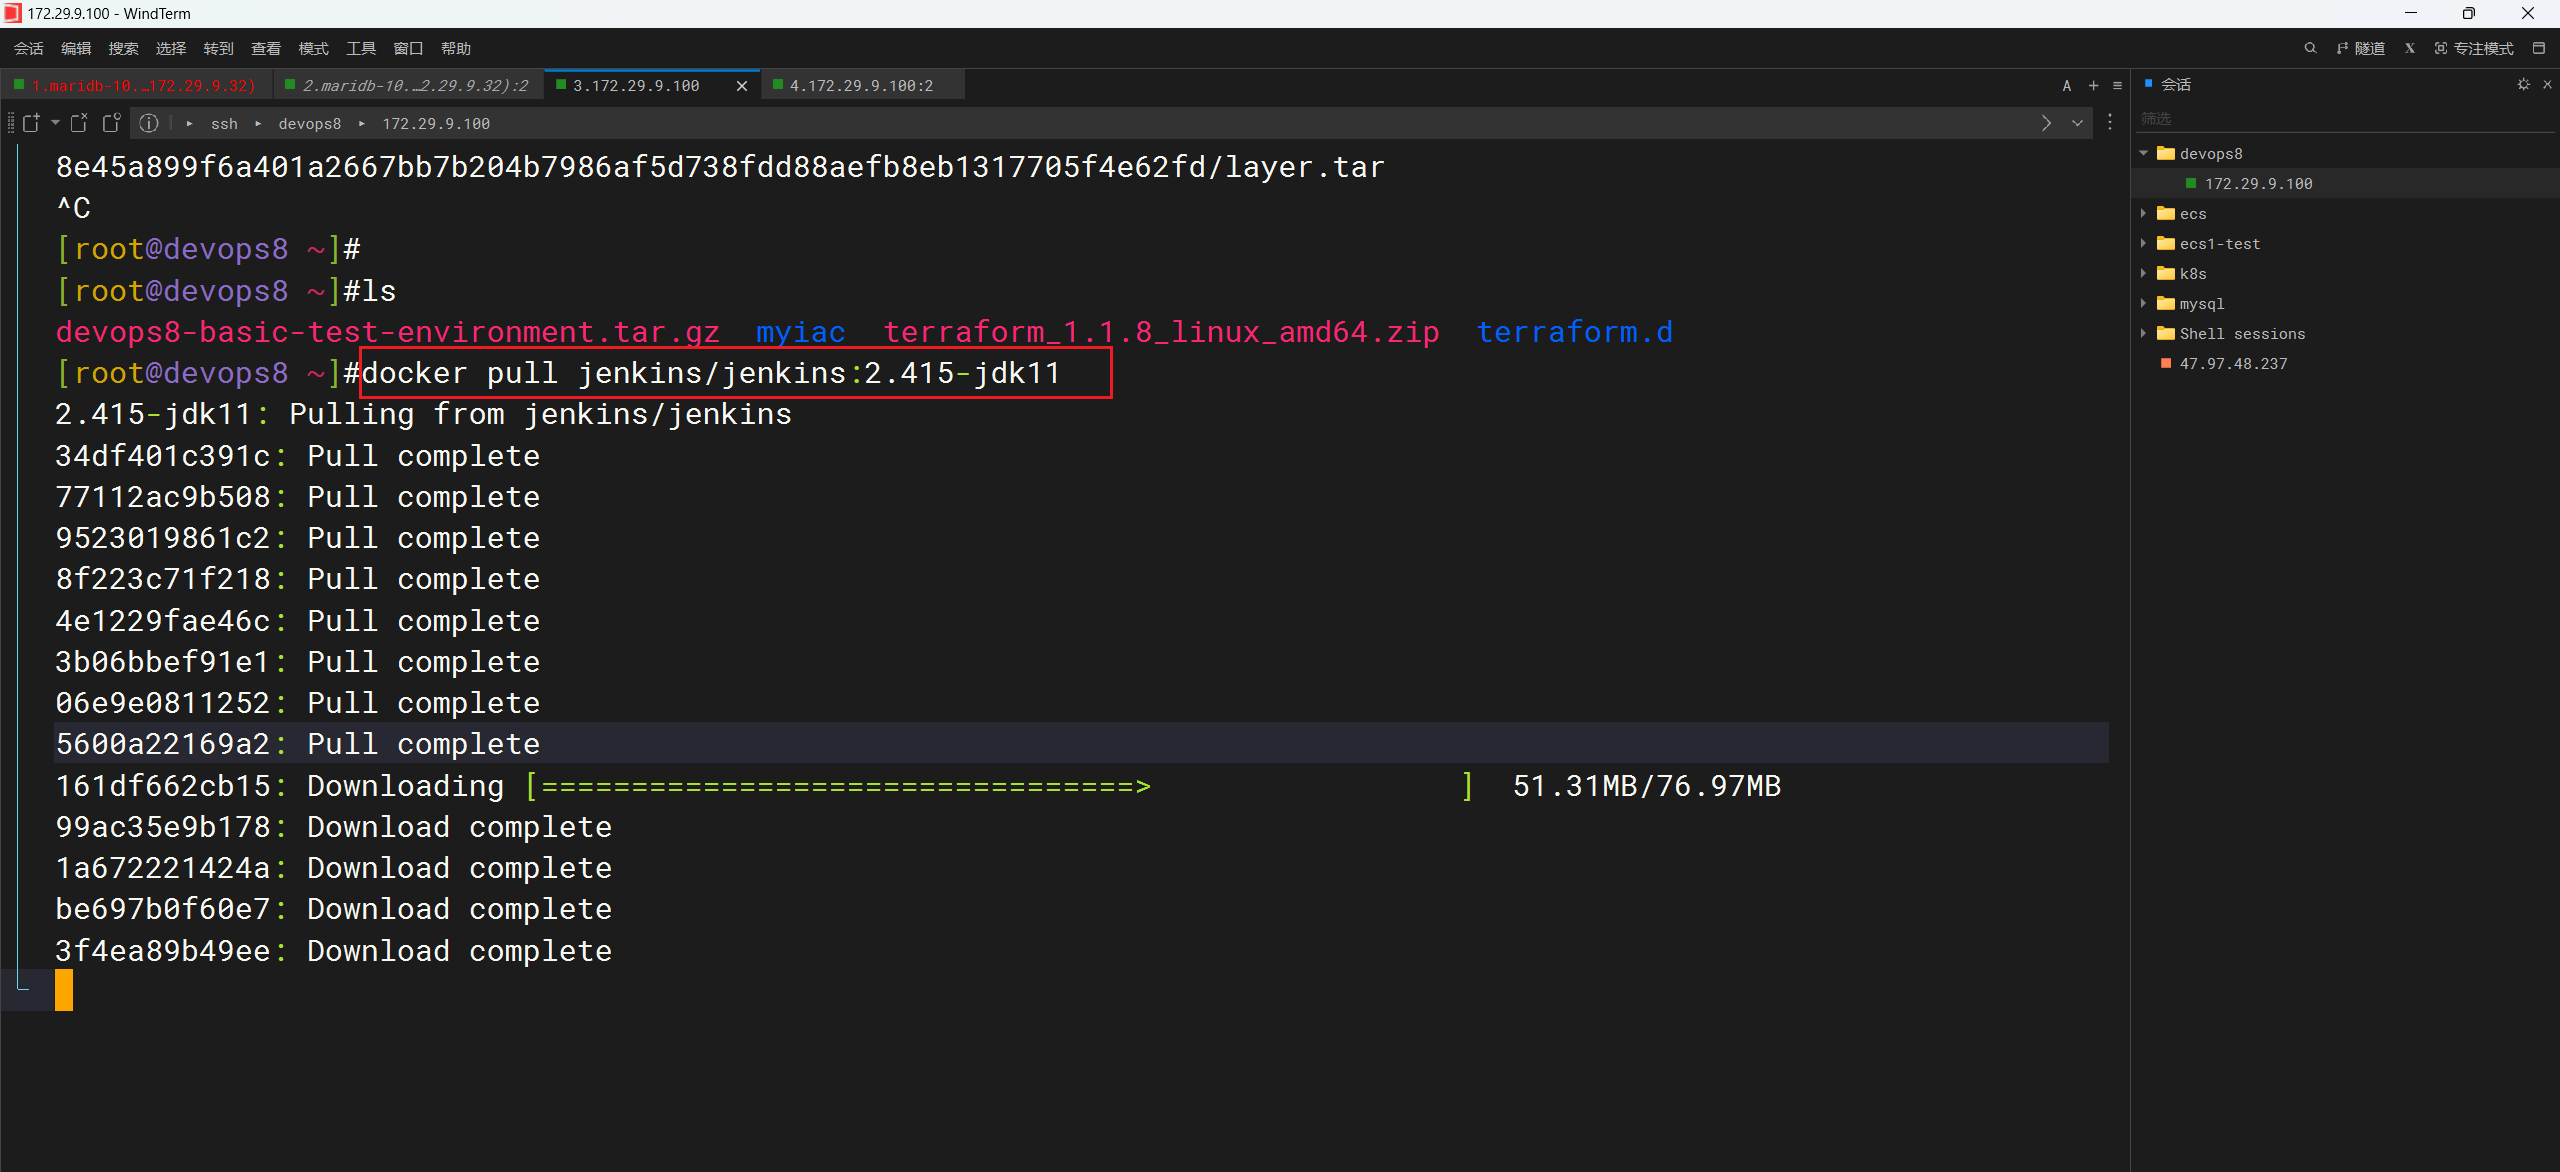
docker pull jenkins/jenkins:2.415-jdk11
docker pull jenkins/inbound-agent:latest

## LoadDockerImage
kind load  docker-image jenkins/jenkins:2.415-jdk11 --name devopscluster
kind load docker-image jenkins/inbound-agent:latest --name devopscluster以上2个镜像拉取速度很慢哦:(耐心等待一会儿哦)
Step2 部署Jenkins
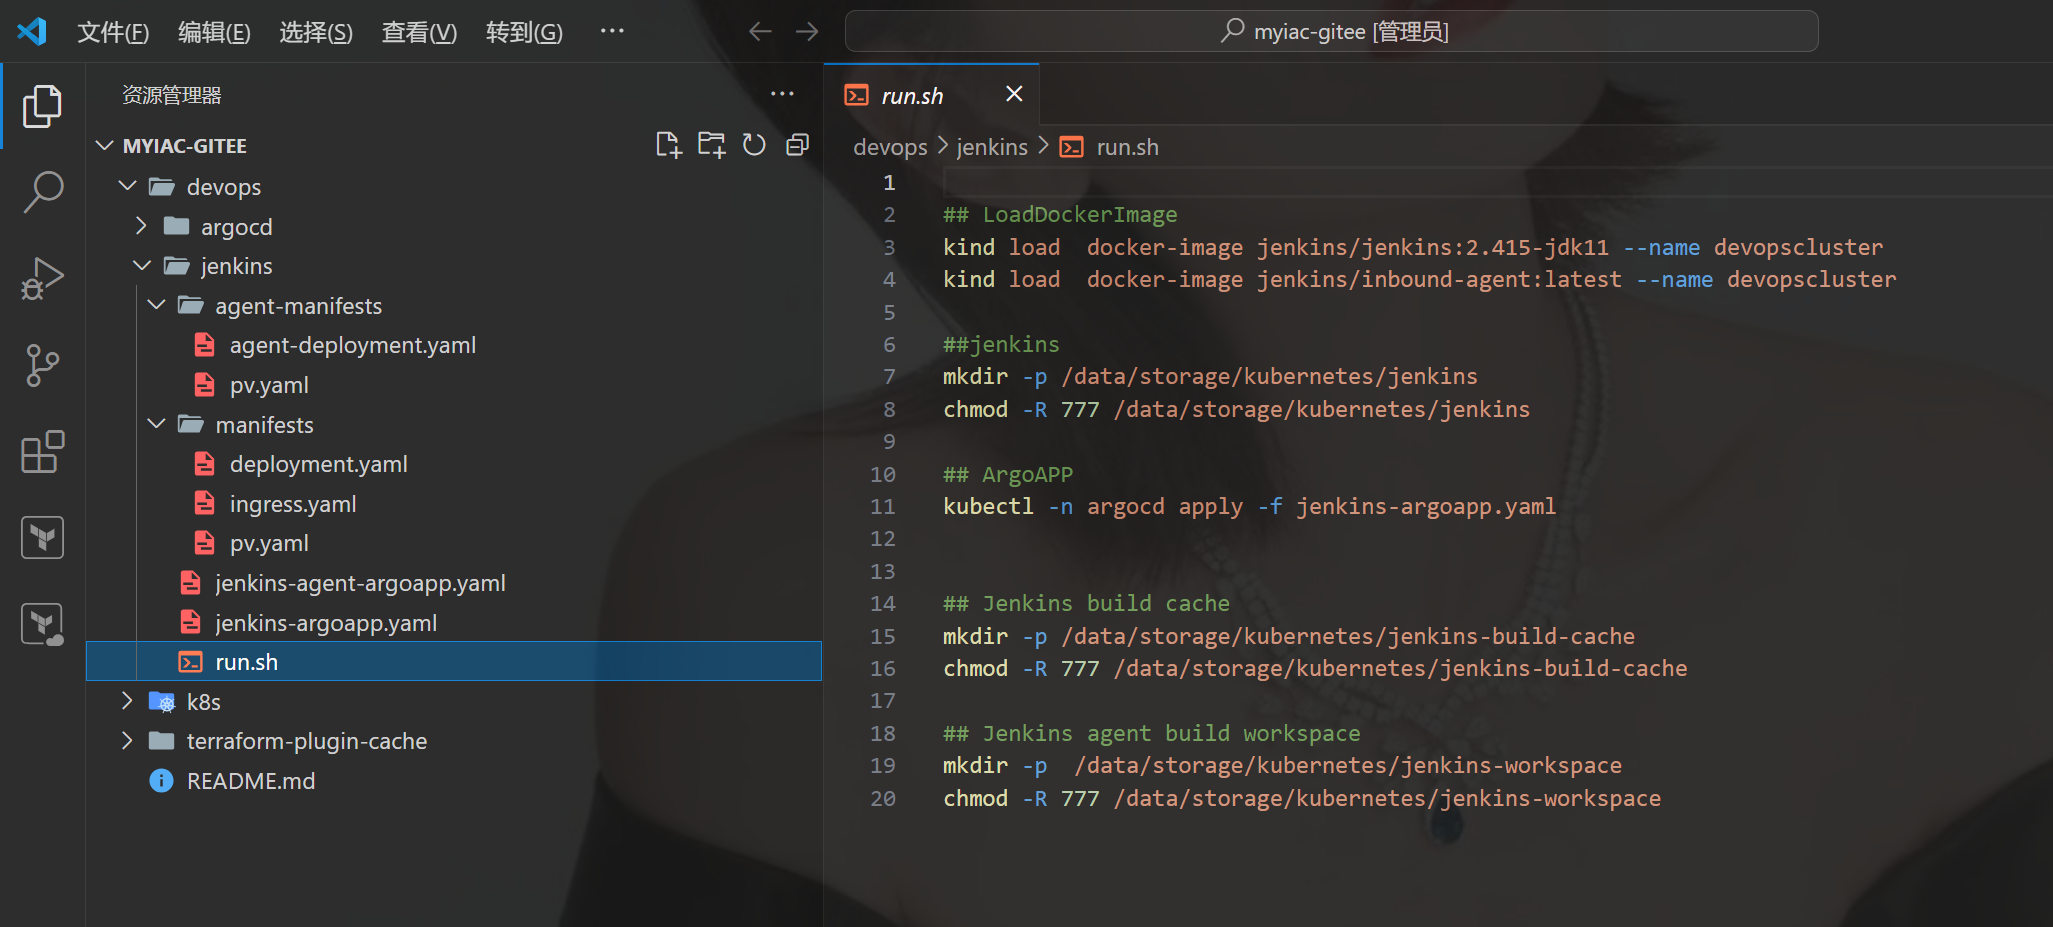
- 已经编写好了一套K8s 清单文件和一个声明式的Argo APP。【具体参考代码库】,我们直接拉取代码执行就好。
[root@devops8 jenkins]#pwd
/root/myiac-gitee/devops/jenkins
[root@devops8 jenkins]#ls
agent-manifests jenkins-agent-argoapp.yaml jenkins-argoapp.yaml manifests run.sh
[root@devops8 jenkins]# sh -x run.sh
+ kind load docker-image jenkins/jenkins:2.415-jdk11 --name devopscluster
Image: "jenkins/jenkins:2.415-jdk11" with ID "sha256:27aa51b3ca68eb5974570b2f685c948b4bfa60b41c5af4807a05411f11333457" found to be already present on all nodes.
+ kind load docker-image jenkins/inbound-agent:latest --name devopscluster
Image: "jenkins/inbound-agent:latest" with ID "sha256:bf21eca245df406d71cbc13bbfdbf51c69b491041e51aff052e9f3cce9fab10f" found to be already present on all nodes.
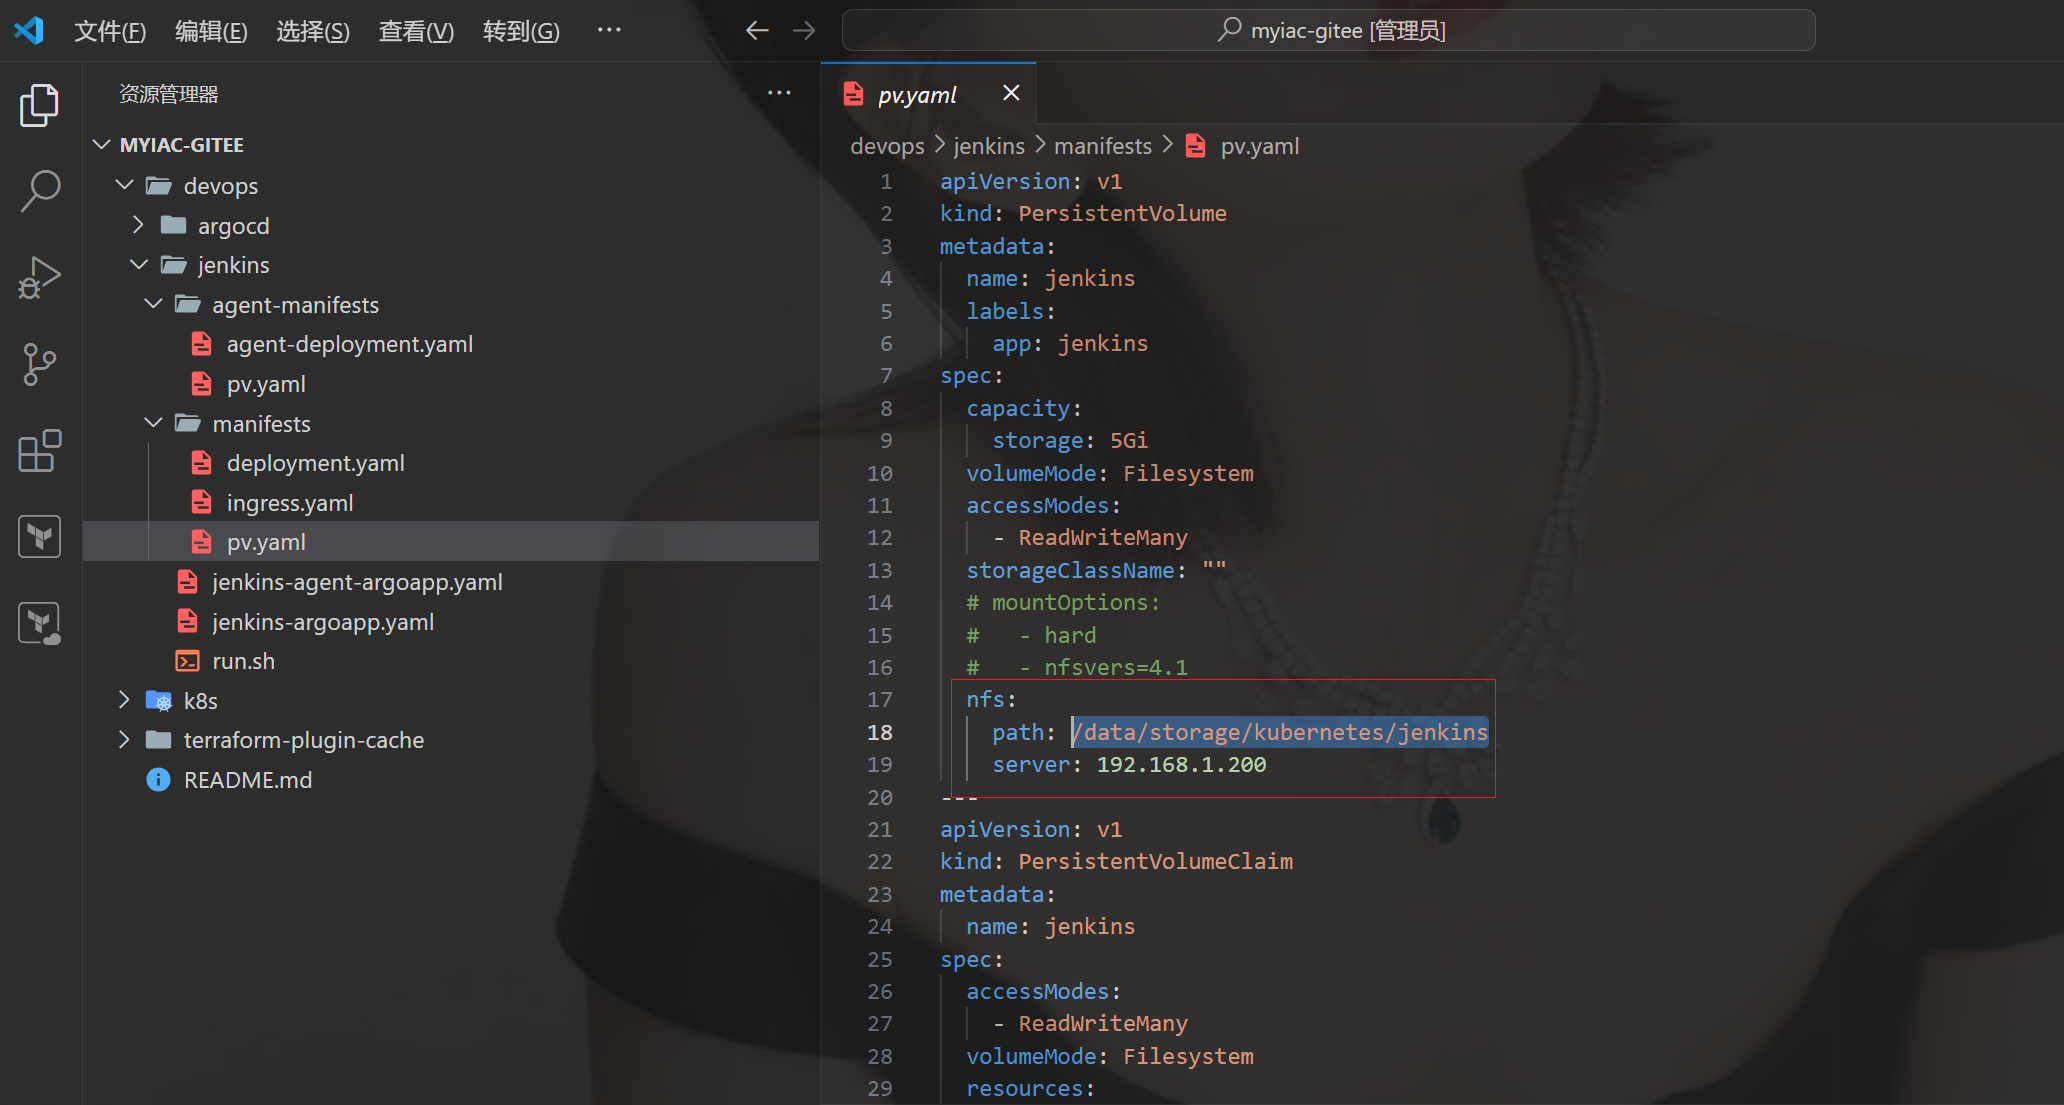
+ mkdir -p /data/storage/kubernetes/jenkins
+ chmod -R 777 /data/storage/kubernetes/jenkins
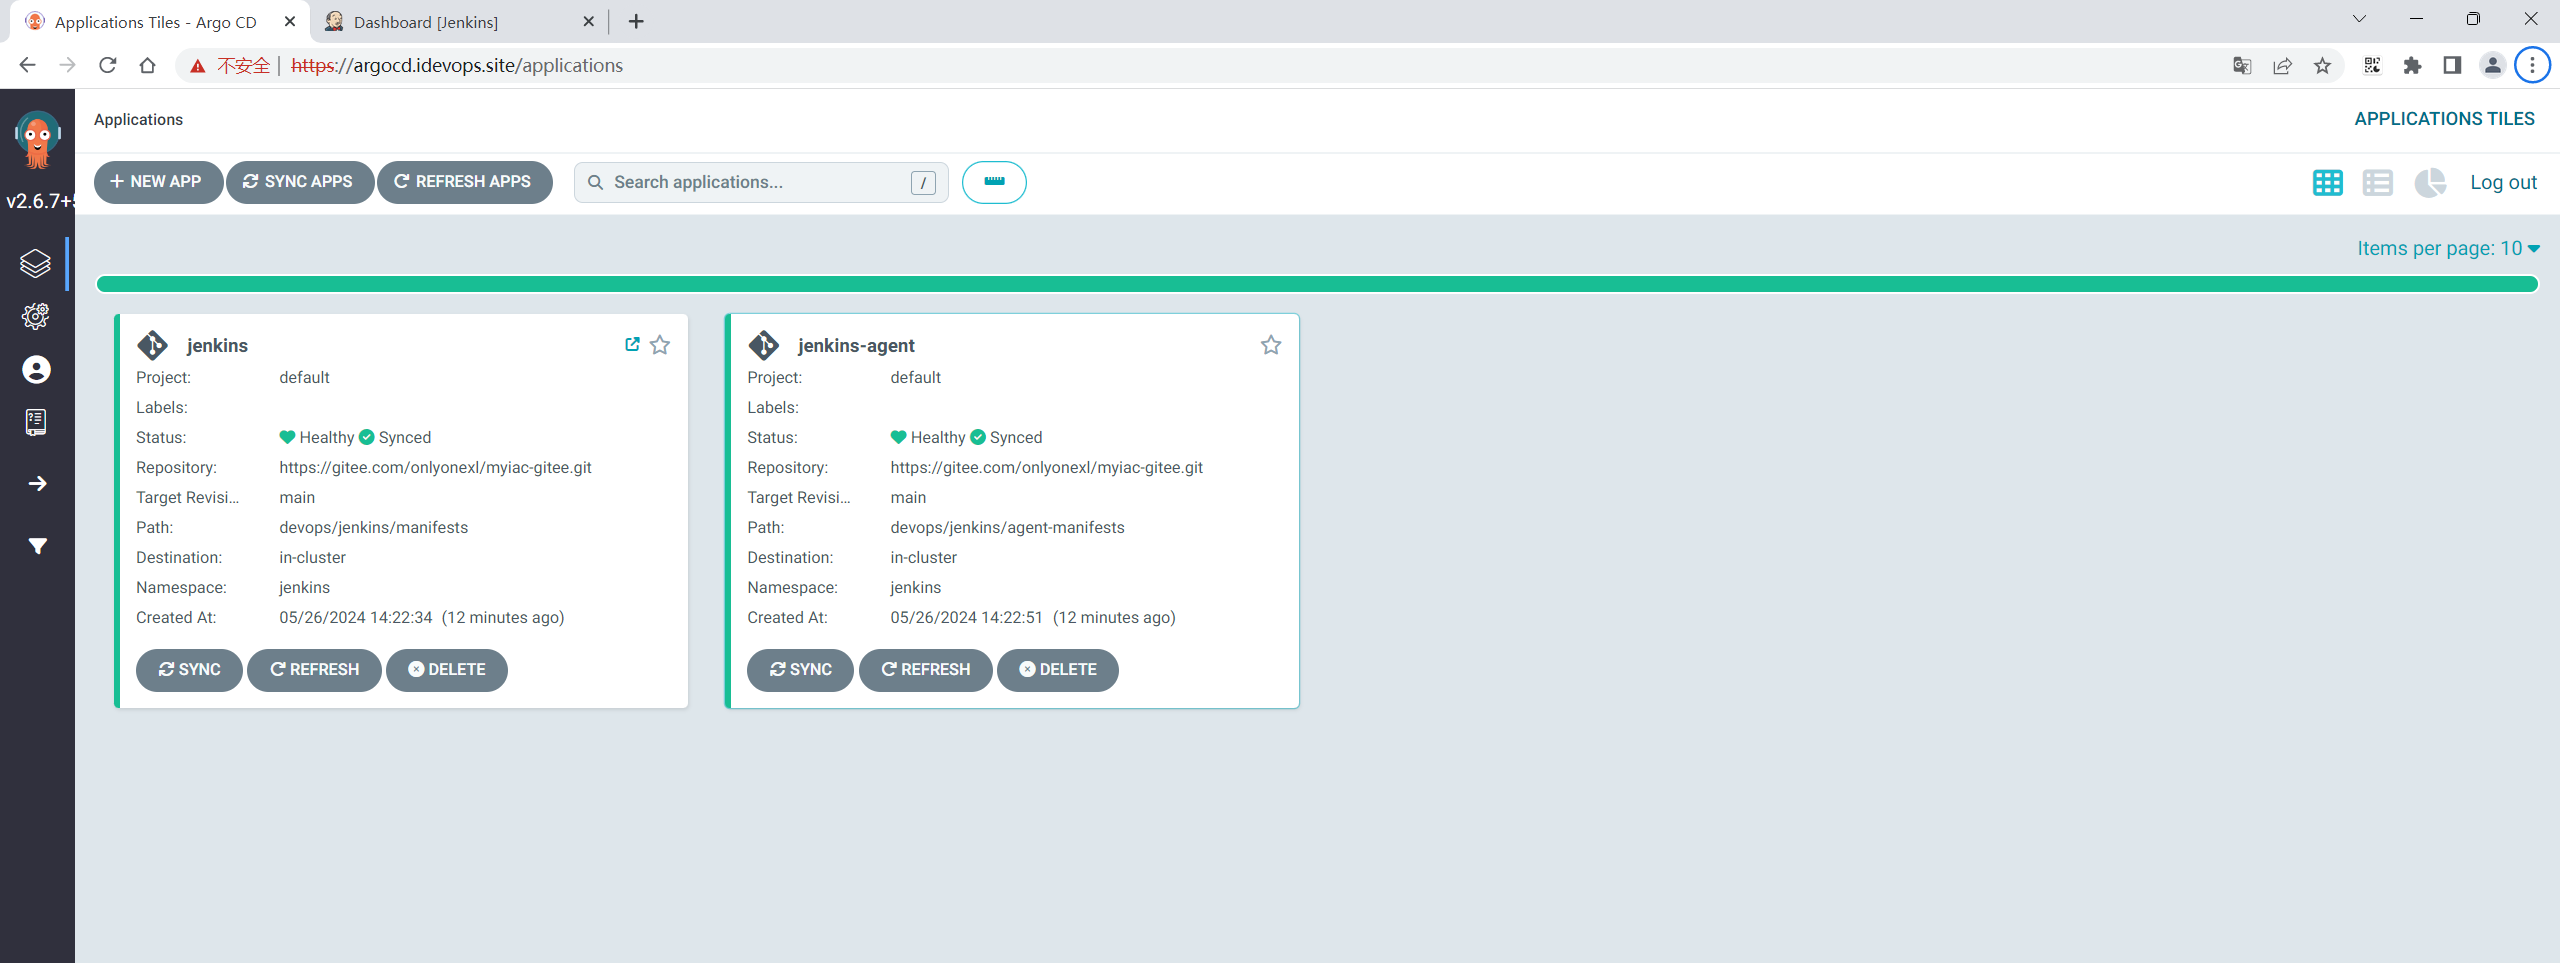
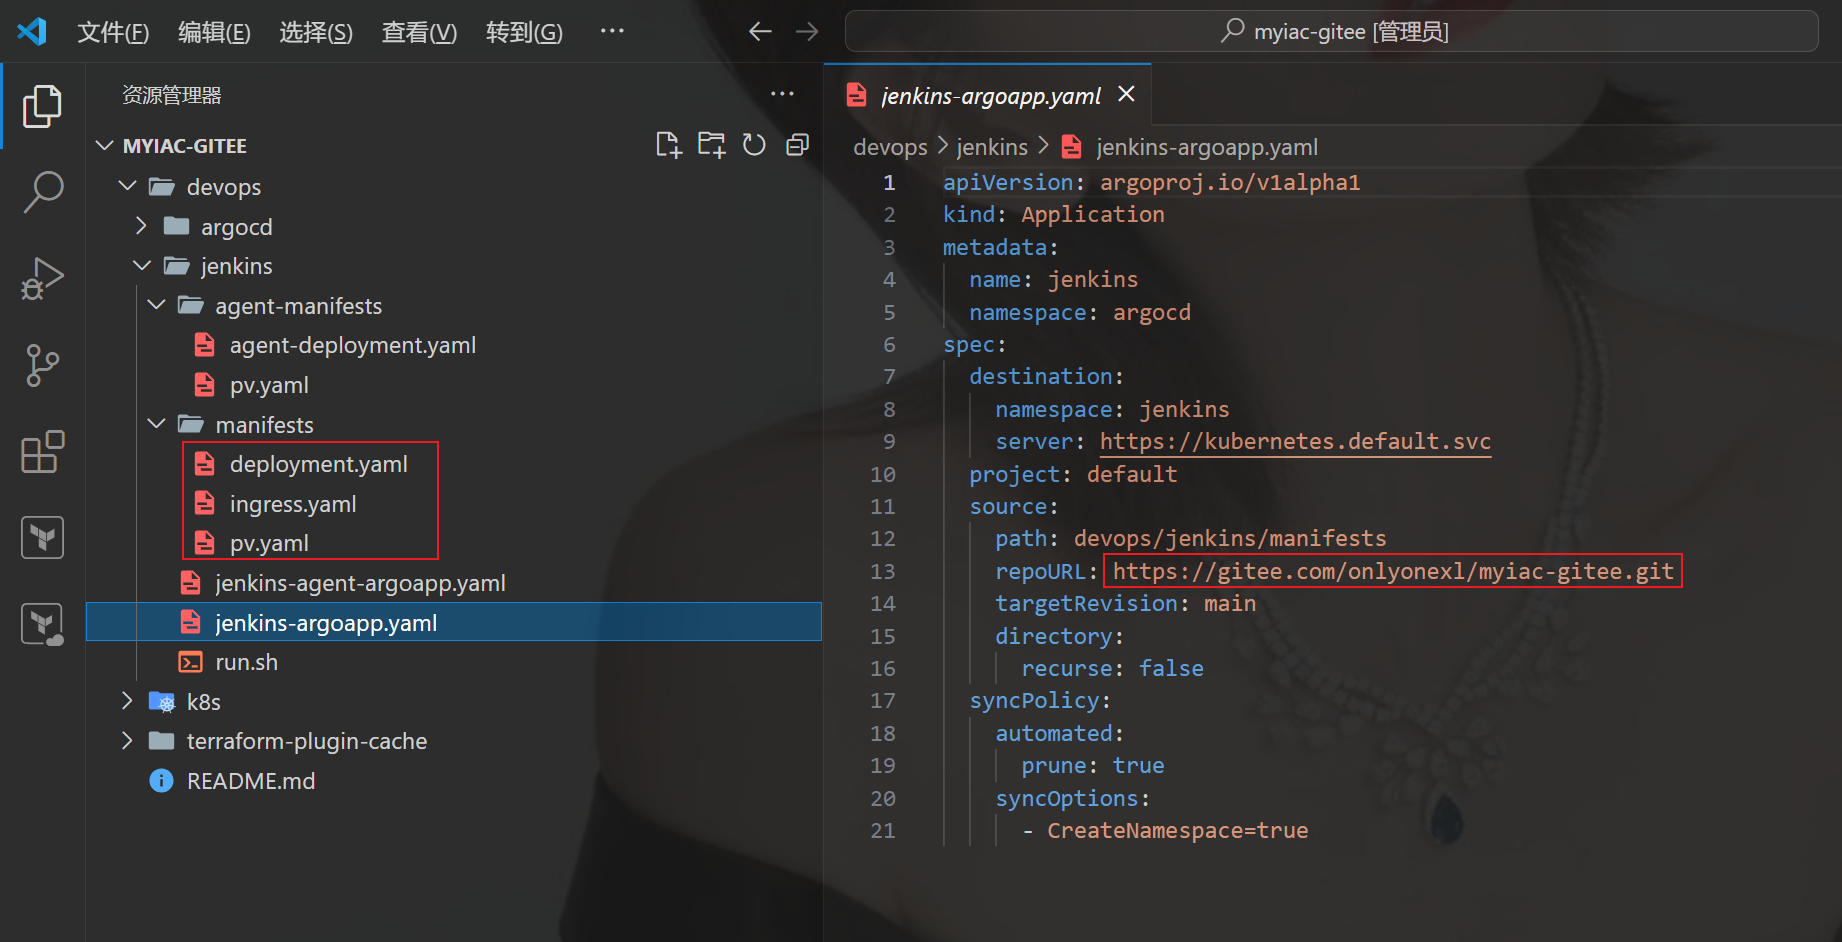
+ kubectl -n argocd apply -f jenkins-argoapp.yaml
application.argoproj.io/jenkins created
+ mkdir -p /data/storage/kubernetes/jenkins-build-cache
+ chmod -R 777 /data/storage/kubernetes/jenkins-build-cache
+ mkdir -p /data/storage/kubernetes/jenkins-workspace
+ chmod -R 777 /data/storage/kubernetes/jenkins-workspace
[root@devops8 jenkins]#- 添加Hosts
192.168.1.200 jenkins.idevops.site- 这里,我们看下本次涉及的相关配置文件
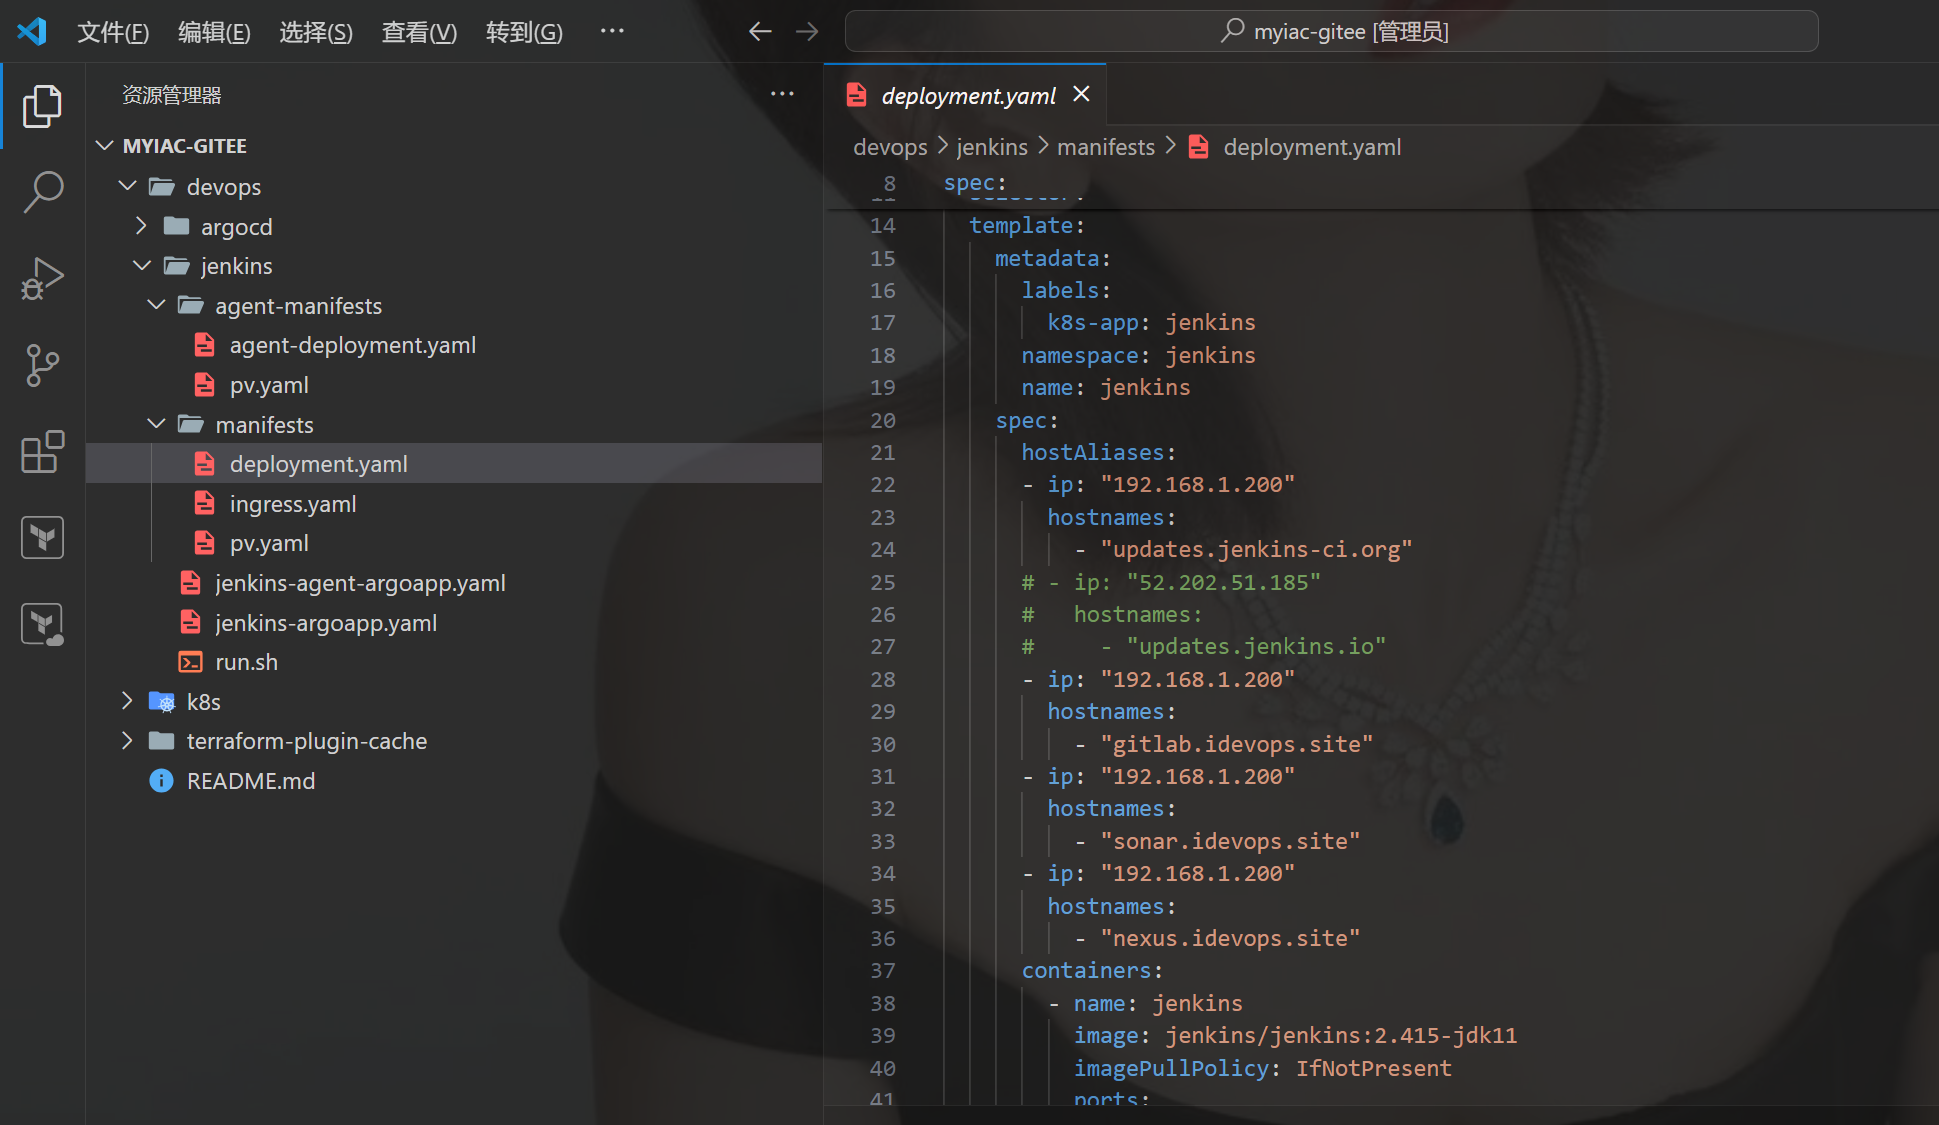
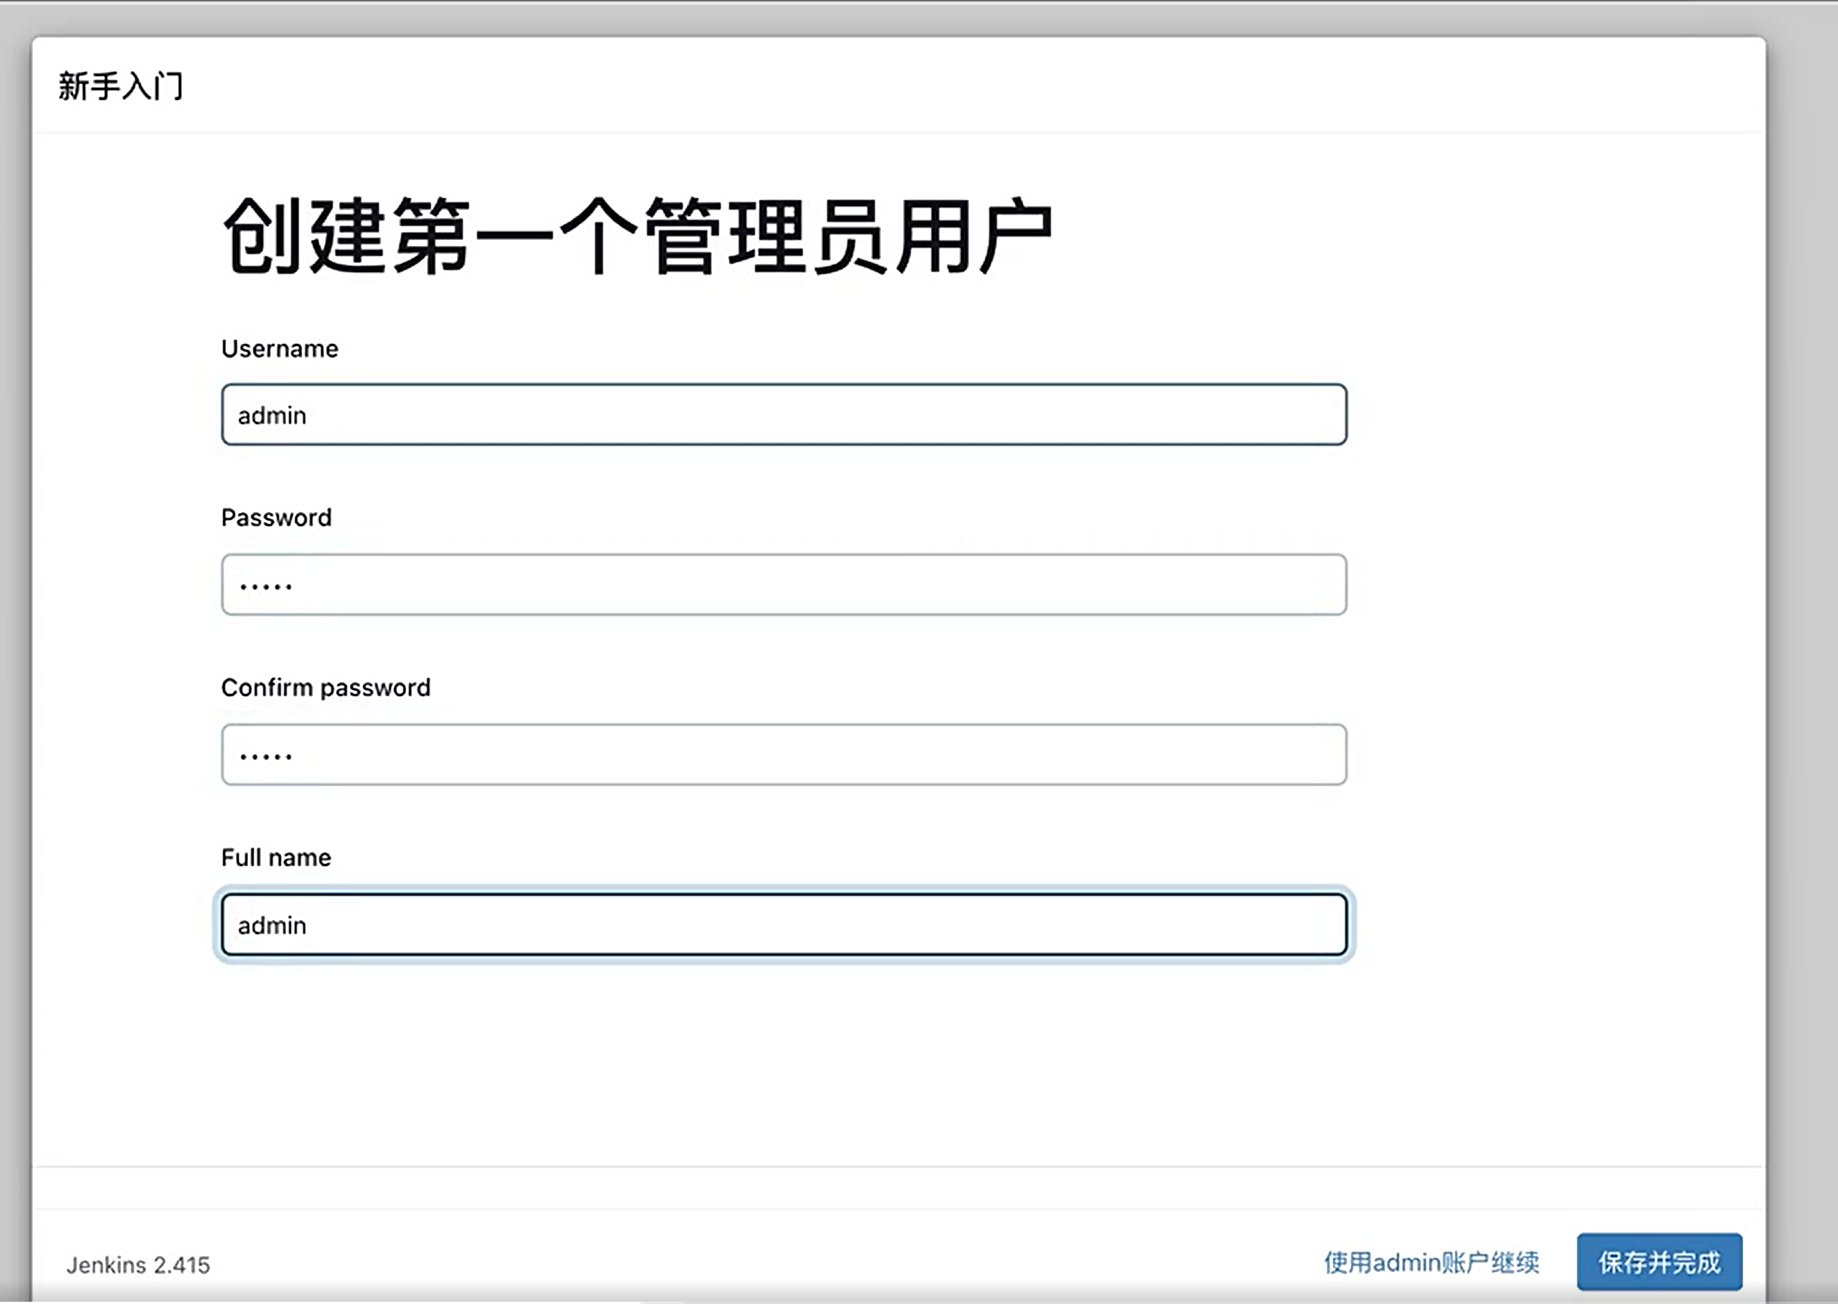
Step3 Jenkins初始化配置
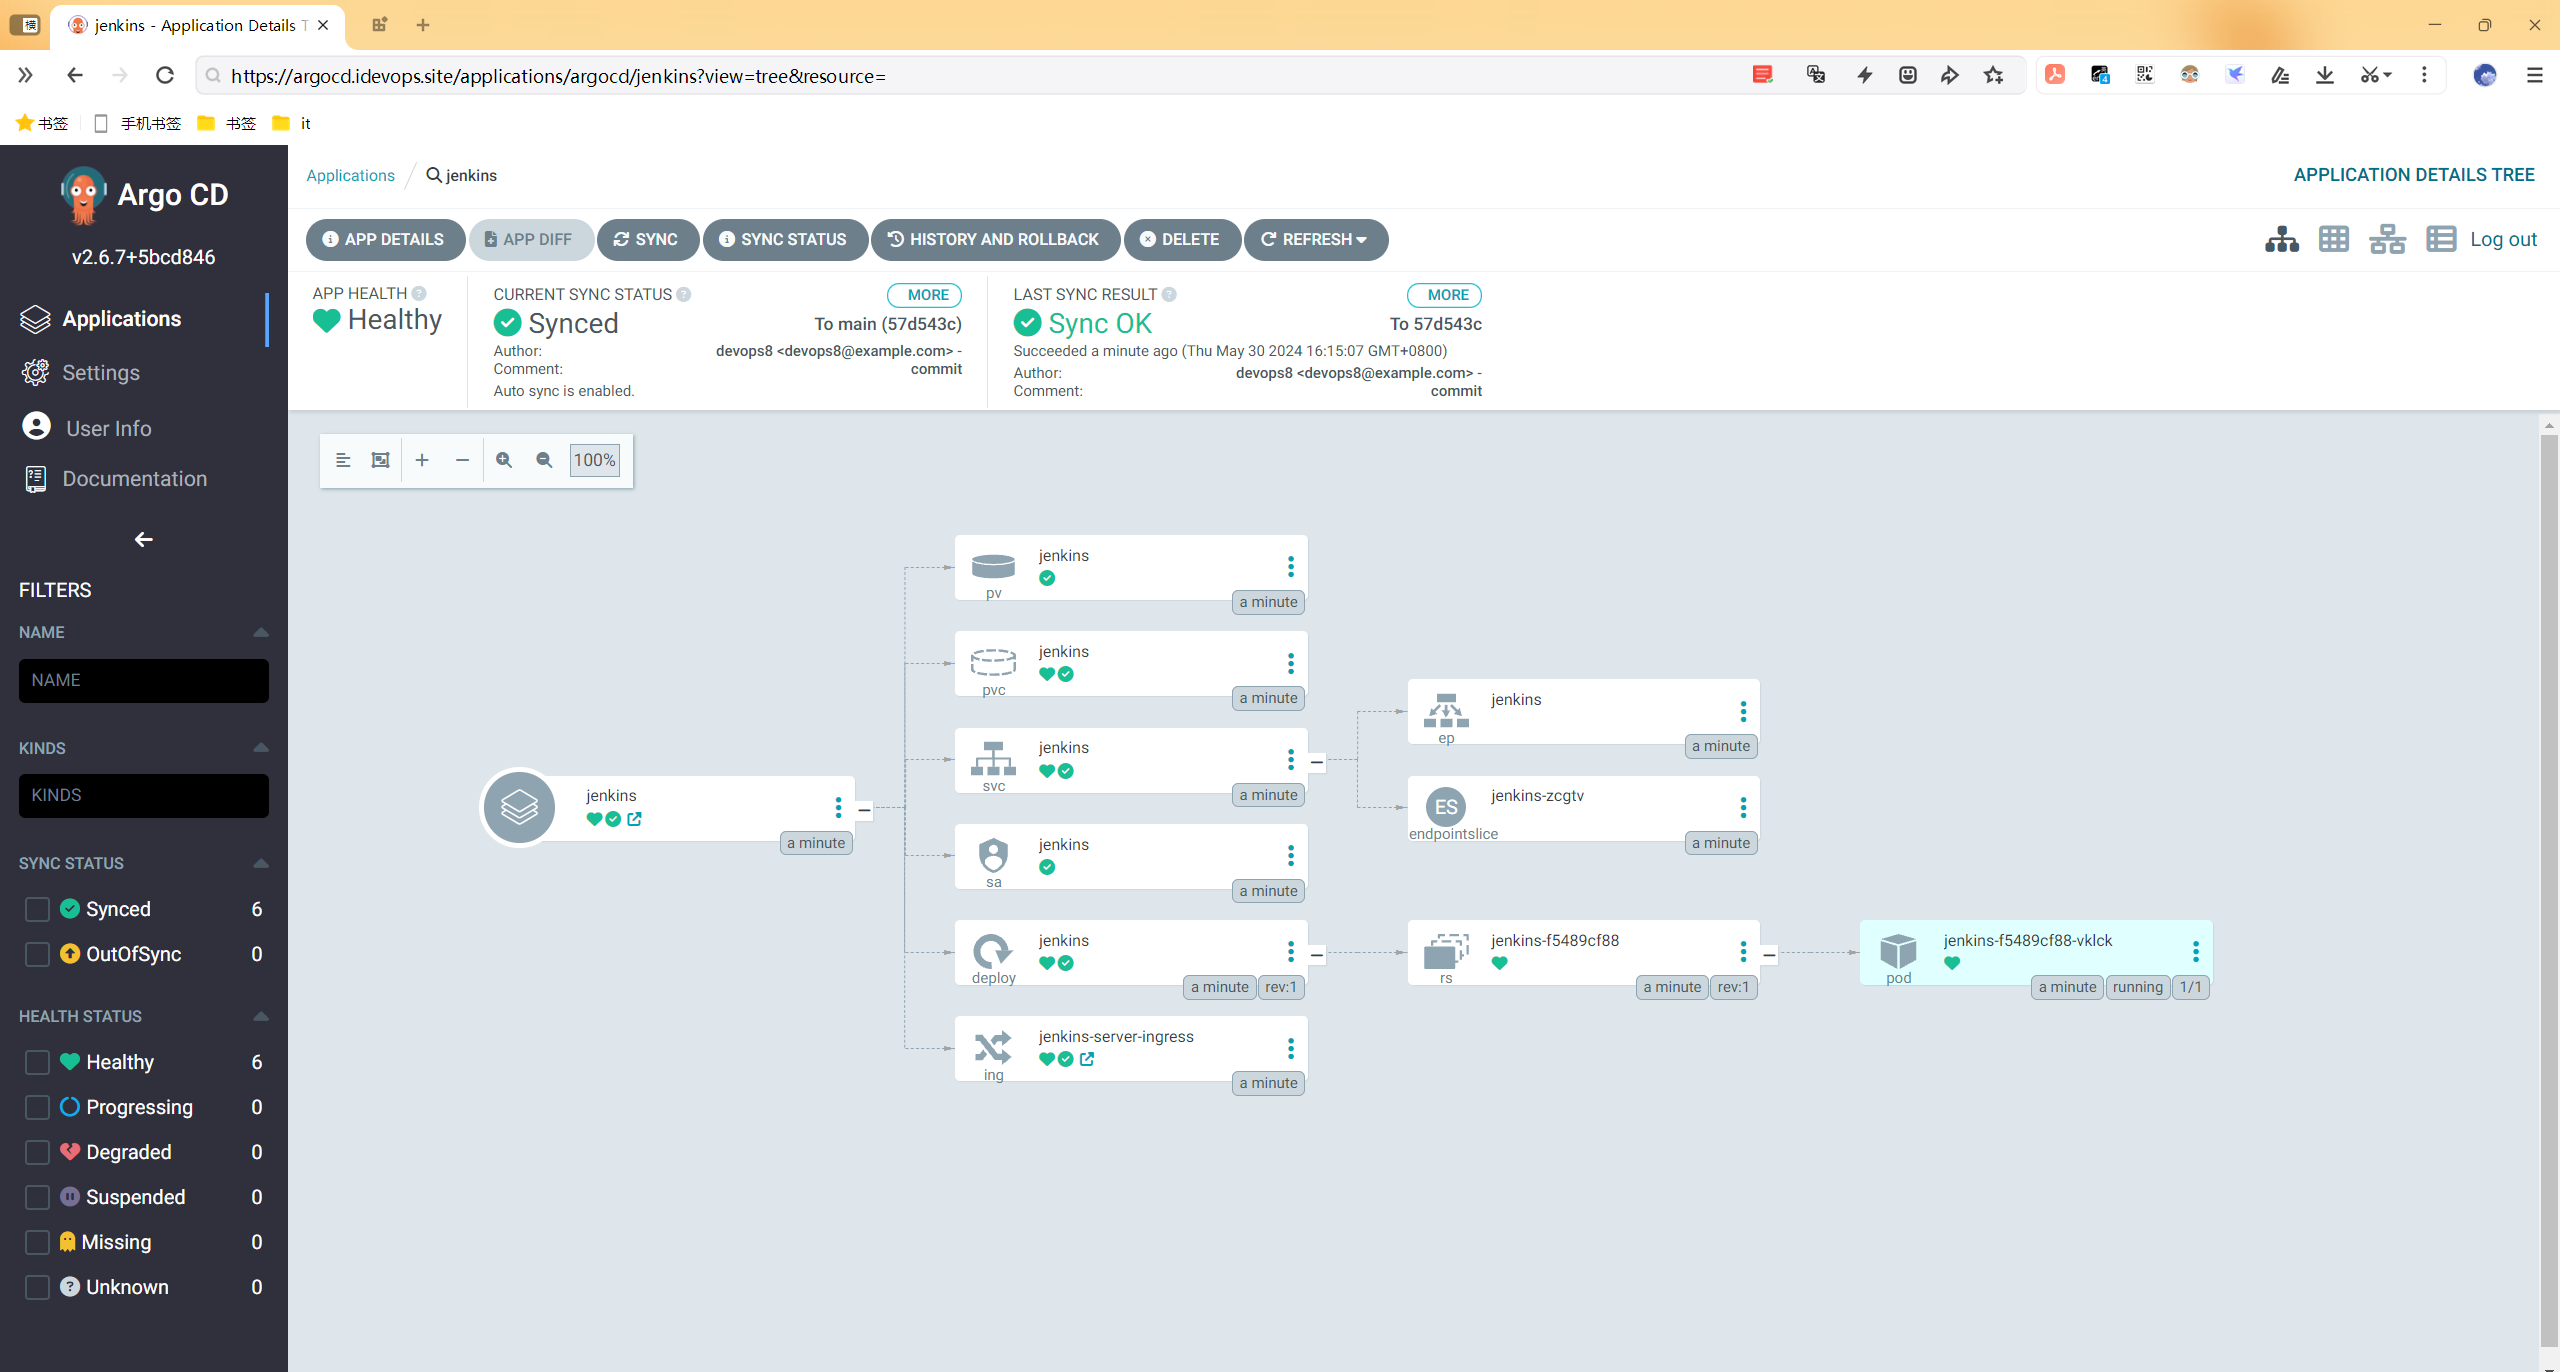
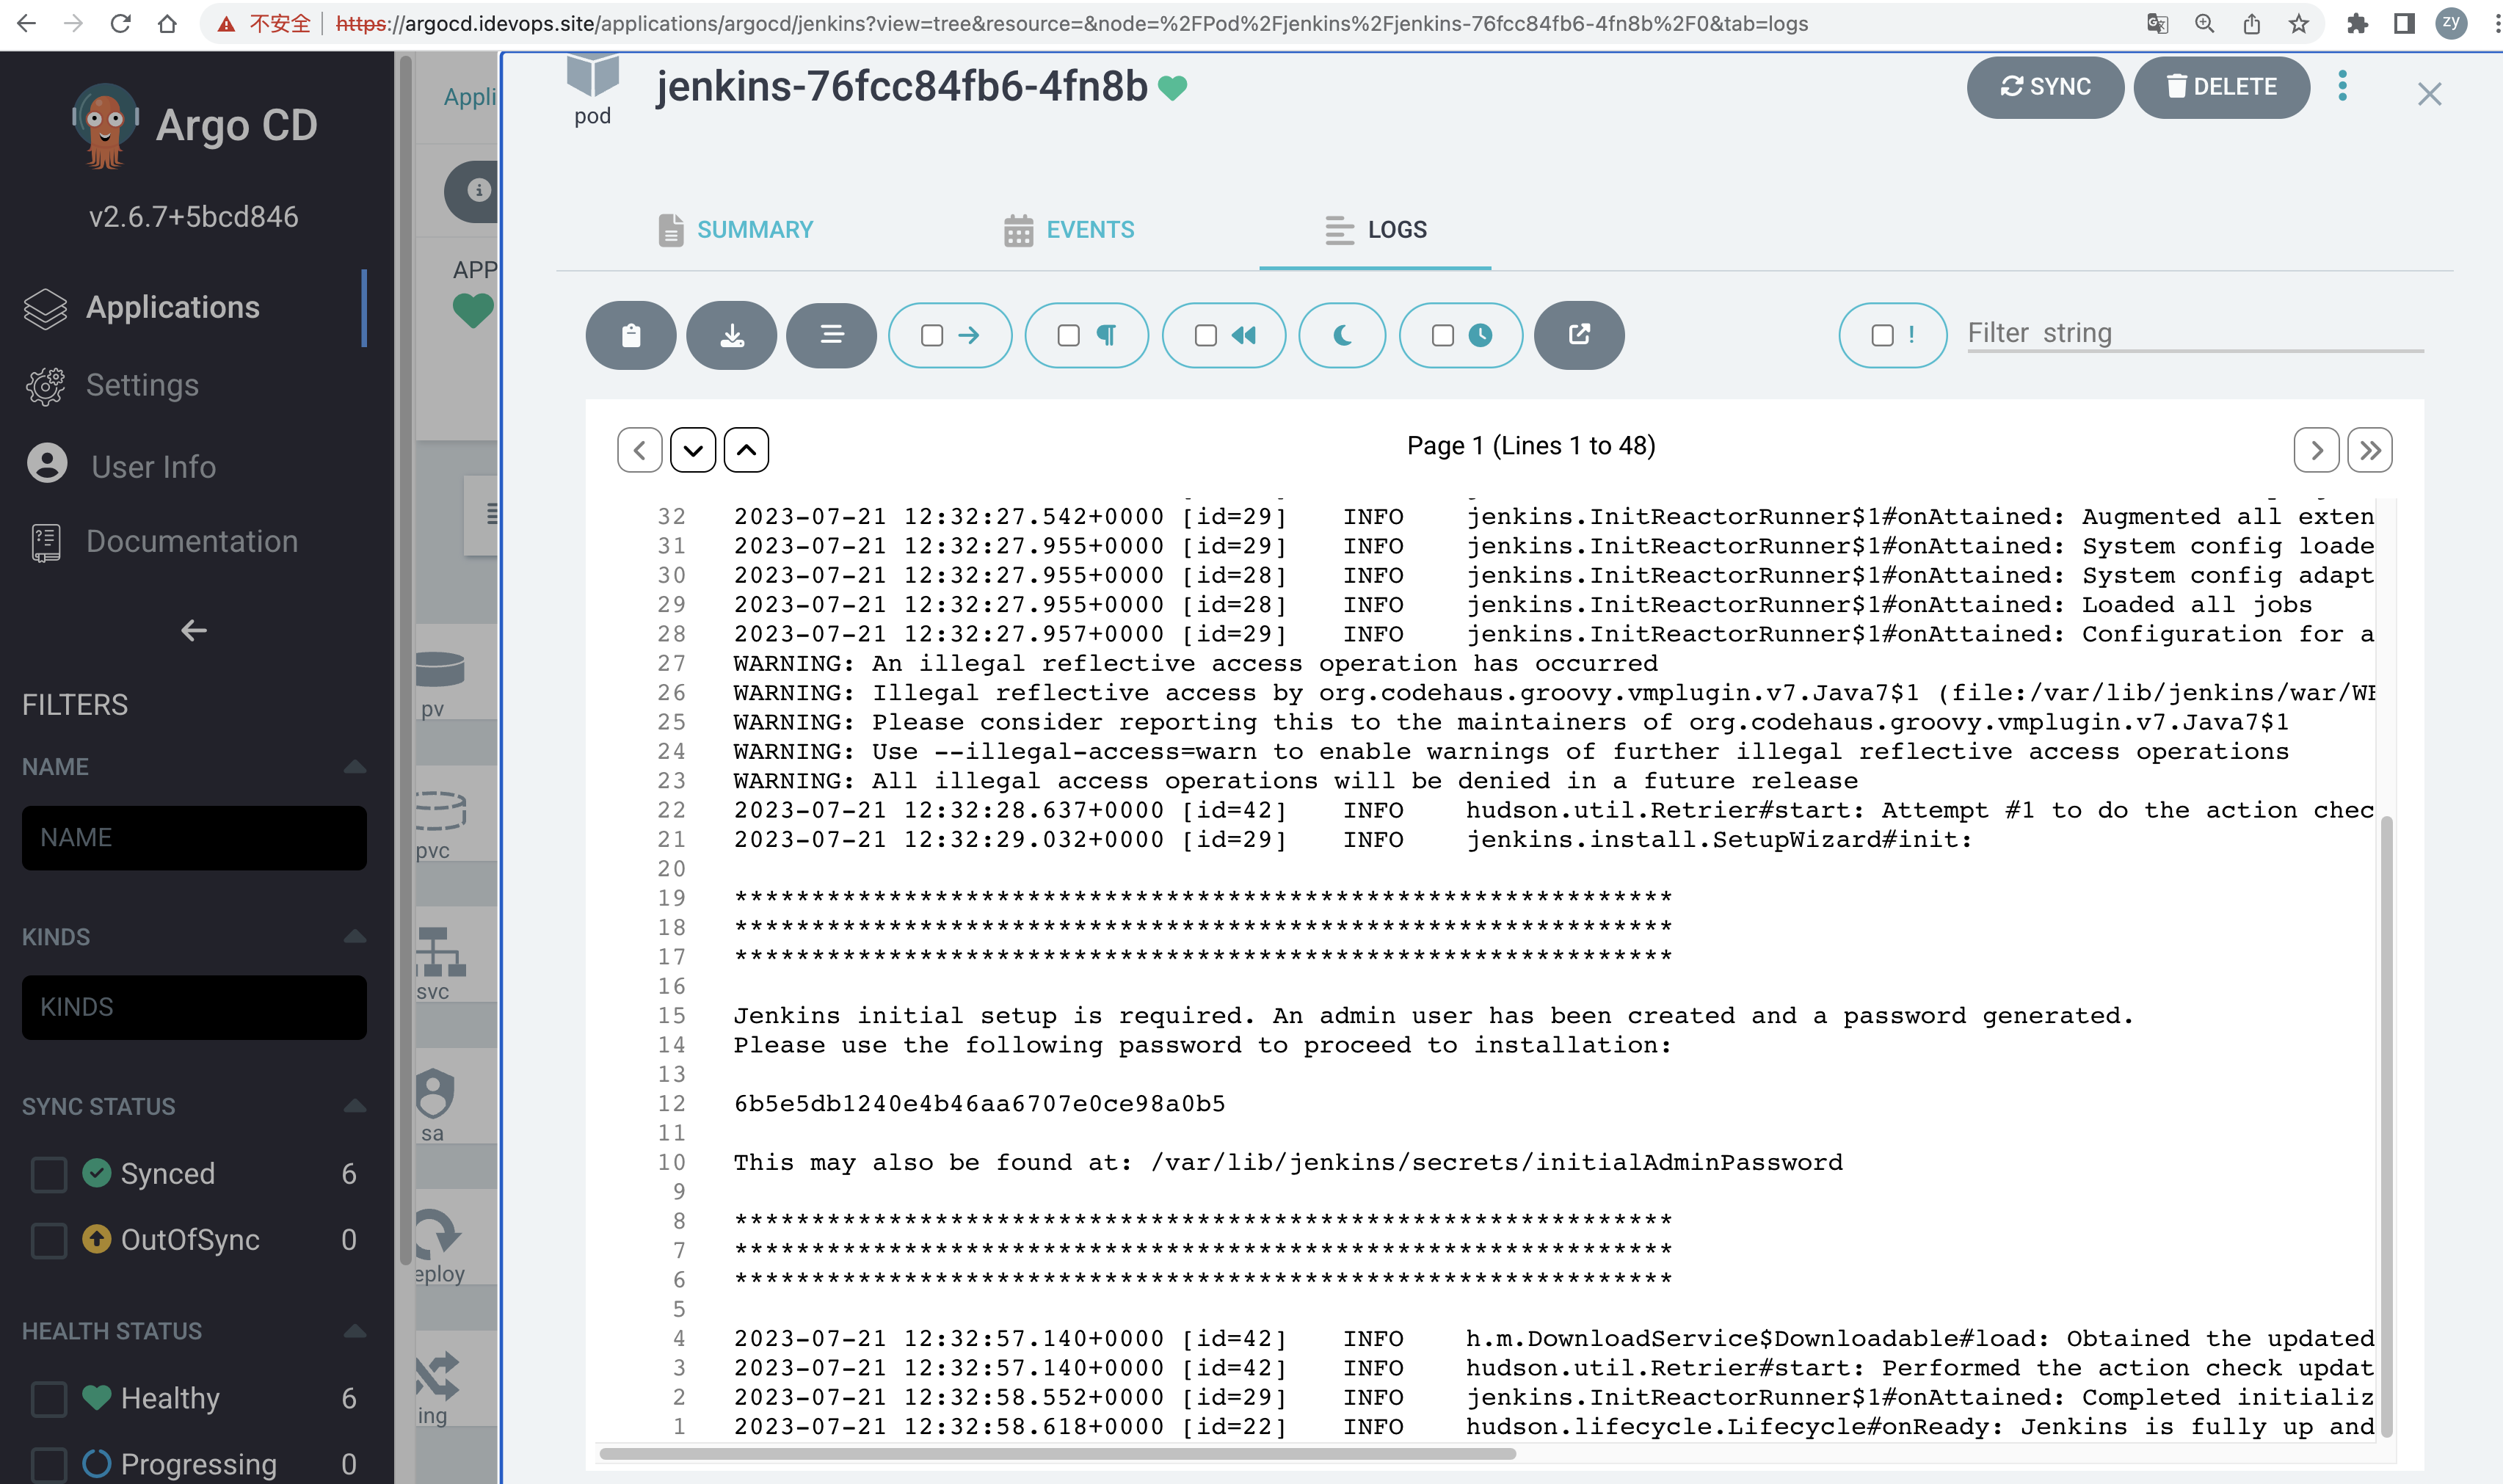
- 从日志中获取解锁秘钥:在ArgoCD选中jenkins pod 然后进入LOGS菜单。
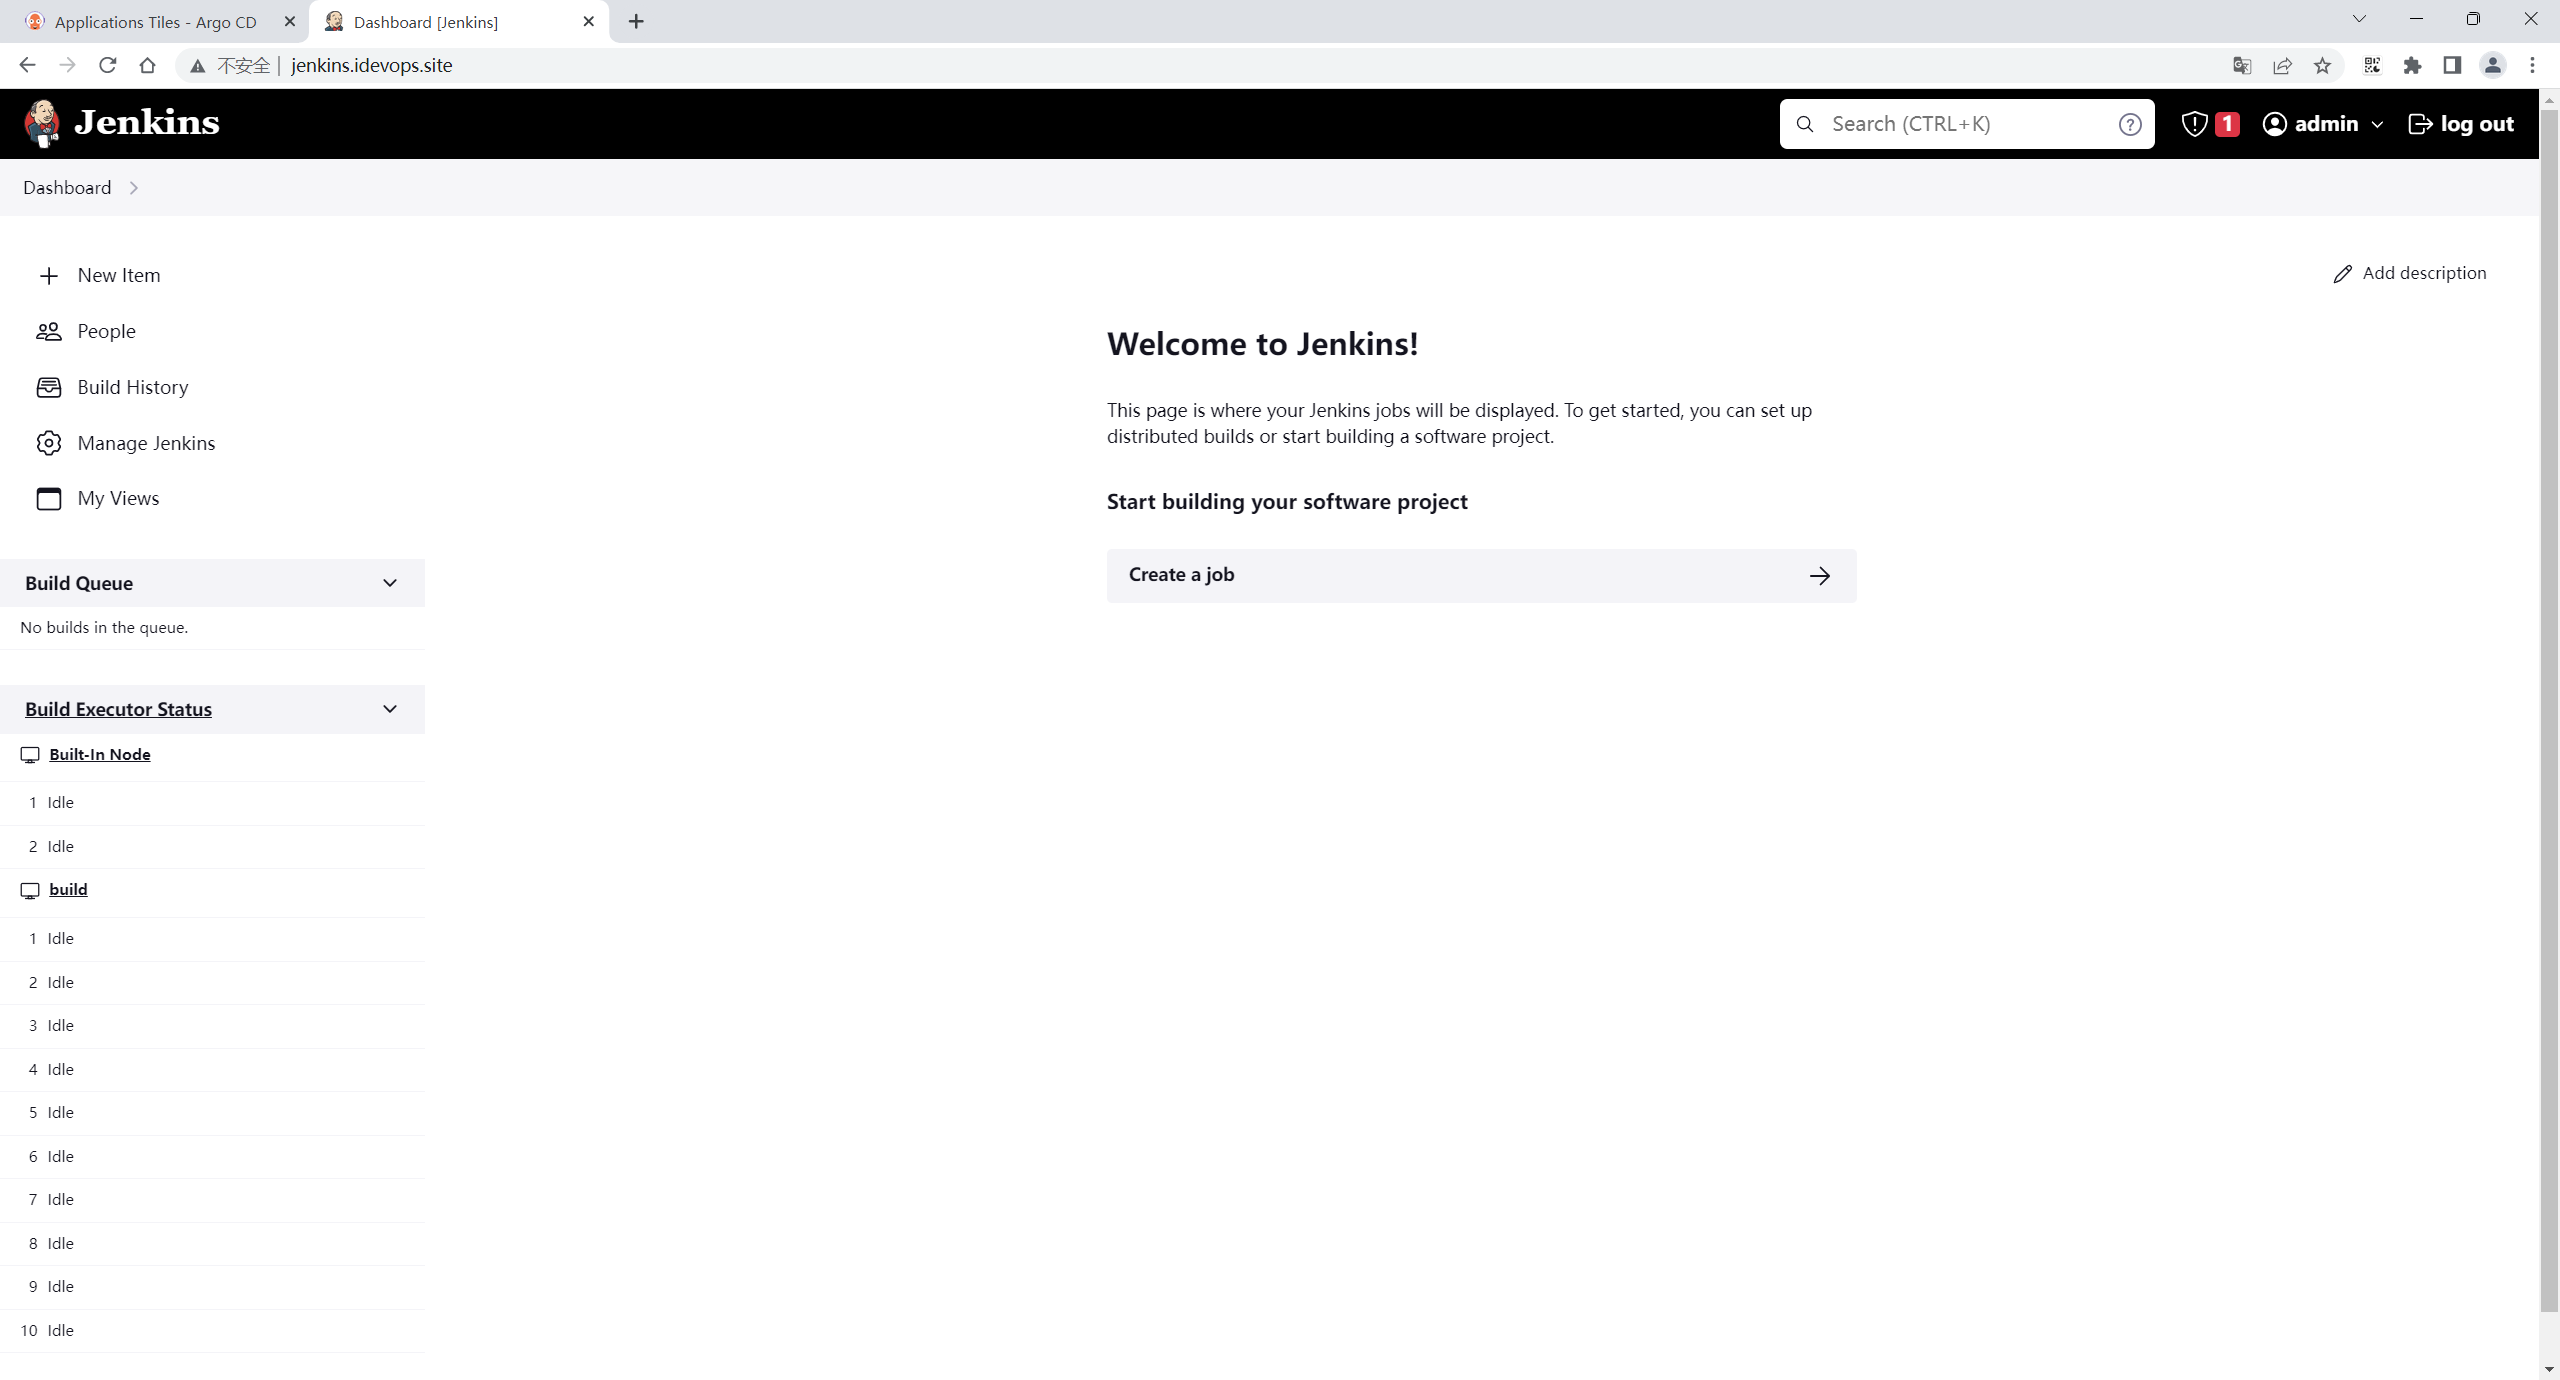
- web访问jenkins.idevops.site
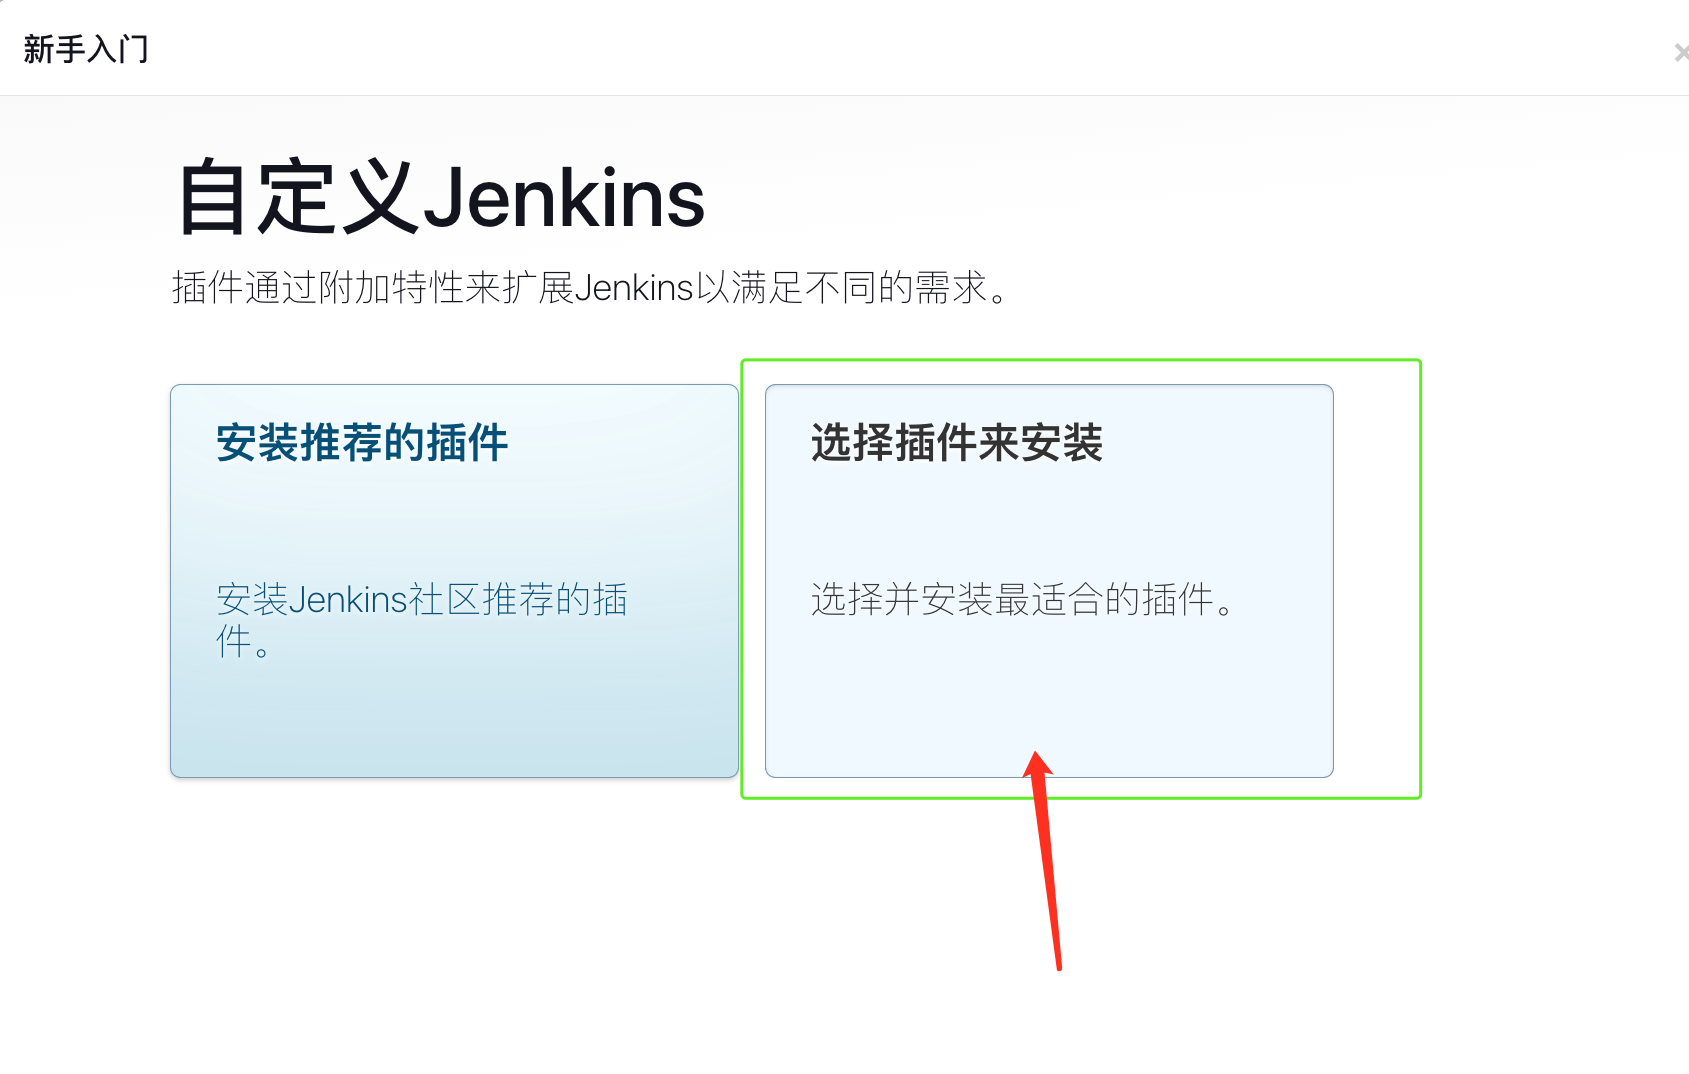
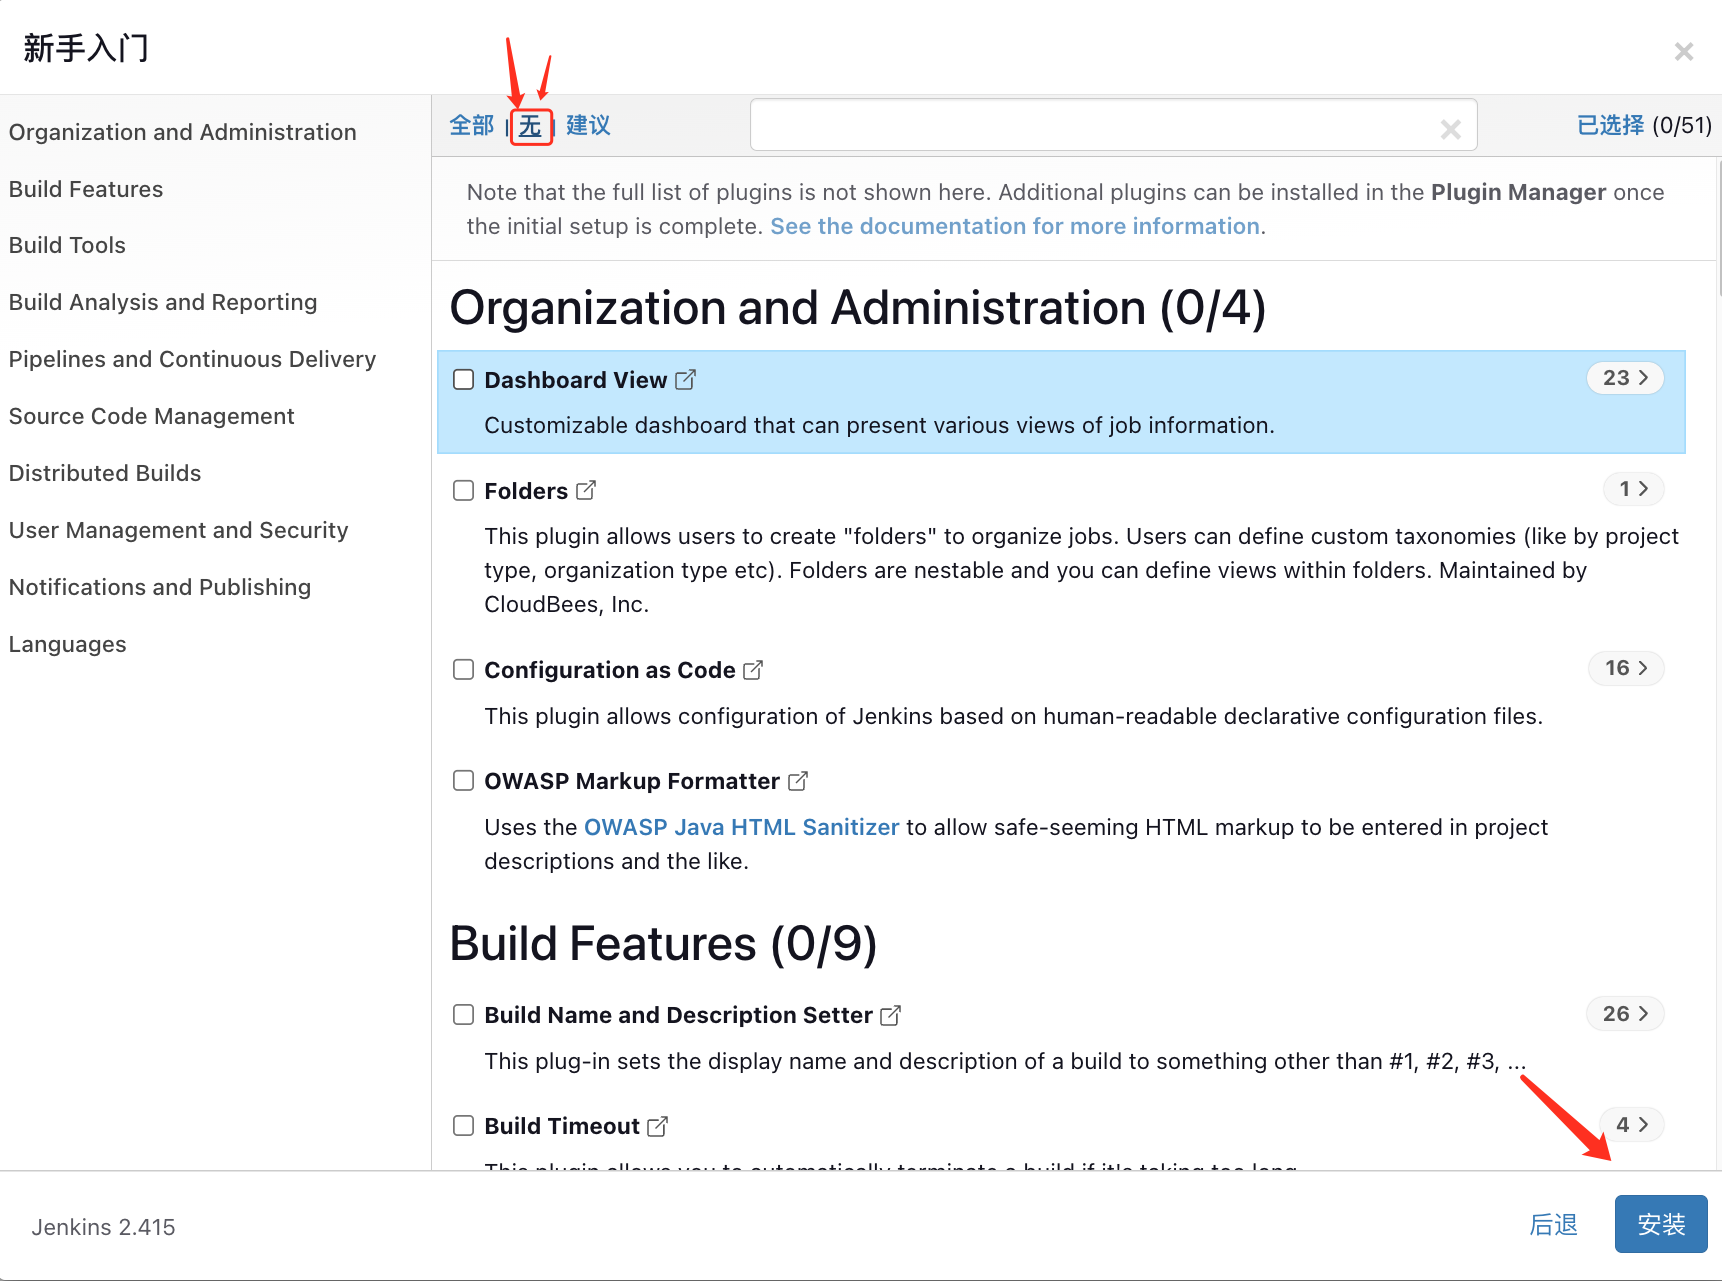
【注意: 插件安装界面,选择自定义,然后什么插件都不选择哈 避免网络问题】
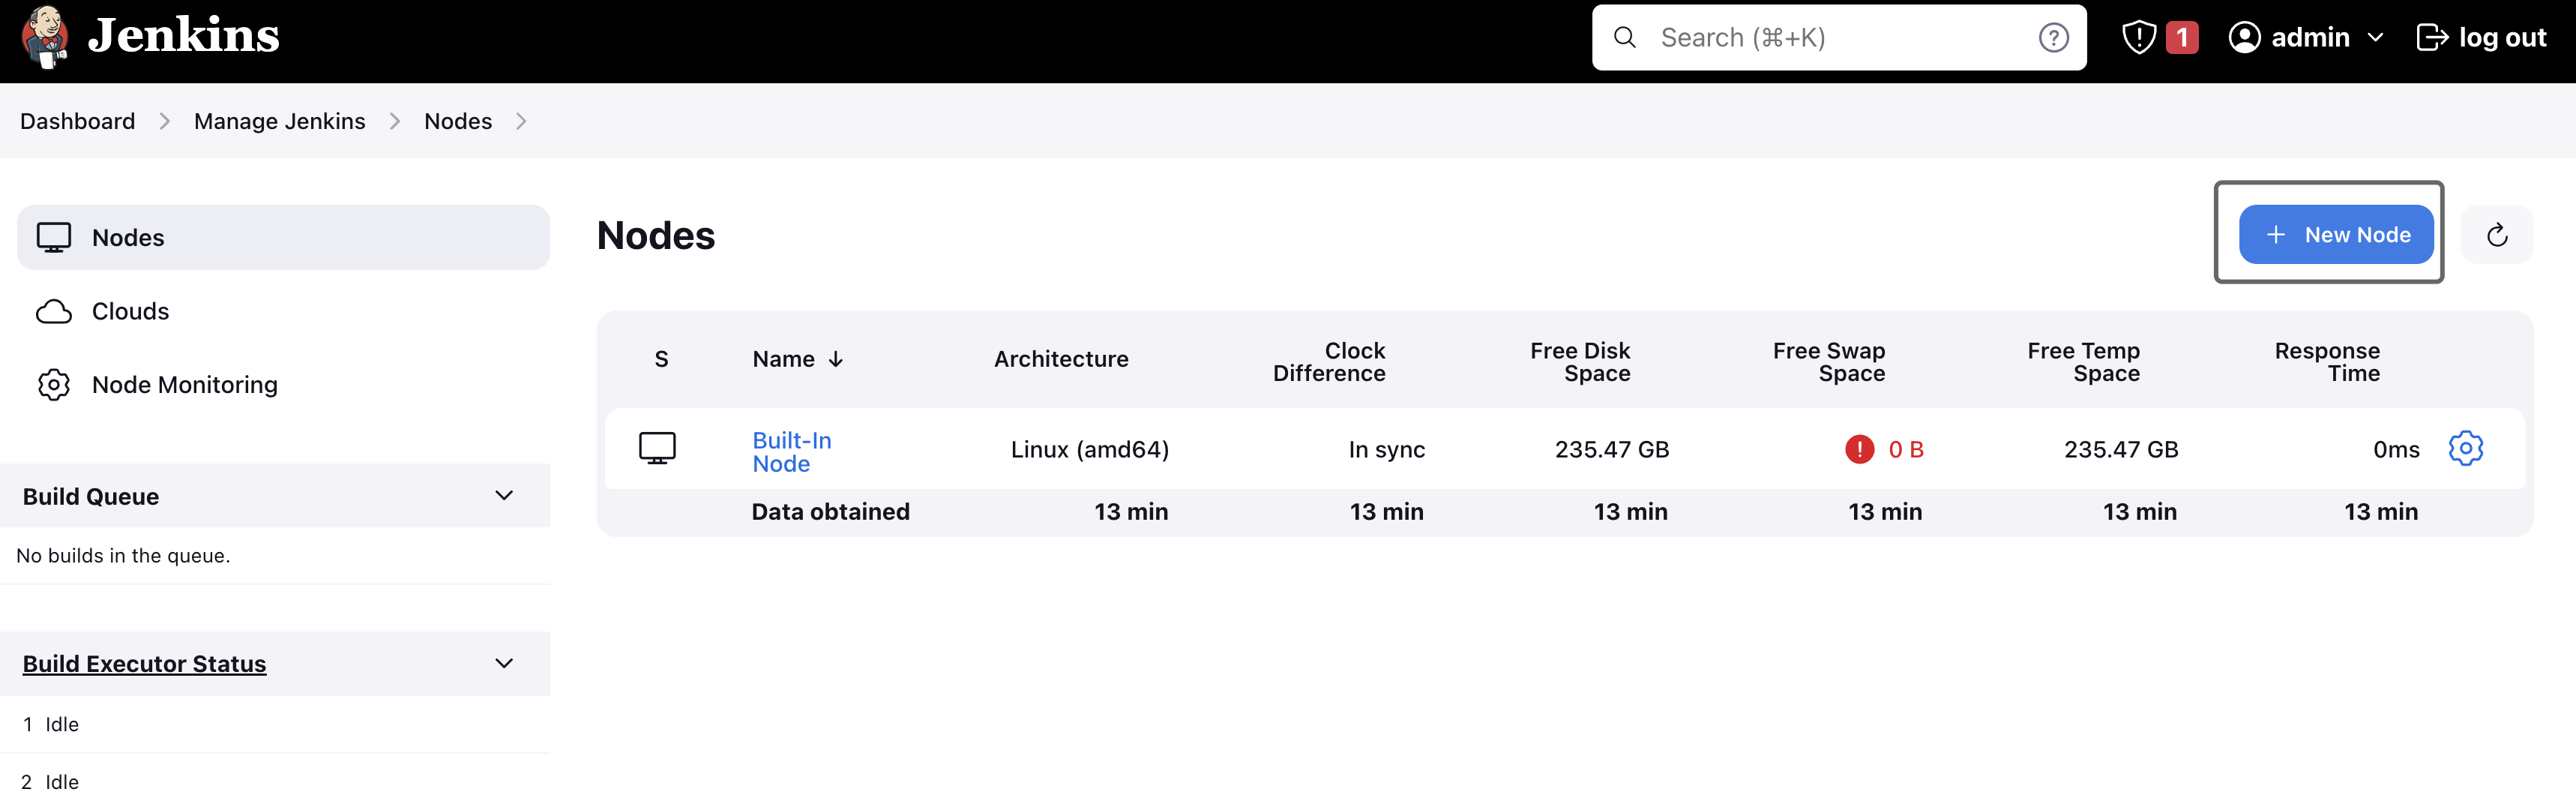
Step4 创建Agent
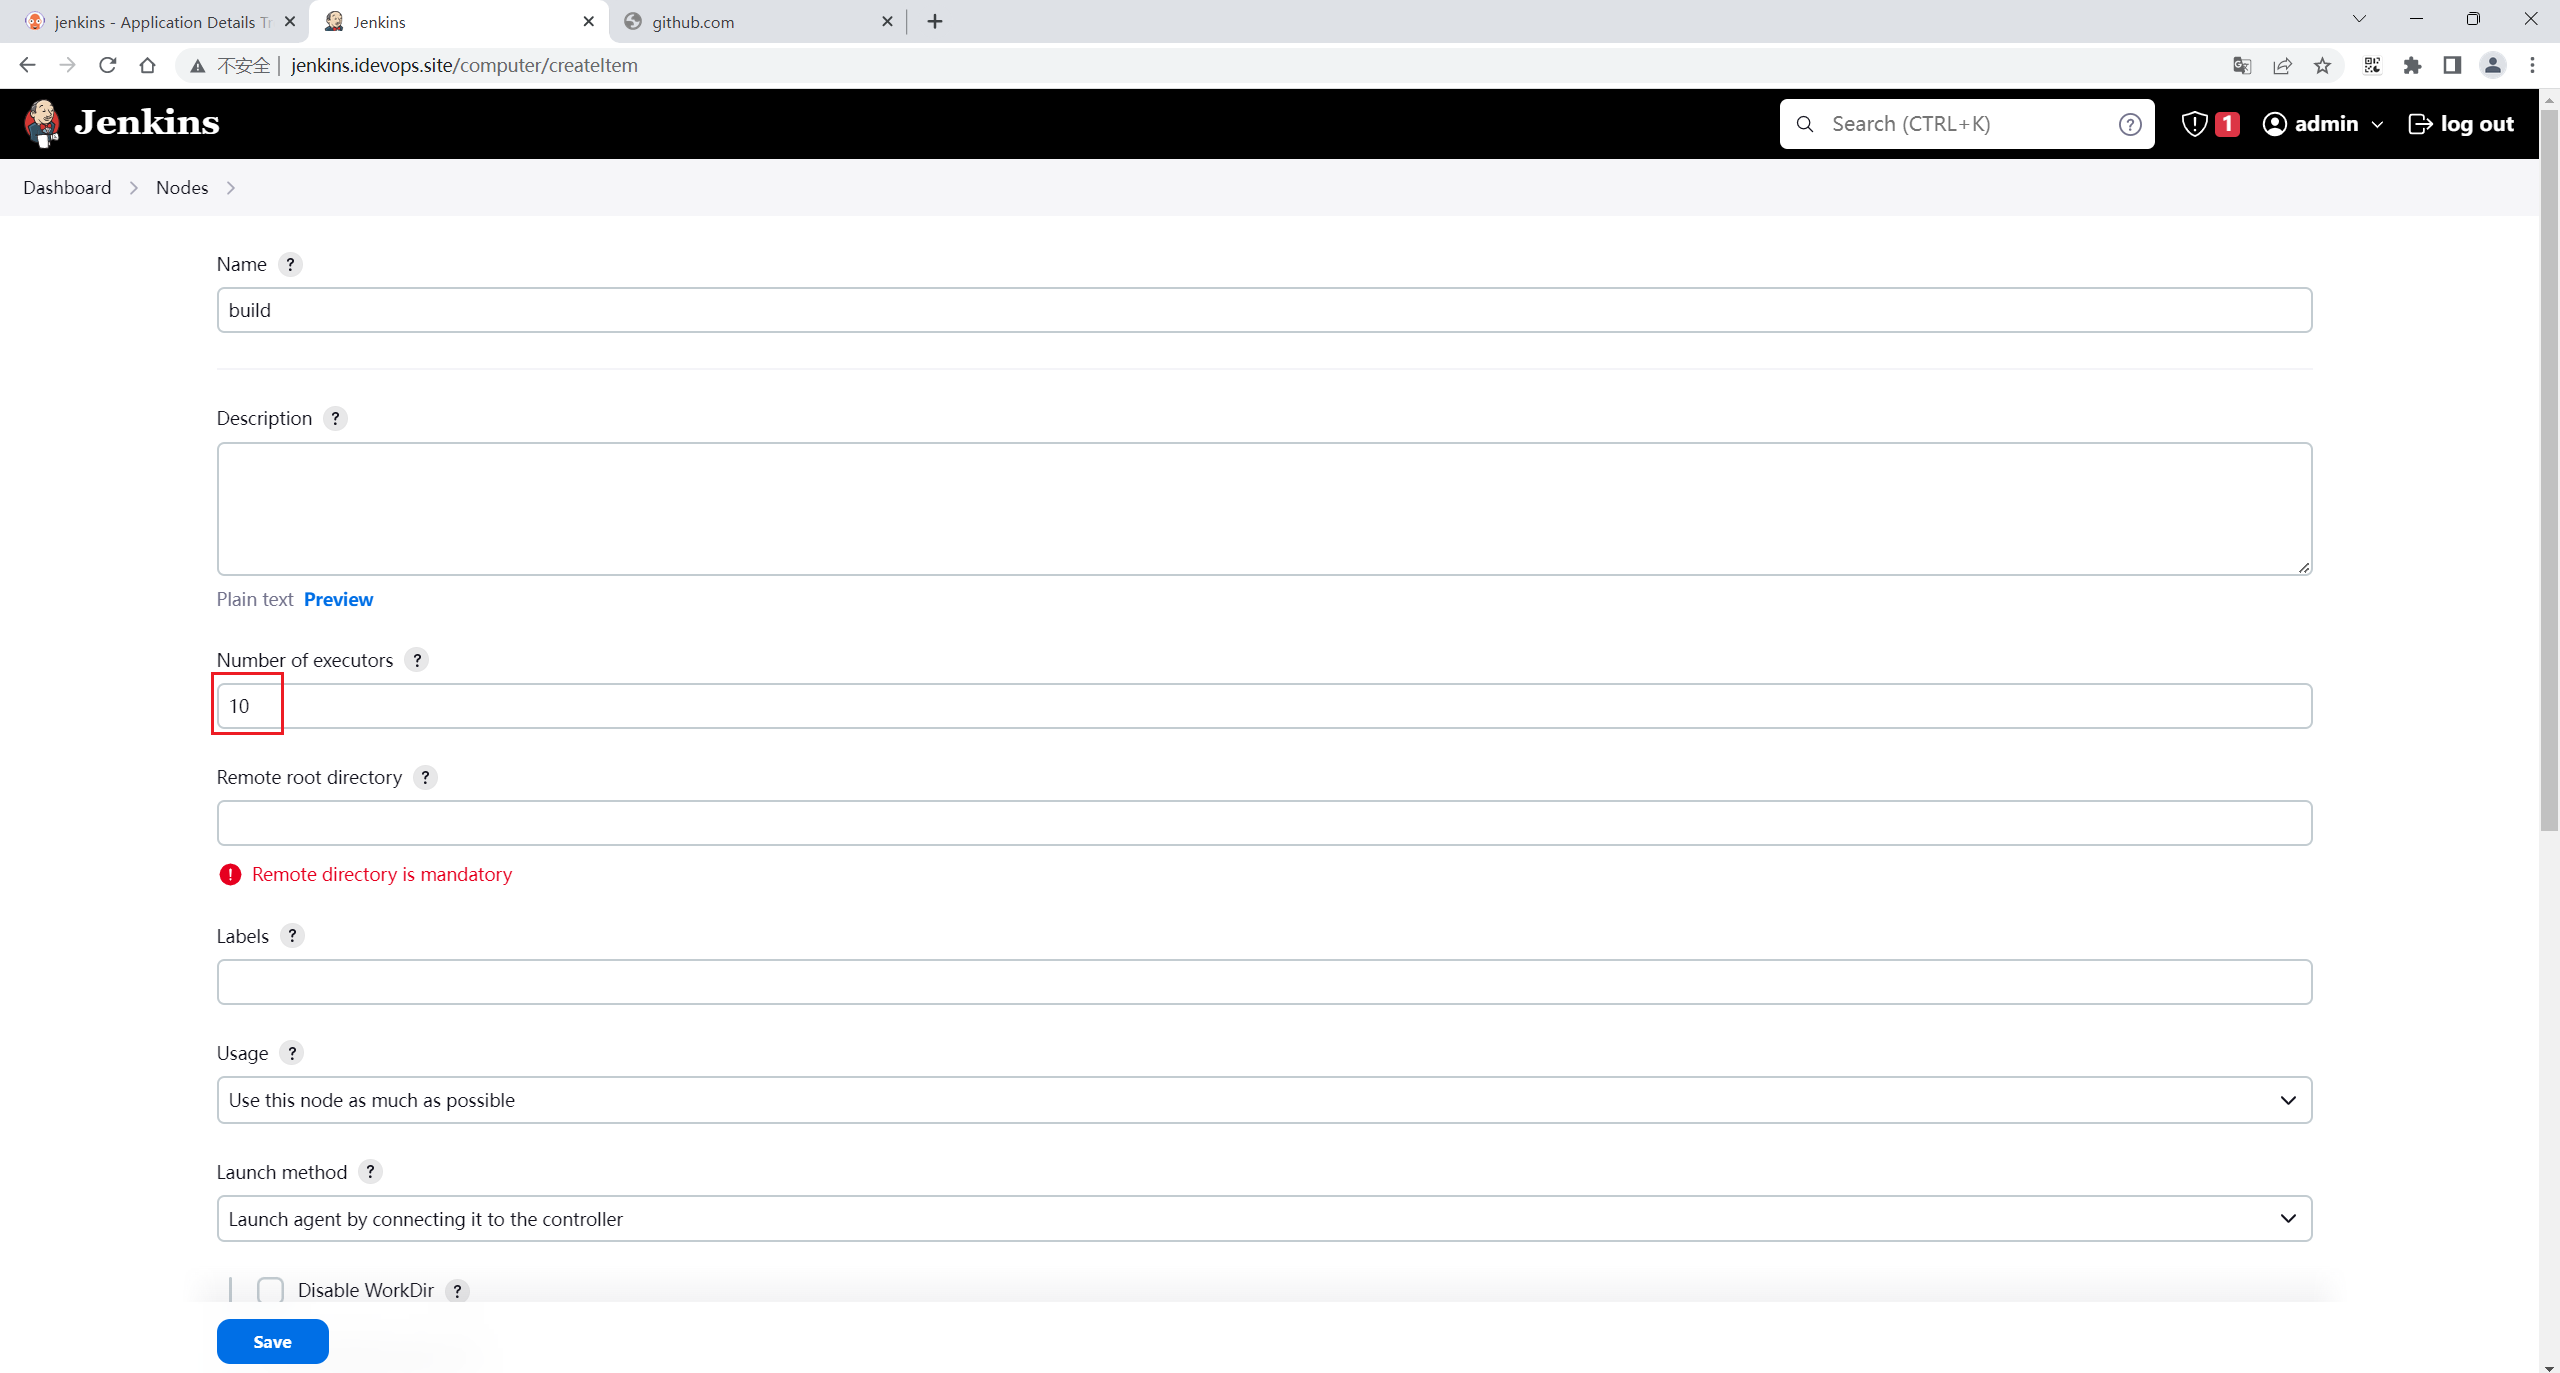
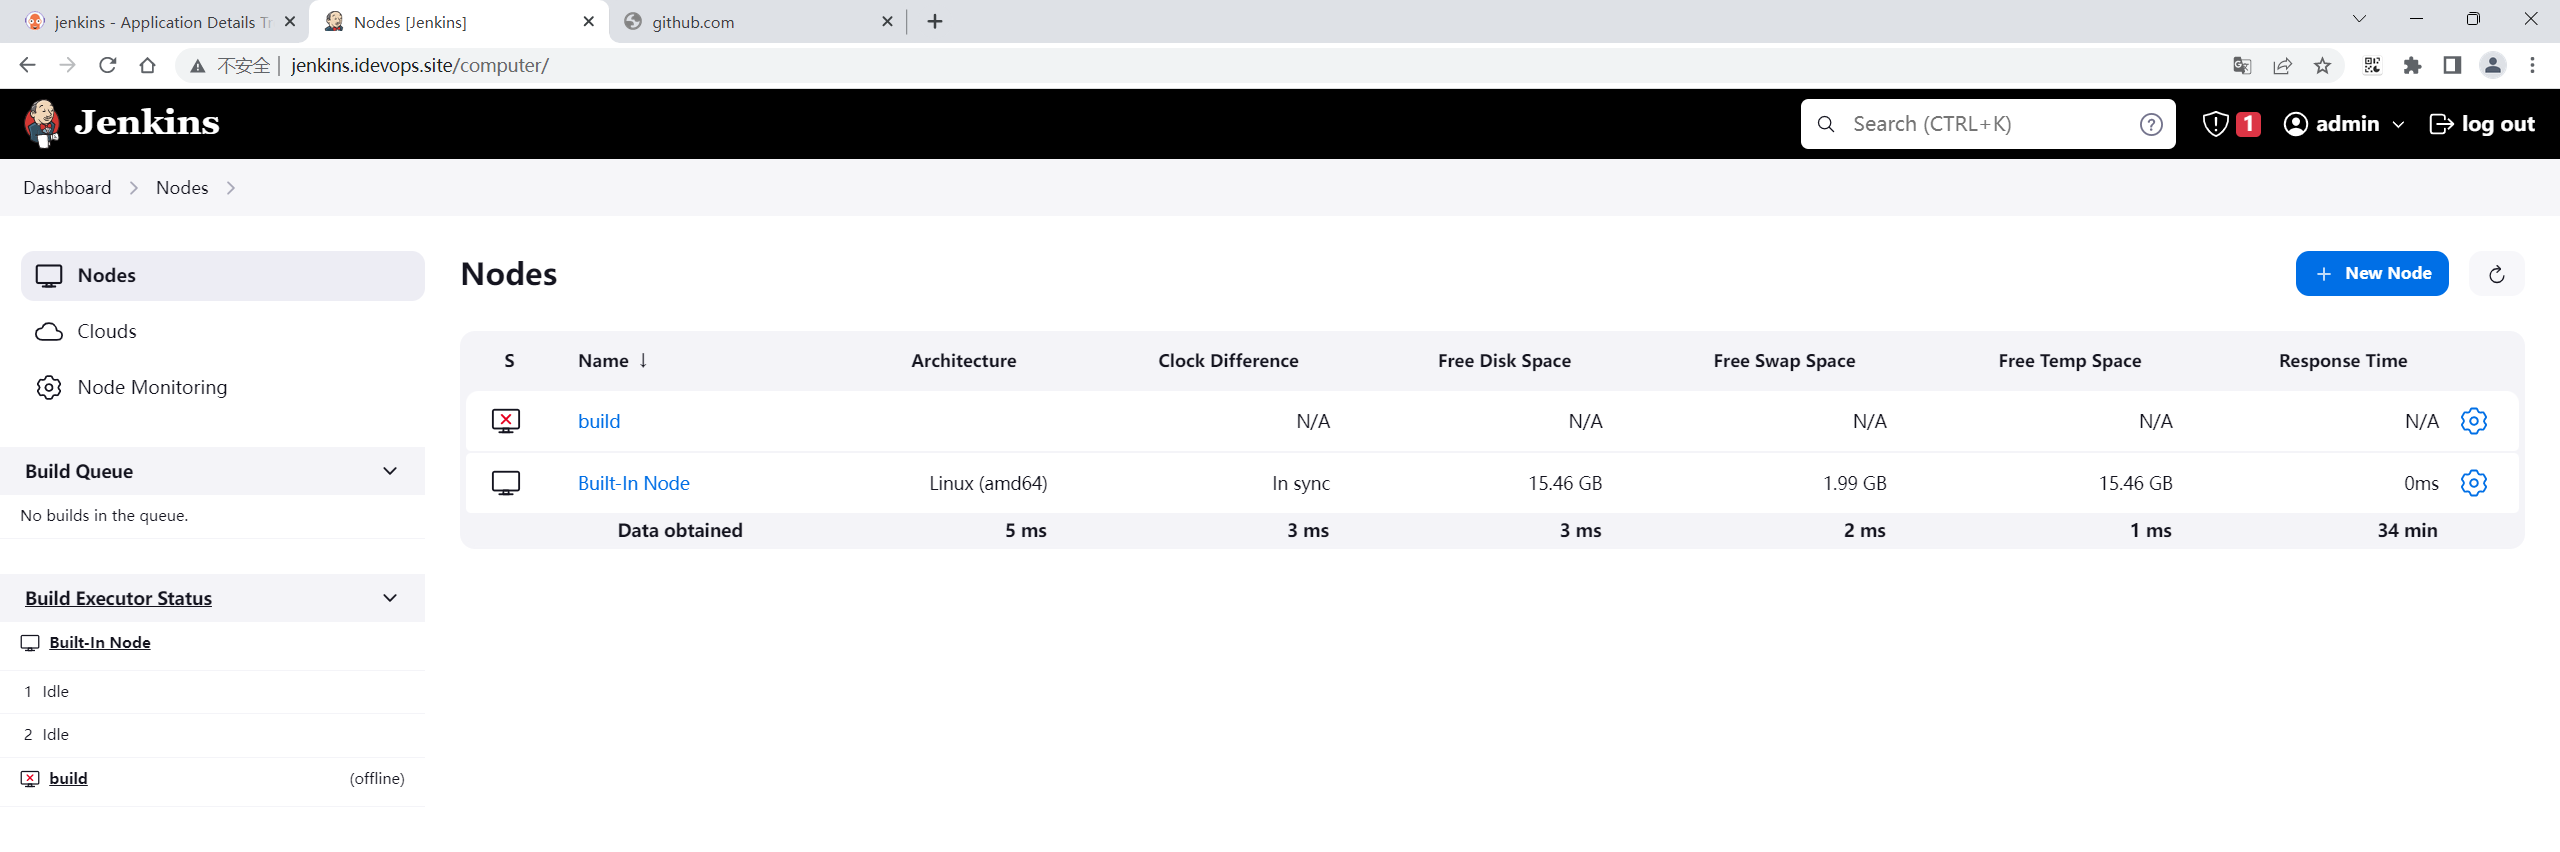
- 新增节点,填写节点信息 :
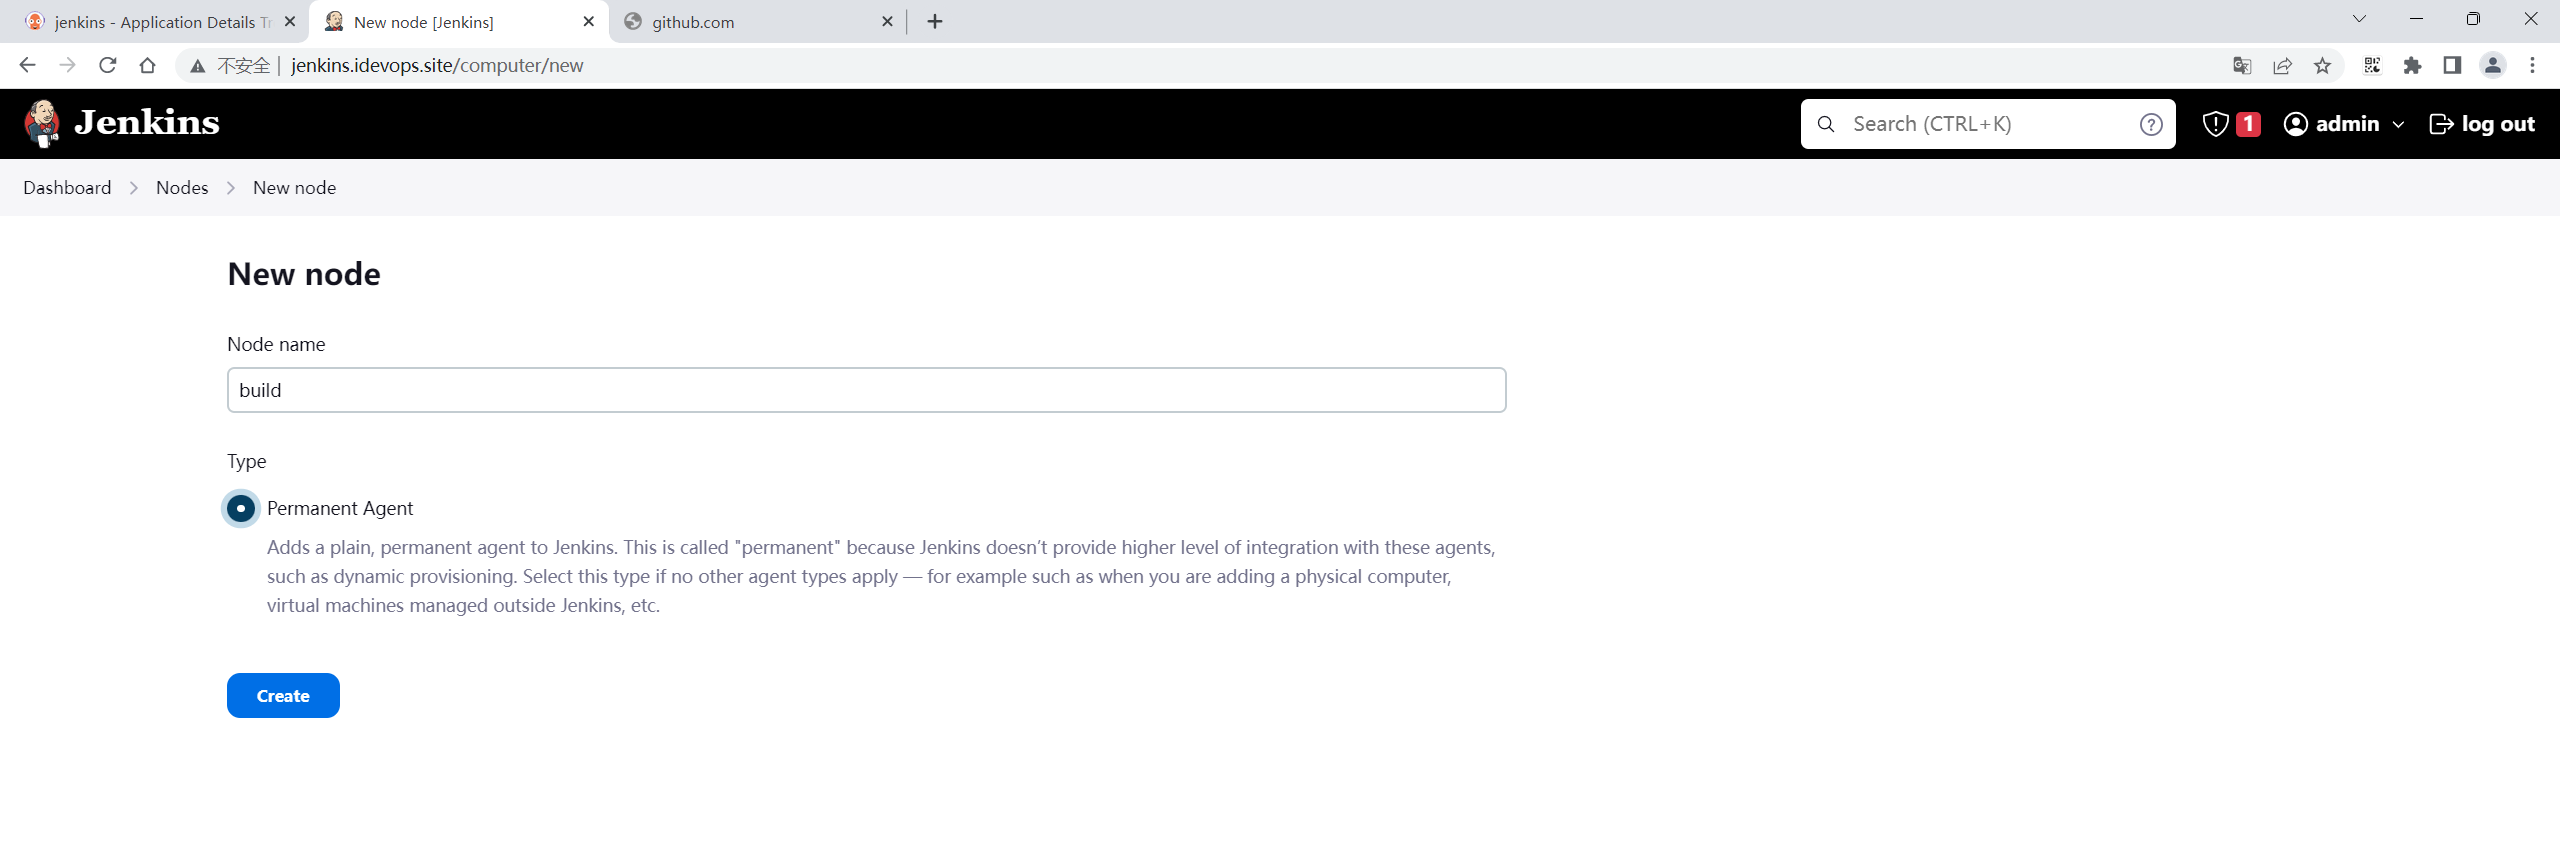
- 填写配置:
这里只需填写执行器数量就行,其他后面有需要可以再填:
- 获取密钥信息:
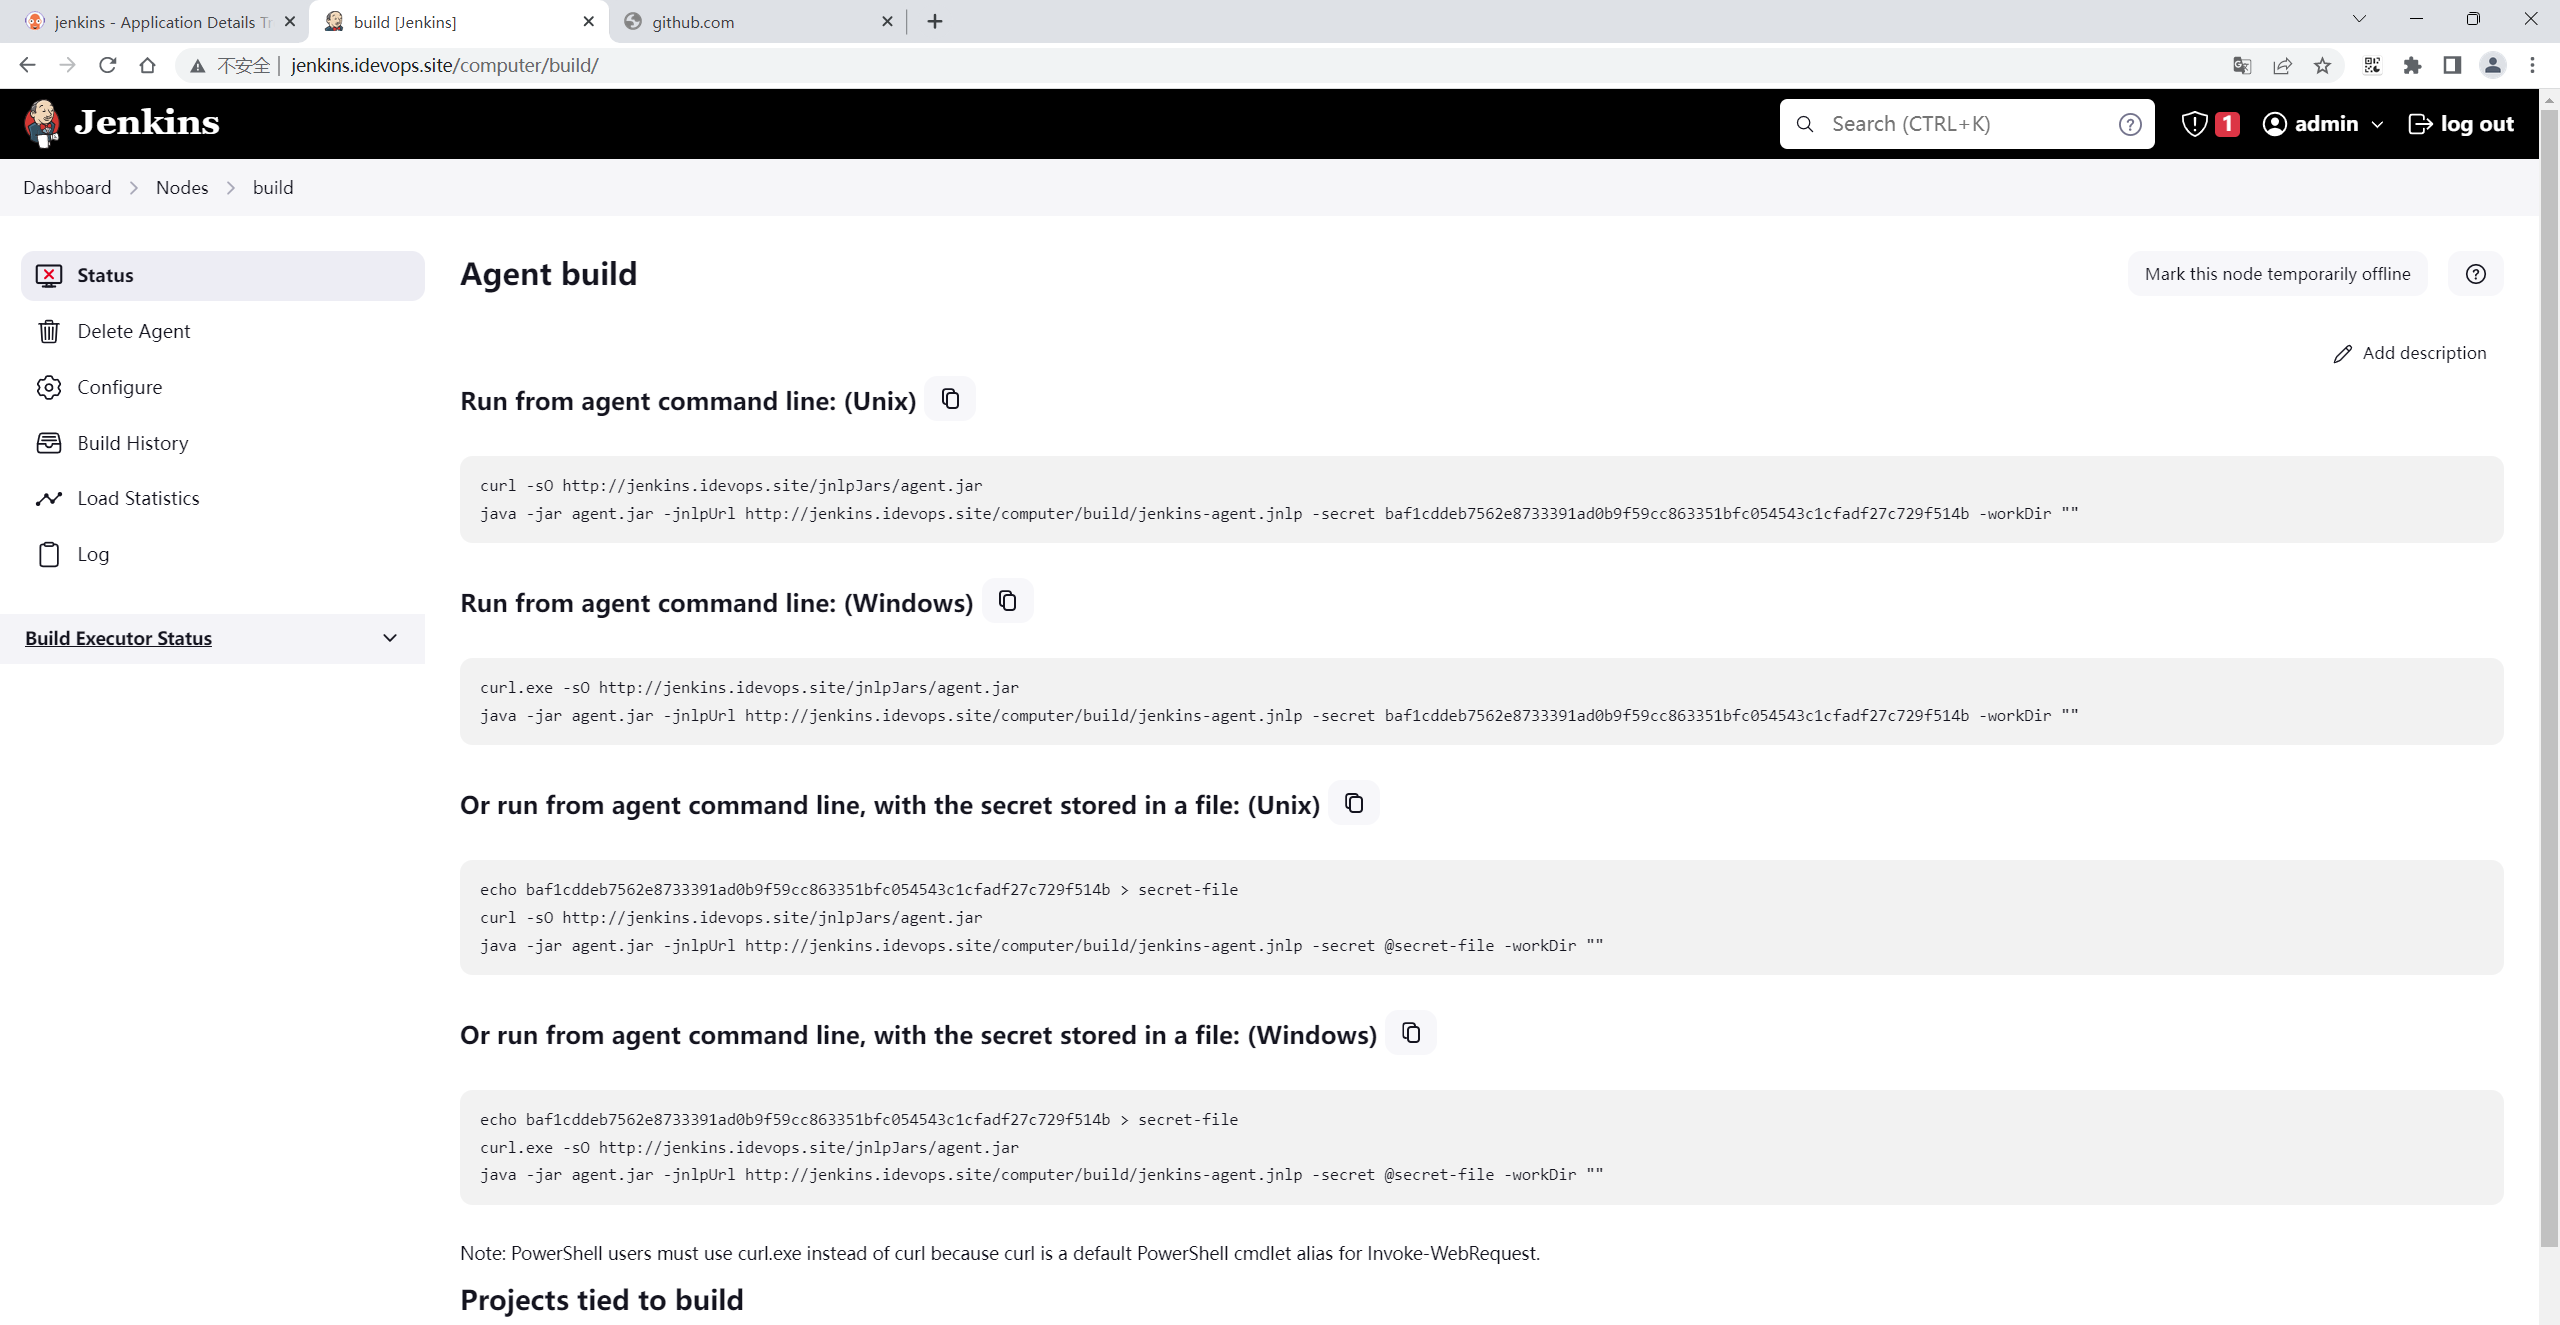
baf1cddeb7562e8733391ad0b9f59cc863351bfc054543c1cfadf27c729f514b- 更新此处配置:
cd /root/myiac-gitee/devops/jenkins/agent-manifests
#vim agent-deployment.yaml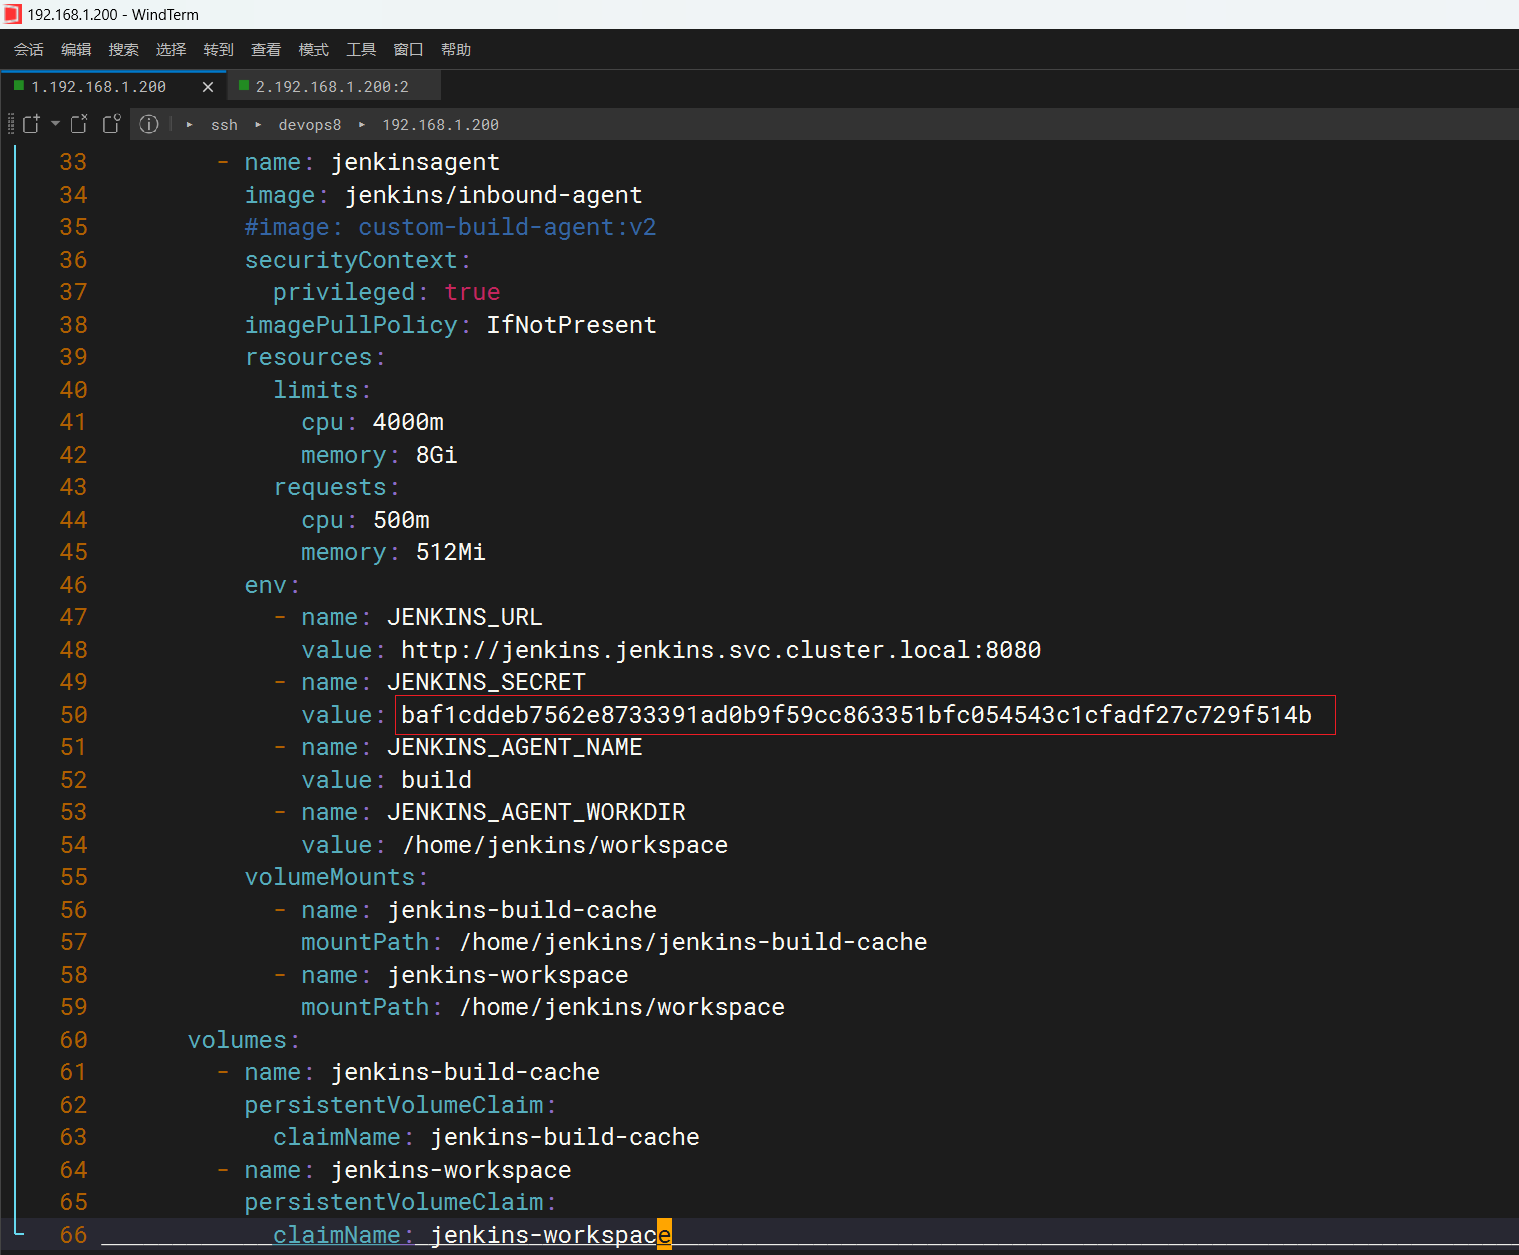
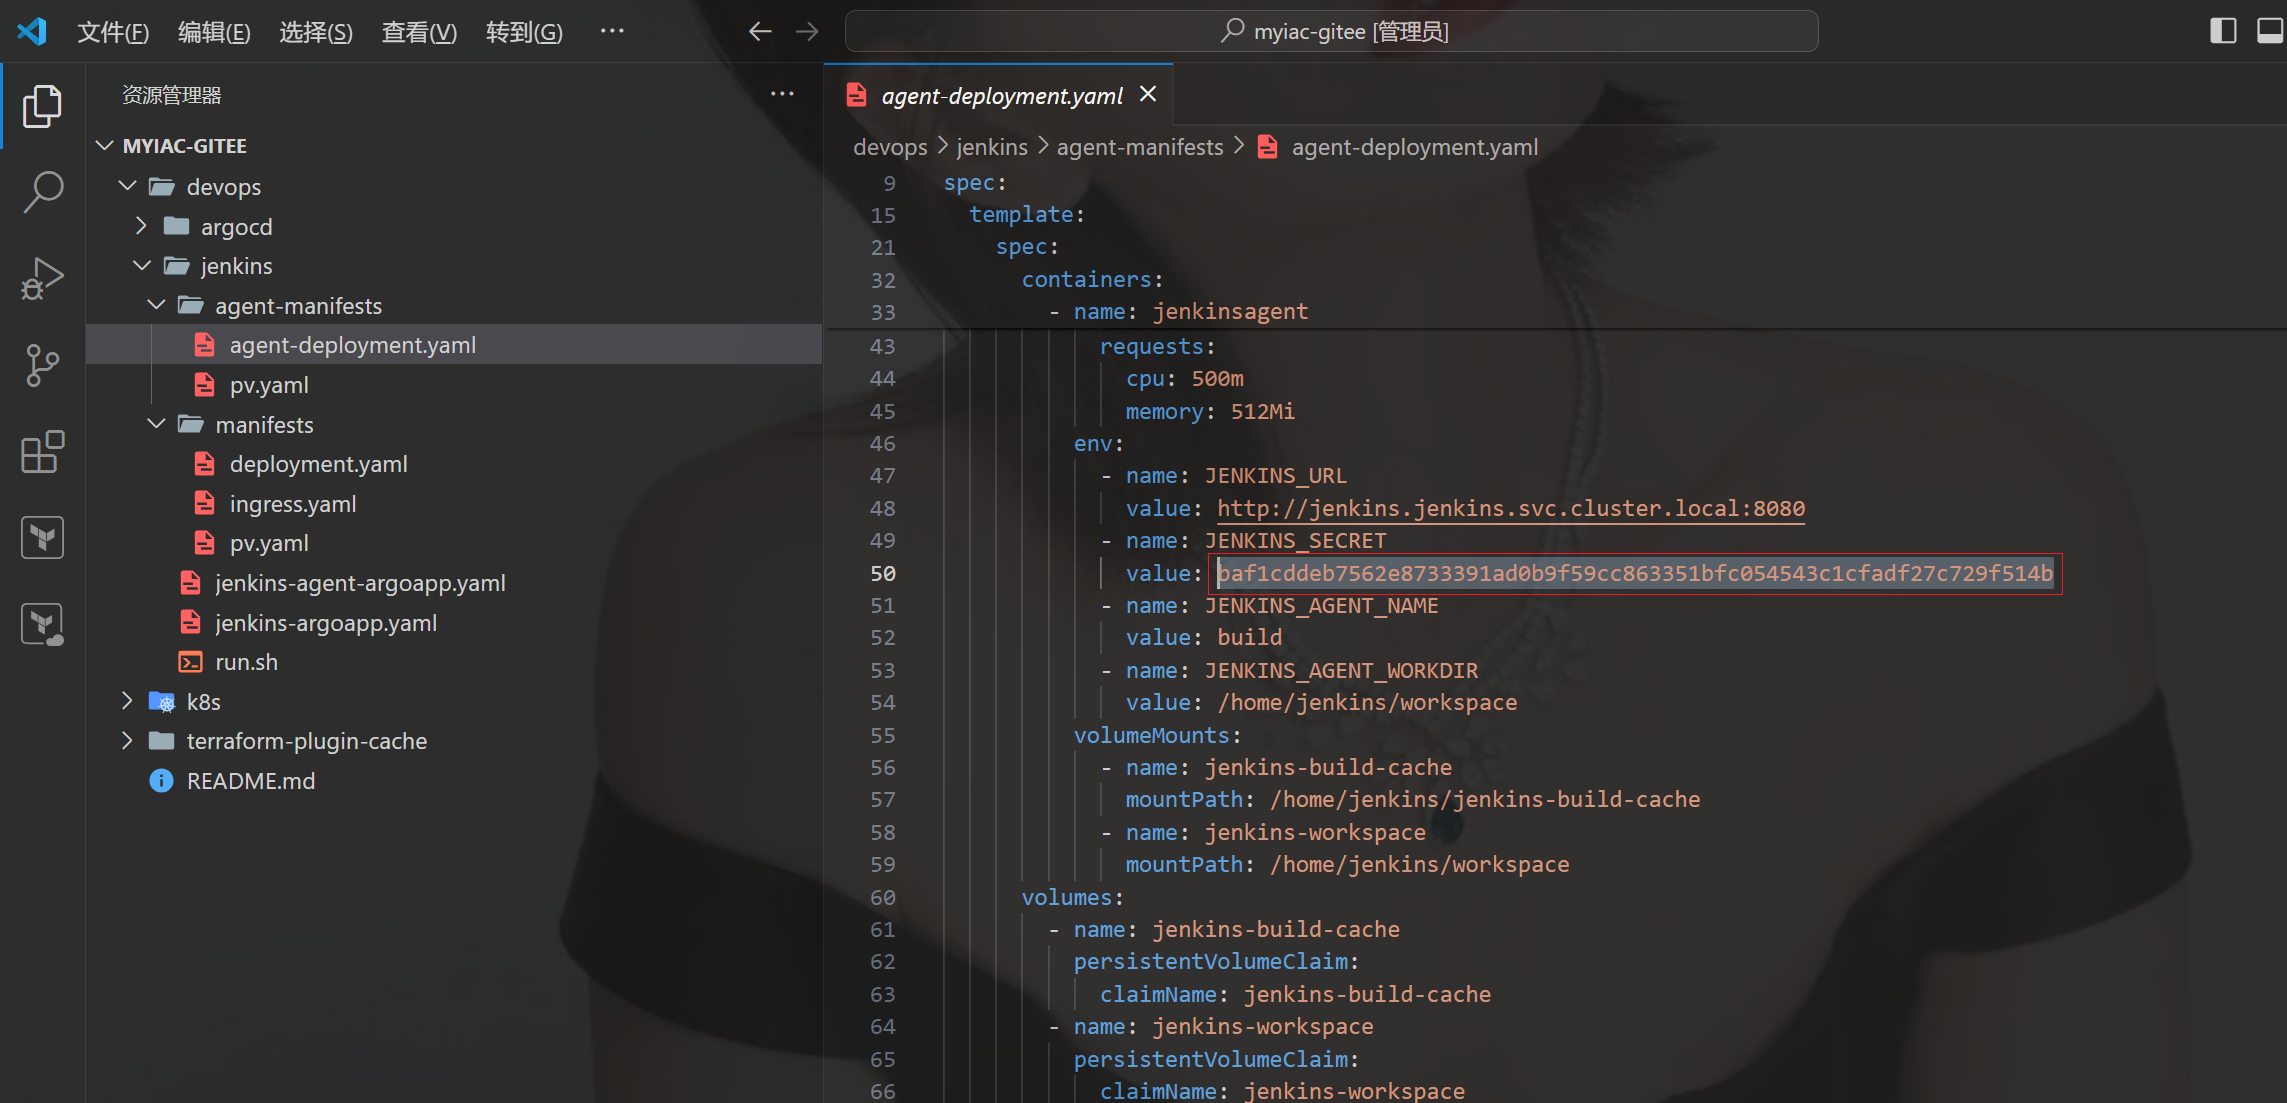
更新完代码,记得推送,再拉取代码。
[root@devops8 myiac-gitee]#pwd
/root/myiac-gitee
[root@devops8 myiac-gitee]#git add -A
[root@devops8 myiac-gitee]#git commit -m"commit"
[main 3c393c7] commit
 5 files changed, 137 insertions(+), 2 deletions(-)
 create mode 100644 k8s/.terraform.lock.hcl
 create mode 120000 k8s/.terraform/providers/registry.terraform.io/hashicorp/null/3.1.1/linux_amd64
 create mode 120000 k8s/.terraform/providers/registry.terraform.io/tehcyx/kind/0.0.12/linux_amd64
 create mode 100644 k8s/terraform.tfstate
[root@devops8 myiac-gitee]#git push
warning: push.default is unset; its implicit value is changing in
Git 2.0 from 'matching' to 'simple'. To squelch this message
and maintain the current behavior after the default changes, use:

  git config --global push.default matching

To squelch this message and adopt the new behavior now, use:

  git config --global push.default simple

See 'git help config' and search for 'push.default' for further information.
(the 'simple' mode was introduced in Git 1.7.11. Use the similar mode
'current' instead of 'simple' if you sometimes use older versions of Git)

Counting objects: 26, done.
Delta compression using up to 4 threads.
Compressing objects: 100% (12/12), done.
Writing objects: 100% (20/20), 9.46 KiB | 0 bytes/s, done.
Total 20 (delta 2), reused 0 (delta 0)
remote: Powered by GITEE.COM [GNK-6.4]
To git@gitee.com:onlyonexl/myiac-gitee.git
   57d543c..3c393c7  main -> main
[root@devops8 myiac-gitee]#

[root@devops8 myiac-gitee]#git pull
Already up-to-date.
[root@devops8 myiac-gitee]#git status
# On branch main
nothing to commit, working directory cleanStep5 部署Agent
#注意:这部分在之前的代码里已经创建过了哦,这里不需要再创建了。
## Jenkins build cache
#mkdir -p /data/storage/kubernetes/jenkins-build-cache
#chmod -R 777 /data/storage/kubernetes/jenkins-build-cache

## Jenkins agent build workspace
#mkdir -p  /data/storage/kubernetes/jenkins-workspace
#chmod -R 777 /data/storage/kubernetes/jenkins-workspace


[root@devops8 jenkins]#pwd
/root/myiac-gitee/devops/jenkins
[root@devops8 jenkins]#ls
agent-manifests  jenkins-agent-argoapp.yaml  jenkins-argoapp.yaml  manifests  run.sh
[root@devops8 jenkins]#kubectl -n argocd apply -f jenkins-agent-argoapp.yaml
application.argoproj.io/jenkins-agent created- 报错解决
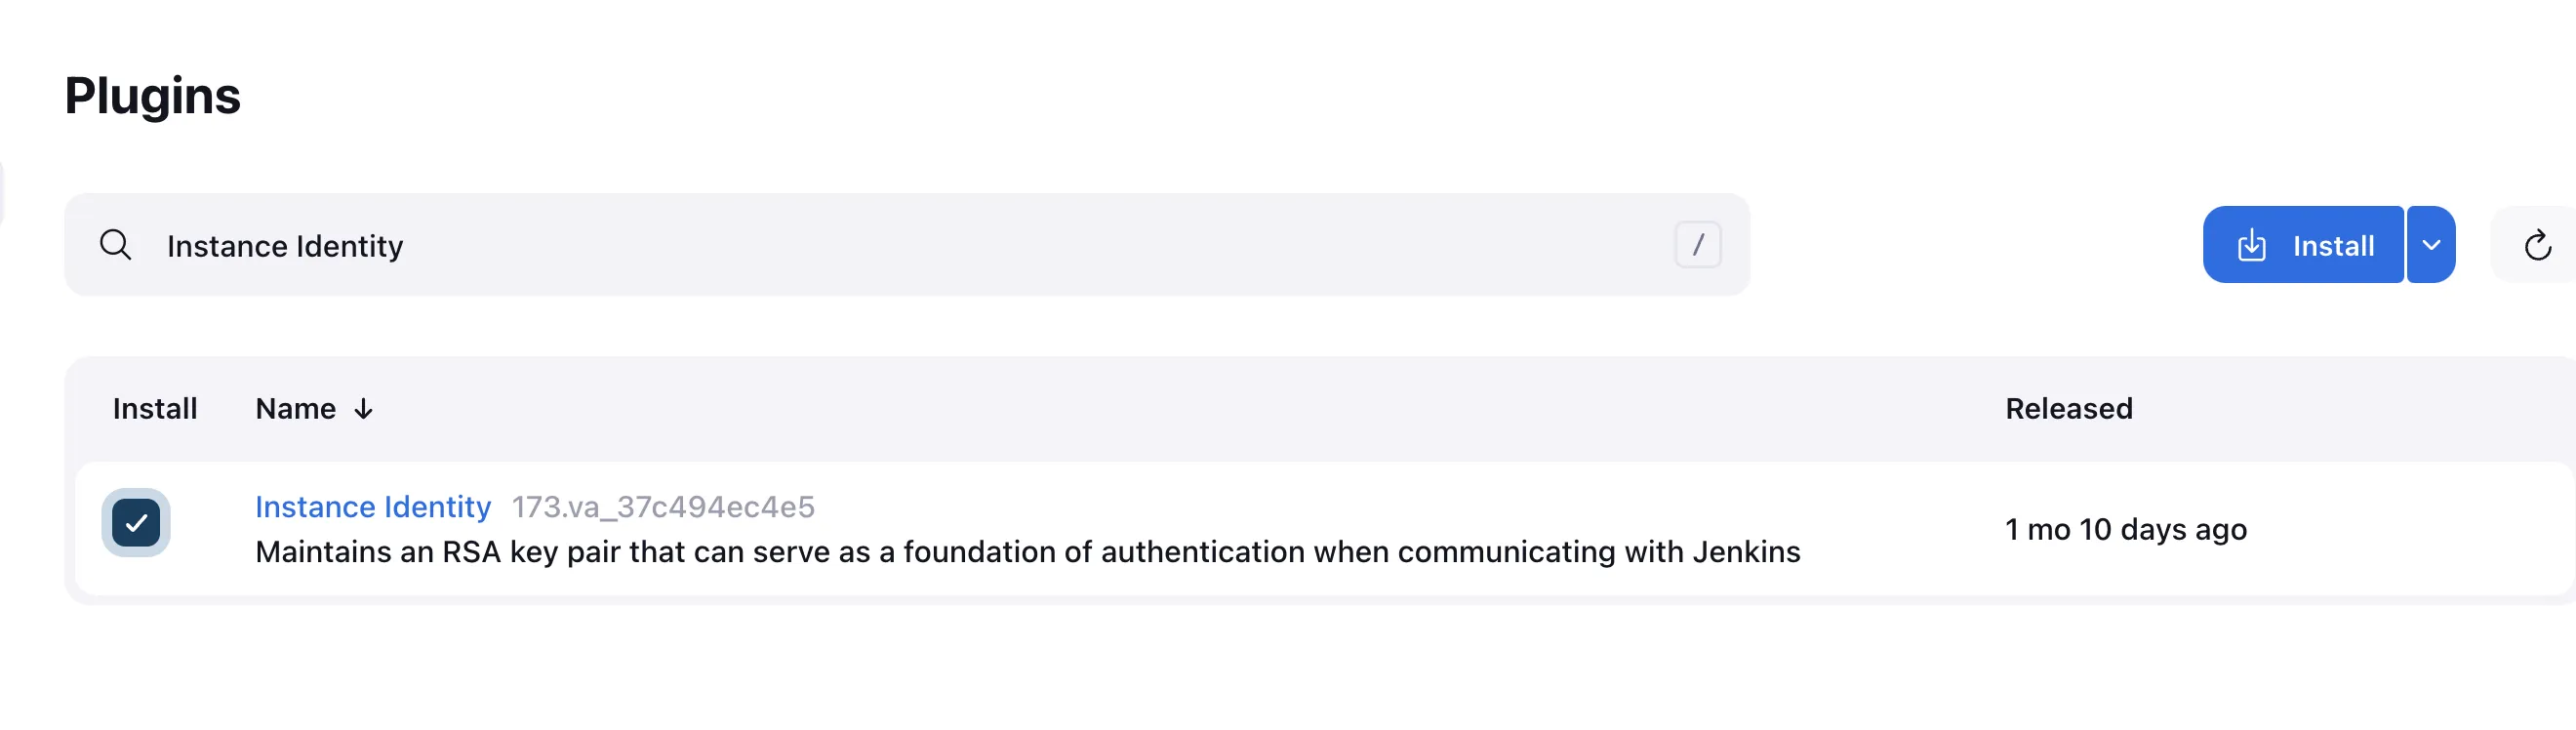
遇到Agent日志出现下面错误,需要安装Instance identity插件解决。【记得插件安装完成后重启Jenkins】
SEVERE: http://jenkins.jenkins.svc.cluster.local:8080/tcpSlaveAgentListener/ appears to be publishing an invalid X-Instance-Identity.
5
java.io.IOException: http://jenkins.jenkins.svc.cluster.local:8080/tcpSlaveAgentListener/ appears to be publishing an invalid X-Instance-Identity.
4
	at org.jenkinsci.remoting.engine.JnlpAgentEndpointResolver.resolve(JnlpAgentEndpointResolver.java:284)
3
	at hudson.remoting.Engine.innerRun(Engine.java:724)
2
at hudson.remoting.Engine.run(Engine.java:540)https://community.jenkins.io/t/invalid-x-instance-identity/4038
- jenkins重启后,观察
至此,以上jenins已安装完成。
FAQ
记得push代码
更新完本地仓库里的代码后,一定要先推送到gitee里,不然argocd还是拉取的旧的代码。

本次安装的插件
Instance identity插件
pipeline插件--pipeline流水线
Role-based Authorization Strategy的授权插件
Pipeline Utility Steps插件--帮我们处理yaml文件和json文件
Stage View插件--查看构建状态
timestamps插件--解决时间日志报错问题
pipeline util插件--
关于我
我的博客主旨:
- 排版美观,语言精炼;
- 文档即手册,步骤明细,拒绝埋坑,提供源码;
- 本人实战文档都是亲测成功的,各位小伙伴在实际操作过程中如有什么疑问,可随时联系本人帮您解决问题,让我们一起进步!
🍀 微信二维码
x2675263825 (舍得), qq:2675263825。

🍀 微信公众号
《云原生架构师实战》

🍀 个人博客站点

🍀 csdn
https://blog.csdn.net/weixin_39246554?spm=1010.2135.3001.5421

🍀 知乎
https://www.zhihu.com/people/foryouone

最后
好了,关于本次就到这里了,感谢大家阅读,最后祝大家生活快乐,每天都过的有意义哦,我们下期见!