
1、devops8基础环境配置(重要)(部署成功)
0-devops8基础环境配置(重要)
目录
[toc]
写在前面
本文档是devops8的基础实验环境文档,过程完整,已经过充分测试。
实验环境
- 老师环境
操作系统: CentOS8 Linux, 内存资源:32GB+
本地实验机器运行工具链,通过笔记本SSH到远程机器。

老师使用的是centos8系统,我使用的是centos7.6系统;
另外,记得给自己虚机扩容下/目录哦,否则后续拉取镜像会报错的。
命令汇总:
pvcreate /dev/sdb
vgextend centos /dev/sdb
lvextend -L +148G /dev/centos/root
xfs_growfs /dev/centos/root


pvcreate /dev/sdf
vgextend centos /dev/sdf
lvextend -L +48G /dev/centos/root
xfs_growfs /dev/centos/root- 自己测试机器环境
自己nuc安装了win11系统,然后装了vmwareworkstation,里面装了centos7.61810作为本次devops8测试机器。
在win11机器上是可以直接ssh devops8虚机的;
nuc cpu:8c 内存:32G
devops8虚机给的配置:
8c,16g,暂时先给这么大的配置。

- 机器ip
192.168.1.200注意:测试虚机的ip一定要是这个,否则后期的argocd部署应用会很麻烦,一直要改代码。
Jenkins 2.415-jdk11
GitLab gitlab-ce:16.2.2-ce.0
Terraform 1.1.7
Kind 0.14.0
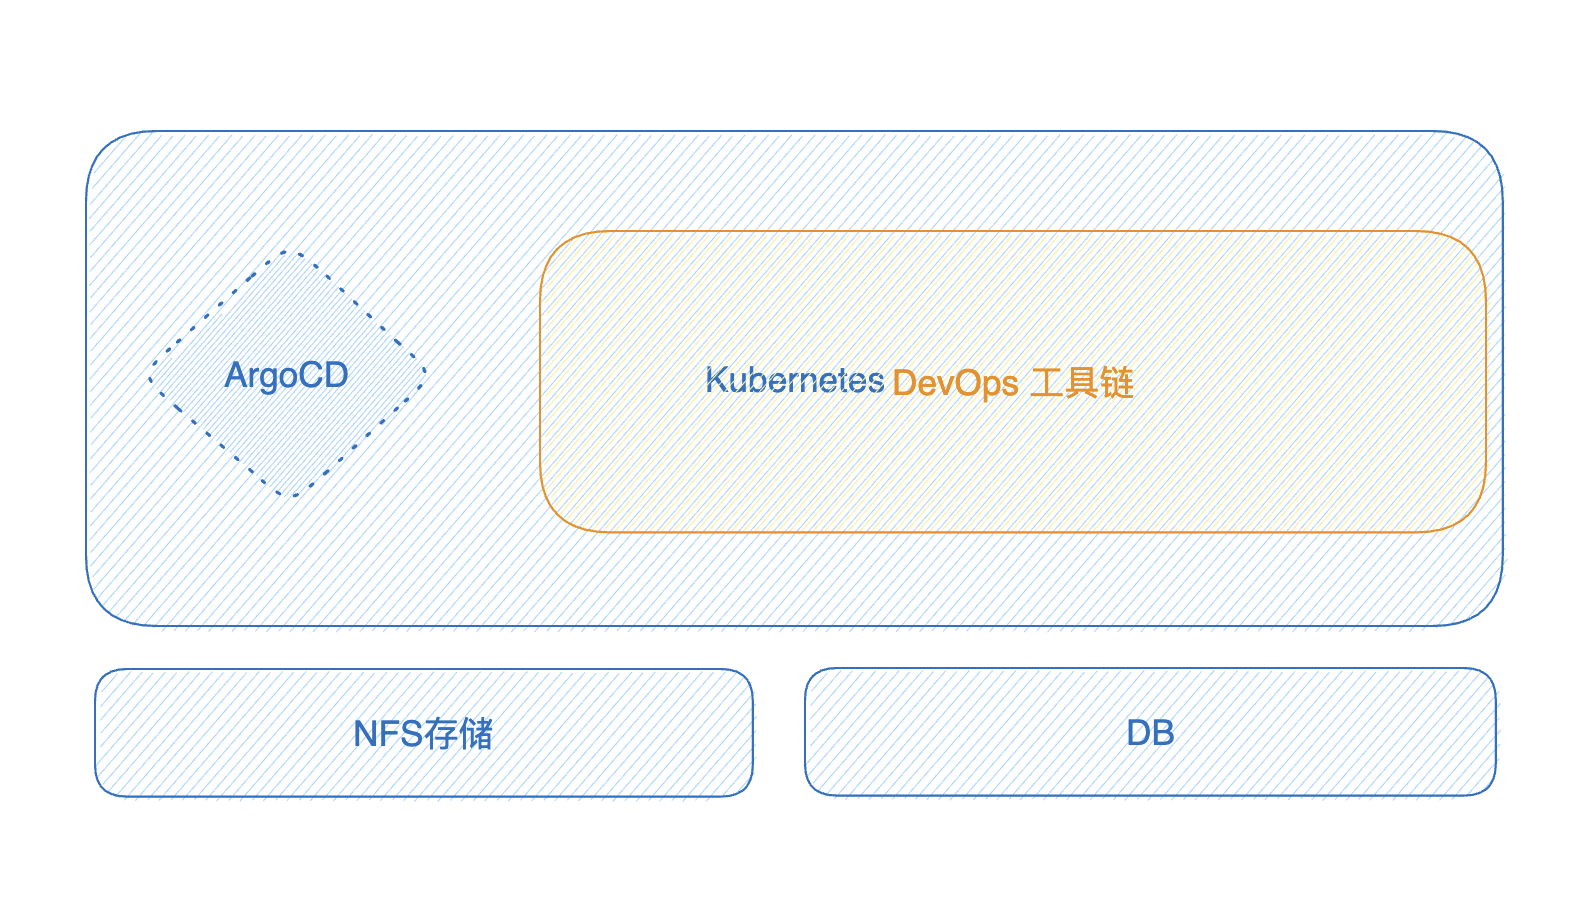
Kubernetes 1.24.0(具备nfs存储)
Docker-CE1.19+ (Docker version 23.0.3, build 3e7cbfd)
ArgoCD 2.6.7
centos7 7.6.1810- 本次软件版本:
| 工具名称 | Version | 描述信息 |
|---|---|---|
| centos7 | 7.6.1810 | |
| Terraform | 1.1.7 | 使用kind provider操作kind |
| Kind | 0.14.0 | 创建Kubernetes集群工具 |
| Docker-CE | 1.19+ (Docker version 23.0.3, build 3e7cbfd) | 容器运行时 |
| kubectl | version.Info{Major:"1", Minor:"24", GitVersion:"v1.24.0 | |
| Kubernetes | 1.24.0 | 容器云环境 |
| ArgoCD | 2.6.7 | 云原生应用持续部署工具 |
| NFS | 存储系统,持久化存储容器数据 |
| 应用名称 | Version | 描述信息 |
|---|---|---|
| Jenkins | 2.415-jdk11 | 持续集成服务器 |
| GitLab | gitlab-ce:16.2.2-ce.0 | 版本控制系统 |
| Maven | 3.9.1 | 后端项目构建工具 |
| Gradle | 7.6.1 | 后端项目构建工具 |
| Node | 14.16.1 | 前端项目构建工具 |
| SonarQube | 9.9.0-community | 代码质量平台 |
| Nexus | sonatype/nexus3:3.60.0 | 制品库平台 |
- 实验设计
常见问题
- 只要是K8s集群环境即可,安装方式没有限制。版本1.24+。节点数没要求。
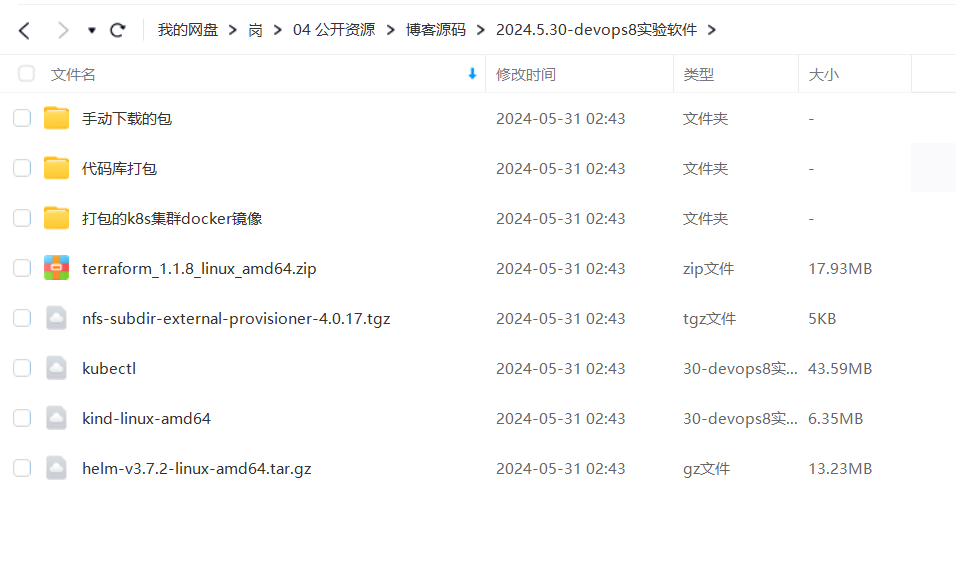
实验软件
一键打包本次涉及所有镜像;其它软件包;代码库;
#实例代码
docker save `docker images | cut -f1 -d ' ' | sed -n '2,$p'` |gzip > k8s-images-v1.20.4.tar.gz

#本次代码
docker save `docker images | cut -f1 -d ' ' | sed -n '2,$p'` |gzip > devops8-basic-test-environment.tar.gz

[root@devops8 ~]#docker save `docker images | cut -f1 -d ' ' | sed -n '2,$p'` |gzip > devops8-basic-test-environment.tar.gz
[root@devops8 ~]#ll -h devops8-basic-test-environment.tar.gz
-rw-r--r-- 1 root root 1.1G May 31 02:32 devops8-basic-test-environment.tar.gz
链接:https://pan.baidu.com/s/1NfbTWKakuV_0fsacToZWsQ?pwd=ivfd 提取码:ivfd 2024.5.30-devops8实验软件
代码库
- 老师的代码库:
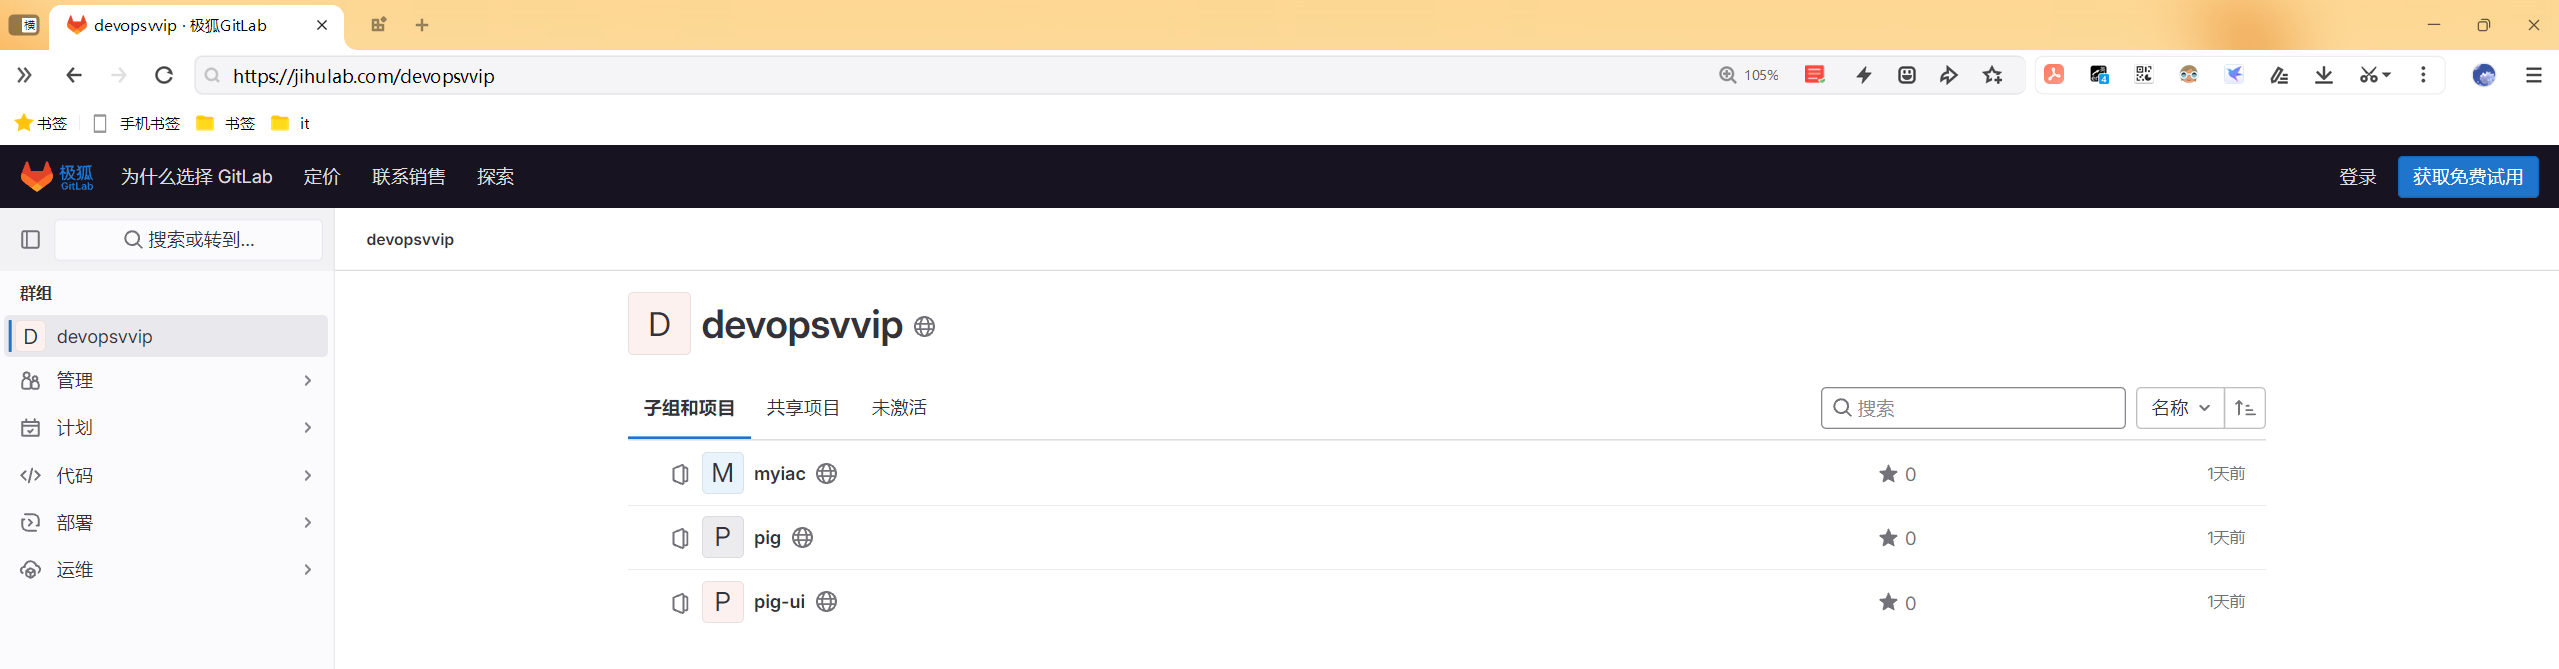
基础设施代码库:https://jihulab.com/devopsvvip/myiac.git

- ==自己的代码库==
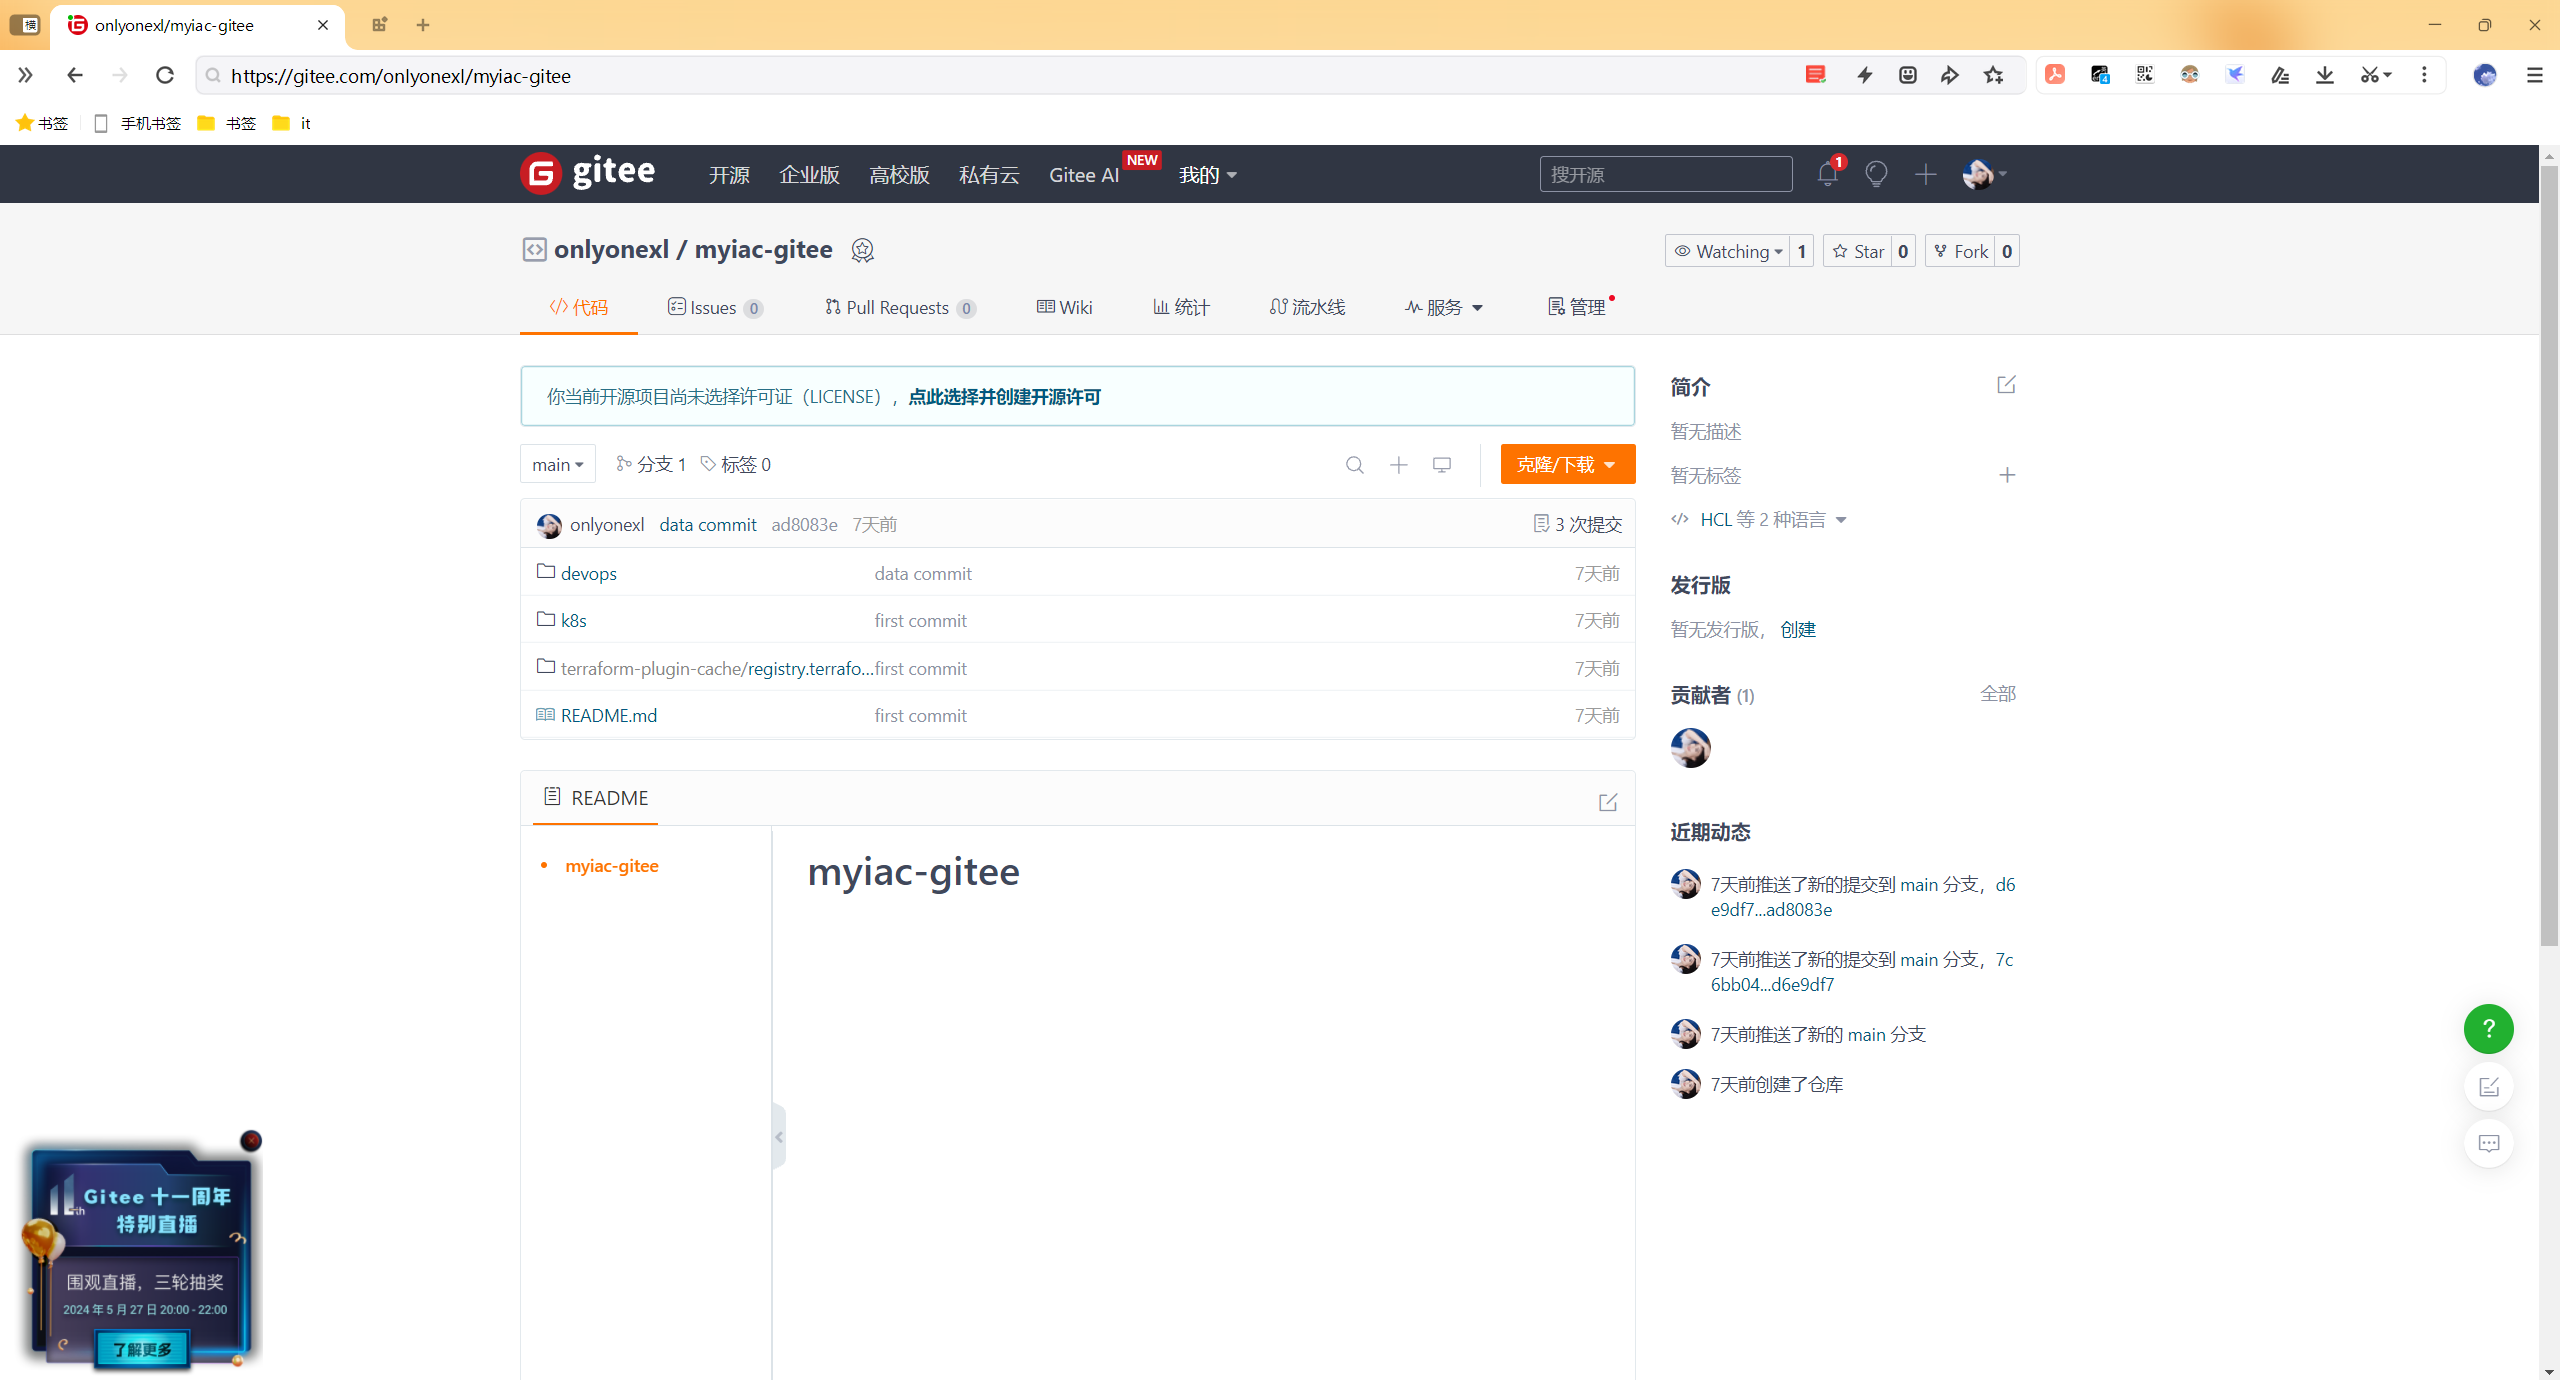
创建自己的gitee仓库:myiac-gitee
代码库地址:https://gitee.com/onlyonexl/myiac-gitee.git
初始化仓库:
#git clone git@gitee.com:onlyonexl/myiac-gitee.git

mkdir myiac-gitee
cd myiac-gitee

echo "# myiac-gitee" >> README.md
git init
git add README.md
git commit -m "first commit"
git branch -M main
git remote add origin git@gitee.com:OnlyOnexl/myiac-gitee.git
git push -u origin main


git config --global user.email "devops8@example.com"
git config --global user.name "devops8"

ssh-keygen
cat /root/.ssh/id_rsa.pub然后提交本次设计的所有代码:
git pull

git add -A
git commit -m "commit code"
git push

git status1. 先决条件
1.0 centos7环境准备
devops8 192.168.1.200(可上公网)
CentOS Linux release 7.6.1810 (Core)
已配置国内yum源
8c,16g,20g系统盘- 配置基础环境:
systemctl stop firewalld && systemctl disable  firewalld
systemctl stop NetworkManager && systemctl disable  NetworkManager

setenforce 0
sed -i s/SELINUX=enforcing/SELINUX=disabled/ /etc/selinux/config1.1 安装Terraform
#上传安装包文件到机器
[root@devops8 ~]#ll -h terraform_1.1.8_linux_amd64.zip
-rw-rw-rw- 1 root root 18M May 19 08:12 terraform_1.1.8_linux_amd64.zip

#解压
[root@devops8 ~]# unzip terraform_1.1.8_linux_amd64.zip
Archive:  terraform_1.1.8_linux_amd64.zip
  inflating: terraform
[root@devops8 ~]# ll -t
total 80148
……
-rw-rw-rw-. 1 root root 18796132 May 19 08:12 terraform_1.1.8_linux_amd64.zip
-rwxr-xr-x. 1 root root 63266816 Apr  8  2022 terraform


#移动二进制文件到PATH路径
[root@devops8 ~]# mv terraform /usr/local/bin


#验证
[root@devops8 ~]# terraform version
Terraform v1.1.8
on linux_amd64

Your version of Terraform is out of date! The latest version
is 1.8.3. You can update by downloading from https://www.terraform.io/downloads.html1.2 安装Kind
#上传安装包文件到机器
[root@devops8 ~]#ll -h kind-linux-amd64
-rw-rw-rw- 1 root root 6.4M May 19 09:35 kind-linux-amd64

#下载并安装
#wget  https://github.com/kubernetes-sigs/kind/releases/download/v0.14.0/kind-linux-amd64
mv kind-linux-amd64  /usr/bin/kind
chmod +x /usr/bin/kind

#验证
[root@devops8 ~]#kind version
kind v0.14.0 go1.18.2 linux/amd641.3 安装Kubectl
#下载
#[root@devops8 ~]# curl -LO https://dl.k8s.io/release/v1.24.0/bin/linux/amd64/kubectl

#上传安装包文件到机器
[root@devops8 ~]#ll -h kubectl
-rw-rw-rw- 1 root root 44M May 19 11:38 kubectl

#移动
[root@devops8 ~]# chmod +x kubectl
[root@devops8 ~]# mv kubectl /usr/bin/kubectl

#验证
[root@devops8 ~]#kubectl version
WARNING: This version information is deprecated and will be replaced with the output from kubectl version --short.  Use --output=yaml|json to get the full version.
Client Version: version.Info{Major:"1", Minor:"24", GitVersion:"v1.24.0", GitCommit:"4ce5a8954017644c5420bae81d72b09b735c21f0", GitTreeState:"clean", BuildDate:"2022-05-03T13:46:05Z", GoVersion:"go1.18.1", Compiler:"gc", Platform:"linux/amd64"}
Kustomize Version: v4.5.4
The connection to the server localhost:8080 was refused - did you specify the right host or port?1.4 安装docker
- 一键安装脚本如下:
systemctl stop firewalld
systemctl disable  firewalld

systemctl stop NetworkManager
systemctl disable  NetworkManager

setenforce 0
sed -i s/SELINUX=enforcing/SELINUX=disabled/ /etc/selinux/config

cd /etc/yum.repos.d/
mkdir backup-`date +%F`
mv * !$

wget -O /etc/yum.repos.d/CentOS-Base.repo http://mirrors.aliyun.com/repo/Centos-7.repo
yum clean all
yum makecache

yum install -y net-tools
yum install -y vim
yum install -y wget
yum install -y lrzsz


yum remove docker \
                  docker-client \
                  docker-client-latest \
                  docker-common \
                  docker-latest \
                  docker-latest-logrotate \
                  docker-logrotate \
                  docker-engine

yum install -y yum-utils device-mapper-persistent-data lvm2
yum-config-manager --add-repo http://mirrors.aliyun.com/docker-ce/linux/centos/docker-ce.repo
yum makecache

#yum install docker-ce -y
yum install -y yum install docker-ce-19.03.9 docker-ce-cli-19.03.9 containerd.io #指定需要安装的版本号
systemctl start docker && systemctl enable docker

docker version
docker info

mkdir -p /etc/docker
tee /etc/docker/daemon.json <<-'EOF'
{
  "registry-mirrors":["https://kvuwuws2.mirror.aliyuncs.com","http://hub-mirror.c.163.com","https://dockerhub.azk8s.cn"]
}
EOF

cat /proc/sys/net/ipv4/ip_forward
echo "net.ipv4.ip_forward = 1" >> /etc/sysctl.conf
sysctl -p
cat /proc/sys/net/ipv4/ip_forward

systemctl daemon-reload
systemctl restart docker- 验证:
[root@devops8 ~]#docker version
Client: Docker Engine - Community
 Version:           19.03.9
 API version:       1.40
 Go version:        go1.13.10
 Git commit:        9d988398e7
 Built:             Fri May 15 00:25:27 2020
 OS/Arch:           linux/amd64
 Experimental:      false

Server: Docker Engine - Community
 Engine:
  Version:          19.03.9
  API version:      1.40 (minimum version 1.12)
  Go version:       go1.13.10
  Git commit:       9d988398e7
  Built:            Fri May 15 00:24:05 2020
  OS/Arch:          linux/amd64
  Experimental:     false
 containerd:
  Version:          1.6.31
  GitCommit:        e377cd56a71523140ca6ae87e30244719194a521
 runc:
  Version:          1.1.12
  GitCommit:        v1.1.12-0-g51d5e94
 docker-init:
  Version:          0.18.0
GitCommit: fec36832. 部署Kuberenetes集群
2.1. 准备镜像
需要用到的docker images 【提前pull下来】:
- kindest/node:v1.24.0
- k8s.gcr.io/ingress-nginx/controller:v1.2.0
- k8s.gcr.io/ingress-nginx/kube-webhook-certgen:v1.1.1
【镜像已上传到腾讯云, 手动pull到本地然后修改镜像标签。(如果网络环境允许可以自行直接下载原始镜像)】
docker pull ccr.ccs.tencentyun.com/devopsvip/kind:v1.24.0
docker tag ccr.ccs.tencentyun.com/devopsvip/kind:v1.24.0 kindest/node:v1.24.0

docker pull ccr.ccs.tencentyun.com/devopsvip/ingress-nginx-controller:v1.2.0
docker tag  ccr.ccs.tencentyun.com/devopsvip/ingress-nginx-controller:v1.2.0  k8s.gcr.io/ingress-nginx/controller:v1.2.0


docker pull ccr.ccs.tencentyun.com/devopsvip/ingress-nginx-webhok:v1.1.1
docker tag ccr.ccs.tencentyun.com/devopsvip/ingress-nginx-webhok:v1.1.1 k8s.gcr.io/ingress-nginx/kube-webhook-certgen:v1.1.12.2. 下载代码库
git clone git@gitee.com:onlyonexl/myiac-gitee.git


[root@devops8 ~]#cd myiac-gitee/
[root@devops8 myiac-gitee]#ls
devops  k8s  README.md  terraform-plugin-cache
[root@devops8 myiac-gitee]#cd k8s/
[root@devops8 k8s]#ls
ingress.yaml kind.tf README.md- kind.tf 文件中是集群的配置信息
- ingress.yaml 是ingress的安装文件
2.3. 配置Terraform缓存
- 编写/root/.terraformrc文件内容,指定缓存路径。
#vim /root/.terraformrc
plugin_cache_dir  = "/root/.terraform.d/terraform-plugin-cache"
disable_checkpoint = true


provider_installation {
  filesystem_mirror {
    path    = "/root/myiac-gitee/terraform-plugin-cache"
    include = ["registry.terraform.io/*/*"]
  }
}


mkdir -p /root/.terraform.d/terraform-plugin-cache- 下载main分支中的terraform-plugin-cache目录到宿主机。
[root@devops8 myiac-gitee]#pwd
/root/myiac-gitee
[root@devops8 myiac-gitee]#ls
devops  k8s  README.md  terraform-plugin-cache
[root@devops8 myiac-gitee]#tree terraform-plugin-cache/
terraform-plugin-cache/
└── registry.terraform.io
    ├── hashicorp
    │   ├── kubernetes
    │   │   └── 2.16.1
    │   │       └── linux_amd64
    │   │           └── terraform-provider-kubernetes_v2.16.1_x5
    │   └── null
    │       ├── 3.1.1
    │       │   ├── darwin_amd64
    │       │   │   └── terraform-provider-null_v3.1.1_x5
    │       │   ├── darwin_arm64
    │       │   │   └── terraform-provider-null_v3.1.1_x5
    │       │   ├── linux_amd64
    │       │   │   └── terraform-provider-null_v3.1.1_x5
    │       │   └── windows_amd64
    │       │       └── terraform-provider-null_v3.1.1_x5.exe
    │       └── 3.2.1
    │           └── linux_amd64
    │               └── terraform-provider-null_v3.2.1_x5
    └── tehcyx
        └── kind
            └── 0.0.12
                └── linux_amd64
                    ├── LICENSE
                    ├── README.md
                    └── terraform-provider-kind

17 directories, 9 files- 查看
kind.tf内容:
[root@devops8 k8s]#cat kind.tf
# terraform用到的providers
terraform {
  required_providers {
    kind = {
      source  = "tehcyx/kind"
      version = "0.0.12"
    }
    null = {
      source  = "hashicorp/null"
      version = "3.1.1"
    }
  }
}

provider "kind" {}

# 此变量指定kubeconfig的文件输出路径
variable "kind_cluster_config_path" {
  type    = string
  default = "~/.kube/config"
}

# 此输出会在控制台打印kubeconfig内容
output "kubeconfig" {
  value = kind_cluster.default.kubeconfig
}

# 定义k8s集群
resource "kind_cluster" "default" {
  name            = "devopscluster"                             # 集群名称
  node_image      = "kindest/node:v1.24.0"                      # kind镜像
  kubeconfig_path = pathexpand(var.kind_cluster_config_path)    # kubeconfig路径
  wait_for_ready  = true  # 等待集群节点ready

  # kind配置文件
  kind_config {
    kind        = "Cluster"
    api_version = "kind.x-k8s.io/v1alpha4"

    # Control节点配置
    node {
      role = "control-plane"
      kubeadm_config_patches = [
        <<-EOT
          kind: InitConfiguration
          imageRepository: registry.aliyuncs.com/google_containers
          networking:
            serviceSubnet: 10.0.0.0/16
            apiServerAddress: "0.0.0.0"
          nodeRegistration:
            kubeletExtraArgs:
              node-labels: "ingress-ready=true"
          ---
          kind: KubeletConfiguration
          cgroupDriver: systemd
          cgroupRoot: /kubelet
          failSwapOn: false
        EOT
      ]

      extra_port_mappings {
        container_port = 80
        host_port      = 80
      }
      extra_port_mappings {
        container_port = 443
        host_port      = 443
      }
      extra_port_mappings {
        container_port = 6443
        host_port      = 6443
      }
    }

    # worker 节点1
    node {
      role = "worker"
    }

    # worker 节点2
    node {
      role = "worker"
    }
  }
}

# null_resource 用于执行shell命令
# 此步骤用于加载ingress镜像并部署ingress
resource "null_resource" "wait_for_instatll_ingress" {
  triggers = {
    key = uuid()
  }

  provisioner "local-exec" {
    command = <<EOF
      sleep 5
      kind load  docker-image k8s.gcr.io/ingress-nginx/controller:v1.2.0 --name devopscluster
      kind load  docker-image k8s.gcr.io/ingress-nginx/kube-webhook-certgen:v1.1.1  --name devopscluster
      kubectl create ns ingress-nginx
      kubectl apply -f ingress.yaml -n ingress-nginx
      printf "\nWaiting for the nginx ingress controller...\n"
      kubectl wait --namespace ingress-nginx \
        --for=condition=ready pod \
              --selector=app.kubernetes.io/component=controller \
        --timeout=90s #这里等待了90s
    EOF
  }

  depends_on = [kind_cluster.default]
}- Terraform初始化
cd /root/myiac-gitee/k8s
# install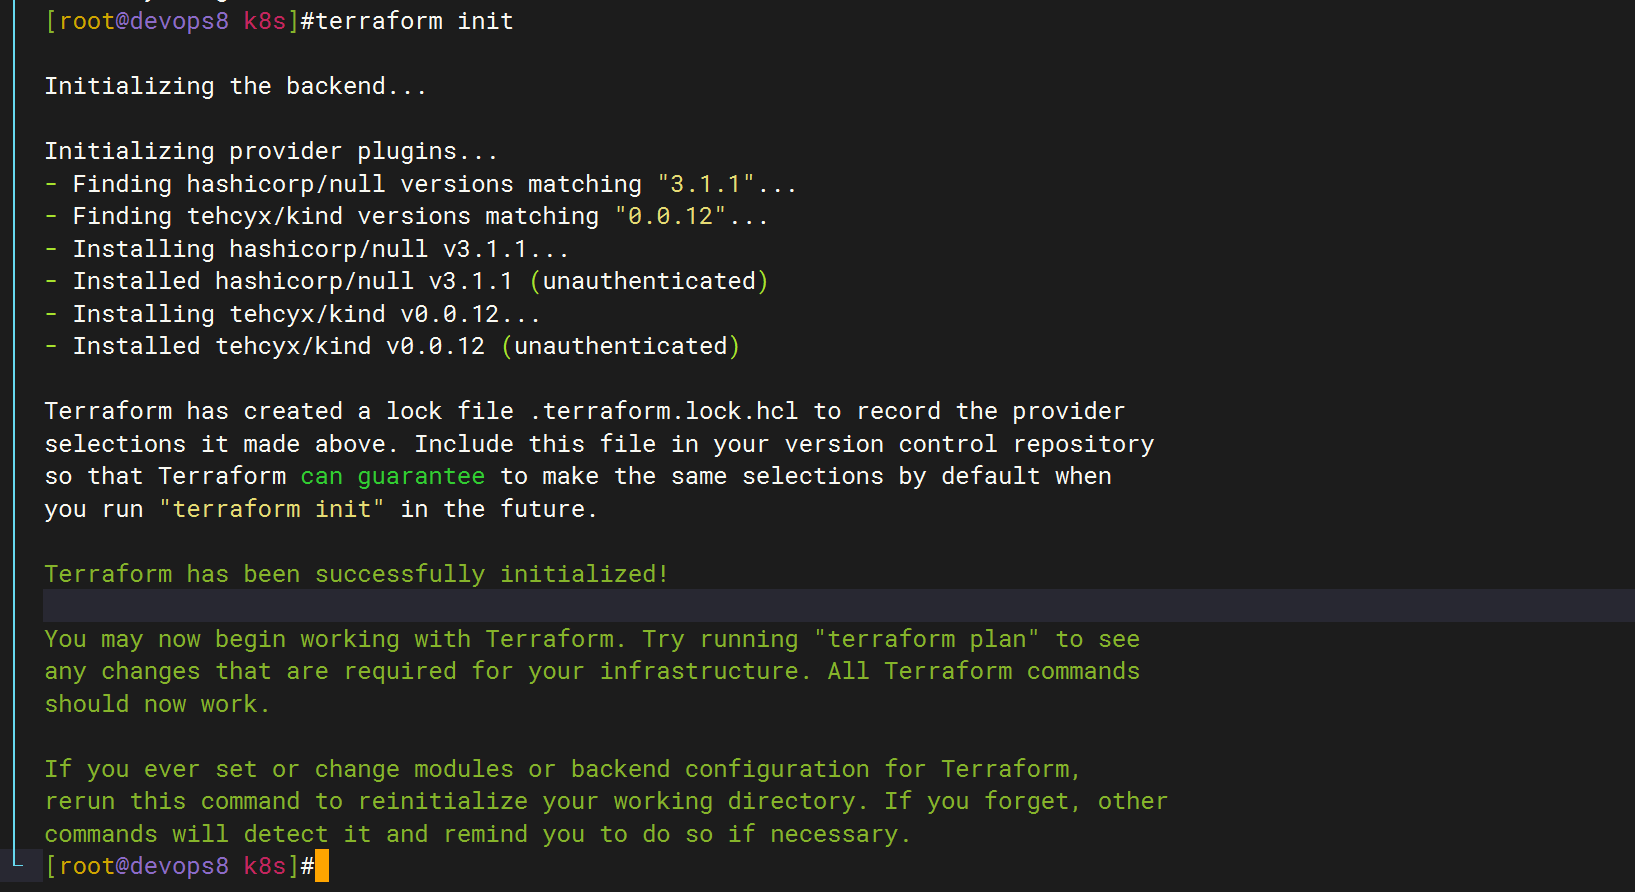
terraform init出现下面的提示信息说明初始化成功,缓存配置生效。(如果未出现提示或者其他错误检查上个步骤中的terrafor缓存配置。)
- 发布:
terraform apply --auto-approve

# uninstall
terraform destroy --auto-approve发布成功会屏幕输出kubeconfig内容,不用保存,这些内容已经存储到了~/.kube/config

- 等待Terraform发布成功后,检查集群状态。
[root@devops8 k8s]#kubectl get node
NAME                          STATUS   ROLES           AGE    VERSION
devopscluster-control-plane   Ready    control-plane   110s   v1.24.0
devopscluster-worker          Ready    <none>          89s    v1.24.0
devopscluster-worker2 Ready <none> 76s v1.24.0ingress-nginx pod:
[root@devops8 k8s]#kubectl get pod -n ingress-nginx
NAME                                        READY   STATUS      RESTARTS   AGE
ingress-nginx-admission-create-49trm        0/1     Completed   0          59s
ingress-nginx-admission-patch-rgqtk         0/1     Completed   0          59s
ingress-nginx-controller-59c96b9cb7-zh4hr 1/1 Running 0 59s2.4 k8s集群配置nfs存储
- 将devops8机器复用为nfs server:
yum -y install nfs-utils rpcbind
mkdir -p /data/storage/kubernetes
echo "/data/storage/kubernetes *(rw,insecure,sync,no_root_squash)" > /etc/exports
systemctl enable rpcbind nfs-utils nfs --now验证:
[root@devops8 ~]#showmount -e 192.168.1.200
Export list for 192.168.1.200:
/data/storage/kubernetes *

[root@devops8 ~]#systemctl status nfs-server
● nfs-server.service - NFS server and services
   Loaded: loaded (/usr/lib/systemd/system/nfs-server.service; enabled; vendor preset: disabled)
  Drop-In: /run/systemd/generator/nfs-server.service.d
           └─order-with-mounts.conf
   Active: active (exited) since Sun 2024-05-19 16:40:39 CST; 58s ago
  Process: 34636 ExecStartPost=/bin/sh -c if systemctl -q is-active gssproxy; then systemctl reload gssproxy ; fi (code=exited, status=0/SUCCESS)
  Process: 34618 ExecStart=/usr/sbin/rpc.nfsd $RPCNFSDARGS (code=exited, status=0/SUCCESS)
  Process: 34616 ExecStartPre=/usr/sbin/exportfs -r (code=exited, status=0/SUCCESS)
 Main PID: 34618 (code=exited, status=0/SUCCESS)
    Tasks: 0
   Memory: 0B
   CGroup: /system.slice/nfs-server.service

May 19 16:40:39 devops8 systemd[1]: Starting NFS server and services...
May 19 16:40:39 devops8 systemd[1]: Started NFS server and services.
[root@devops8 ~]#cat /etc/exports
/data/storage/kubernetes *(rw,insecure,sync,no_root_squash)- nfs动态供给安装(helm方式)
(1)先安装helm:
#上传软件到机器
[root@devops8 ~]#ll -h helm-v3.7.2-linux-amd64.tar.gz
-rw-rw-rw- 1 root root 14M May 19 16:46 helm-v3.7.2-linux-amd64.tar.gz

tar xf helm-v3.7.2-linux-amd64.tar.gz
cd linux-amd64/
cp helm /usr/bin/
chmod +x  /usr/bin/helm
helm version
helm repo add stable http://mirror.azure.cn/kubernetes/charts/
helm repo update
#helm补全
echo "source <(helm completion bash)" >> ~/.bashrc
source ~/.bashrc


[root@devops8 linux-amd64]#helm version
version.BuildInfo{Version:"v3.7.2", GitCommit:"663a896f4a815053445eec4153677ddc24a0a361", GitTreeState:"clean", GoVersion:"go1.16.10"}(2)安装nfs存储:
注意:这里重新拉取下代码(因为dockerhub仓库被q了)
docker pull uhub.service.ucloud.cn/onedayxyy/nfs-subdir-external-provisioner:v4.0.2

docker tag  uhub.service.ucloud.cn/onedayxyy/nfs-subdir-external-provisioner:v4.0.2 cnych/nfs-subdir-external-provisioner:v4.0.2

kind load docker-image cnych/nfs-subdir-external-provisioner:v4.0.2 --name devopscluster#上传附件到机器并解压
[root@devops8 ~]#ll -h nfs-subdir-external-provisioner-4.0.17.tgz
-rw-rw-rw- 1 root root 5.7K May 19 16:49 nfs-subdir-external-provisioner-4.0.17.tgz
[root@devops8 ~]#tar xf nfs-subdir-external-provisioner-4.0.17.tgz
[root@devops8 ~]#helm upgrade --install nfs-subdir-external-provisioner ./nfs-subdir-external-provisioner --set nfs.server=192.168.1.200 --set nfs.path=/data/storage/kubernetes --set image.repository=cnych/nfs-subdir-external-provisioner -n kube-system
Release "nfs-subdir-external-provisioner" does not exist. Installing it now.
NAME: nfs-subdir-external-provisioner
LAST DEPLOYED: Sun May 19 16:53:56 2024
NAMESPACE: kube-system
STATUS: deployed
REVISION: 1
TEST SUITE: None
[root@devops8 jenkins]#helm ls -A
NAME NAMESPACE REVISION UPDATED STATUS CHART APP VERSION
nfs-subdir-external-provisioner kube-system 1 2024-05-26 14:21:56.976270952 +0800 CST deployed nfs-subdir-external-provisioner-4.0.17 4.0.2
[root@devops8 jenkins]#kubectl get po -nkube-system
NAME READY STATUS RESTARTS AGE
……
nfs-subdir-external-provisioner-5846f745b4-d6htb 1/1 Running 0 6m2s3. 部署ArgoCD
- 添加Hosts
192.168.1.200 argocd.idevops.site- 先拉取镜像并导入kind集群:
# GetDockerImage
docker pull ccr.ccs.tencentyun.com/argocds/dex:v2.35.3
docker pull ccr.ccs.tencentyun.com/argocds/redis:7.0.8-alpine
docker pull ccr.ccs.tencentyun.com/argocds/argocd:v2.6.7

# TagDockerImage
docker tag ccr.ccs.tencentyun.com/argocds/dex:v2.35.3 ghcr.io/dexidp/dex:v2.35.3
docker tag ccr.ccs.tencentyun.com/argocds/argocd:v2.6.7 quay.io/argoproj/argocd:v2.6.7
docker tag ccr.ccs.tencentyun.com/argocds/redis:7.0.8-alpine redis:7.0.8-alpine

#导入镜像到kind集群
kind load  docker-image ghcr.io/dexidp/dex:v2.35.3 --name devopscluster
kind load  docker-image quay.io/argoproj/argocd:v2.6.7 --name devopscluster
kind load docker-image redis:7.0.8-alpine --name devopscluster- 查看run.sh:
[root@devops8 ~]#cd myiac-gitee/
[root@devops8 myiac-gitee]#ls
devops  k8s  README.md  terraform-plugin-cache
[root@devops8 myiac-gitee]#cd devops/
[root@devops8 devops]#ls
argocd  jenkins
[root@devops8 devops]#cd argocd/
[root@devops8 argocd]#ls
ingress.yaml  install.yaml  run.sh
[root@devops8 argocd]#cat run.sh
# # GetDockerImage
# docker pull ccr.ccs.tencentyun.com/argocds/dex:v2.35.3
# docker pull ccr.ccs.tencentyun.com/argocds/redis:7.0.8-alpine
# docker pull ccr.ccs.tencentyun.com/argocds/argocd:v2.6.7

# # TagDockerImage
# docker tag ccr.ccs.tencentyun.com/argocds/dex:v2.35.3 ghcr.io/dexidp/dex:v2.35.3
# docker tag ccr.ccs.tencentyun.com/argocds/argocd:v2.6.7 quay.io/argoproj/argocd:v2.6.7
# docker tag ccr.ccs.tencentyun.com/argocds/redis:7.0.8-alpine redis:7.0.8-alpine

# From local to Kind K8s Cluster
images=`grep image: install.yaml | awk -F 'image: ' '{print $NF}' | sort -n | uniq`

for image in $images
do
  kind load  docker-image $image --name devopscluster
done


# Install argocd
kubectl create ns argocd
kubectl -n argocd apply -f install.yaml
kubectl -n argocd apply -f ingress.yaml
sleep 3
kubectl -n argocd get pod
kubectl -n argocd get secret
sleep 5
# Get password
kubectl -n argocd get secret argocd-initial-admin-secret -o jsonpath='{.data.password}' | base64 -d ; echo- 执行安装脚本:
cd /root/myiac-gitee/devops/argocd

[root@devops8 argocd]#pwd
/root/myiac-gitee/devops/argocd
[root@devops8 argocd]#ls
ingress.yaml  install.yaml  run.sh
[root@devops8 argocd]#sh -x run.sh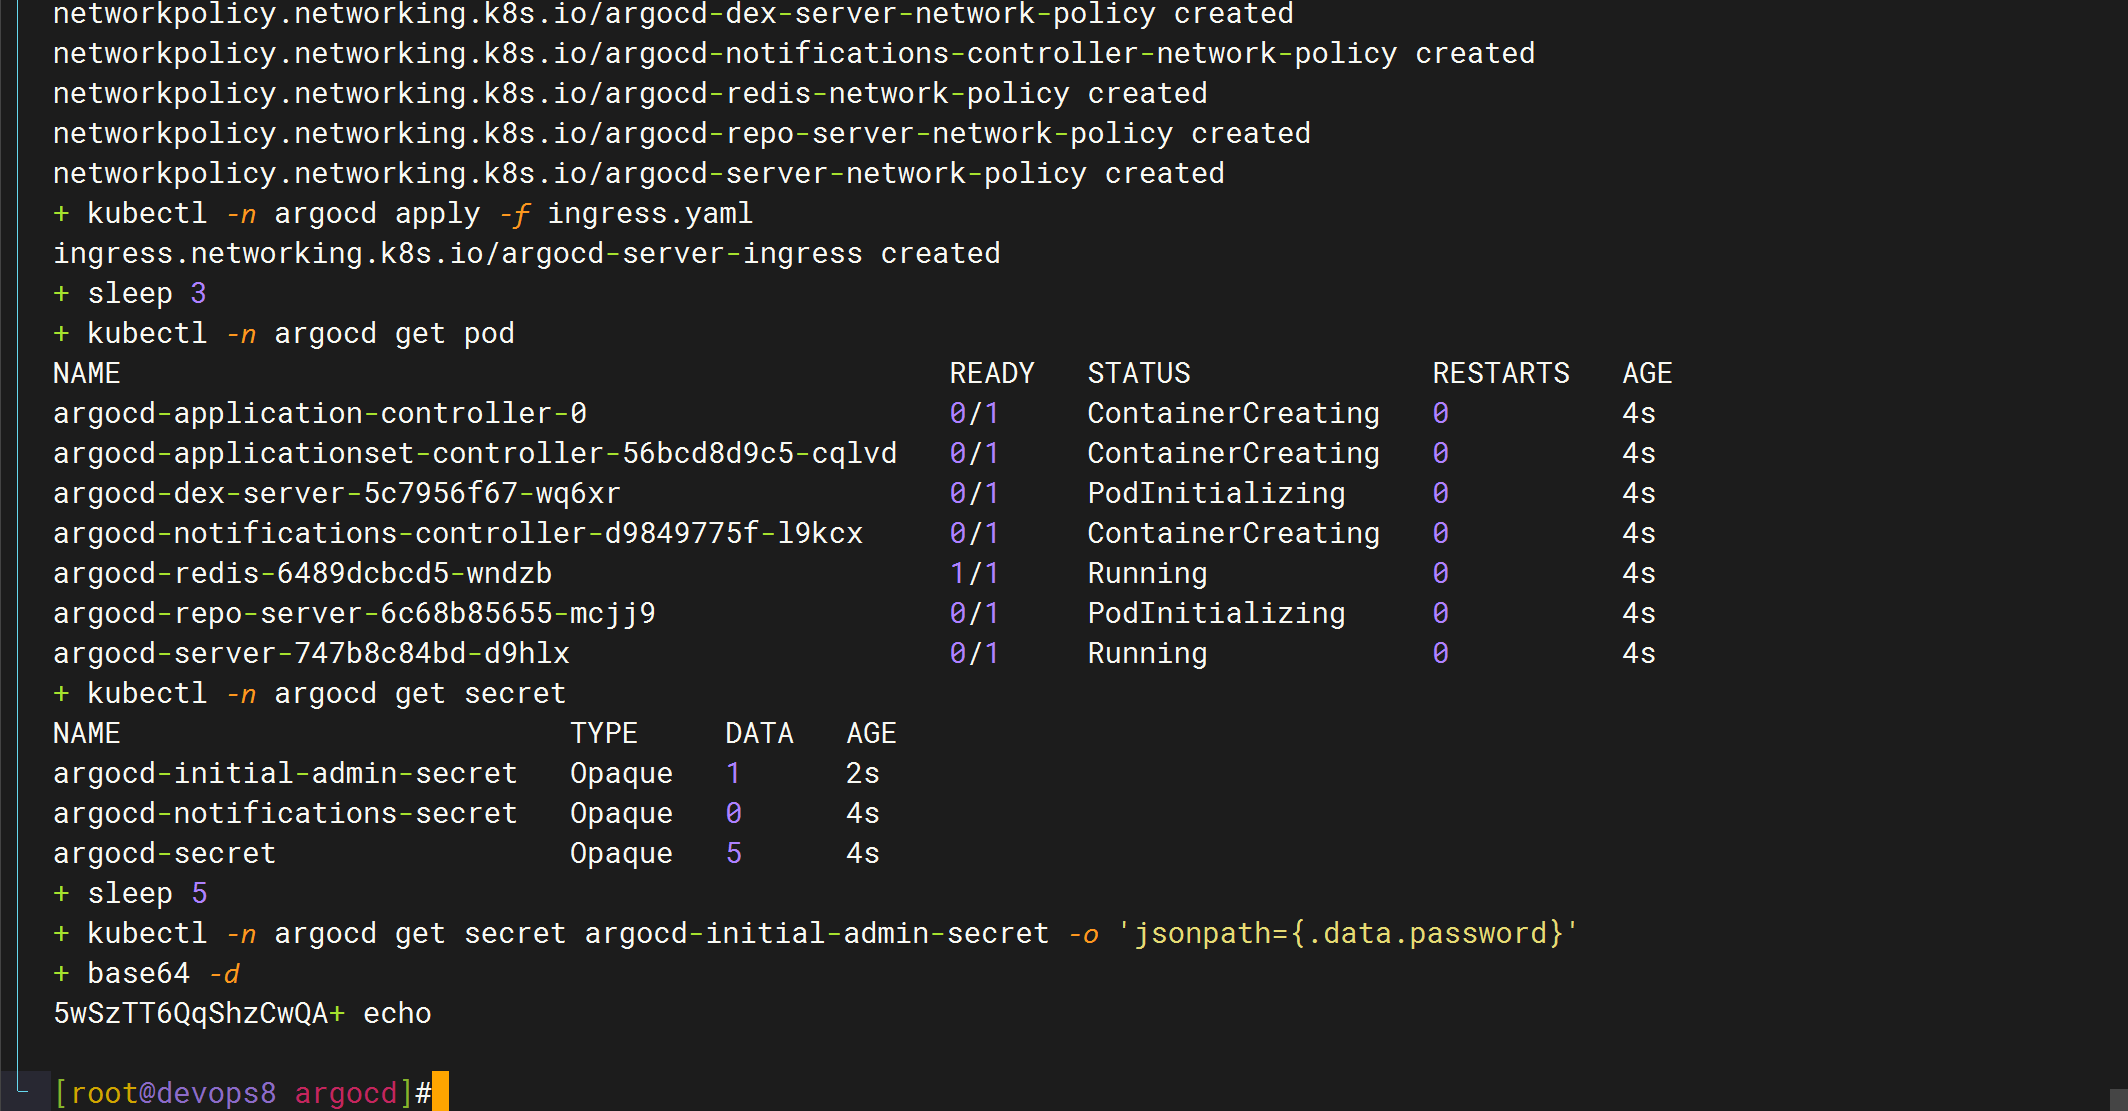
#也可以手动查看密码
+ kubectl -n argocd get secret argocd-initial-admin-secret -o 'jsonpath={.data.password}'
+ base64 -d
5wSzTT6QqShzCwQA+ echo #注意不包含这个+号

5wSzTT6QqShzCwQAargocd pod信息:
[root@devops8 argocd]#kubectl -n argocd get pod
NAME                                                READY   STATUS    RESTARTS   AGE
argocd-application-controller-0                     1/1     Running   0          48s
argocd-applicationset-controller-56bcd8d9c5-cqlvd   1/1     Running   0          48s
argocd-dex-server-5c7956f67-wq6xr                   1/1     Running   0          48s
argocd-notifications-controller-d9849775f-l9kcx     1/1     Running   0          48s
argocd-redis-6489dcbcd5-wndzb                       1/1     Running   0          48s
argocd-repo-server-6c68b85655-mcjj9                 1/1     Running   0          48s
argocd-server-747b8c84bd-d9hlx                      1/1     Running   0          48s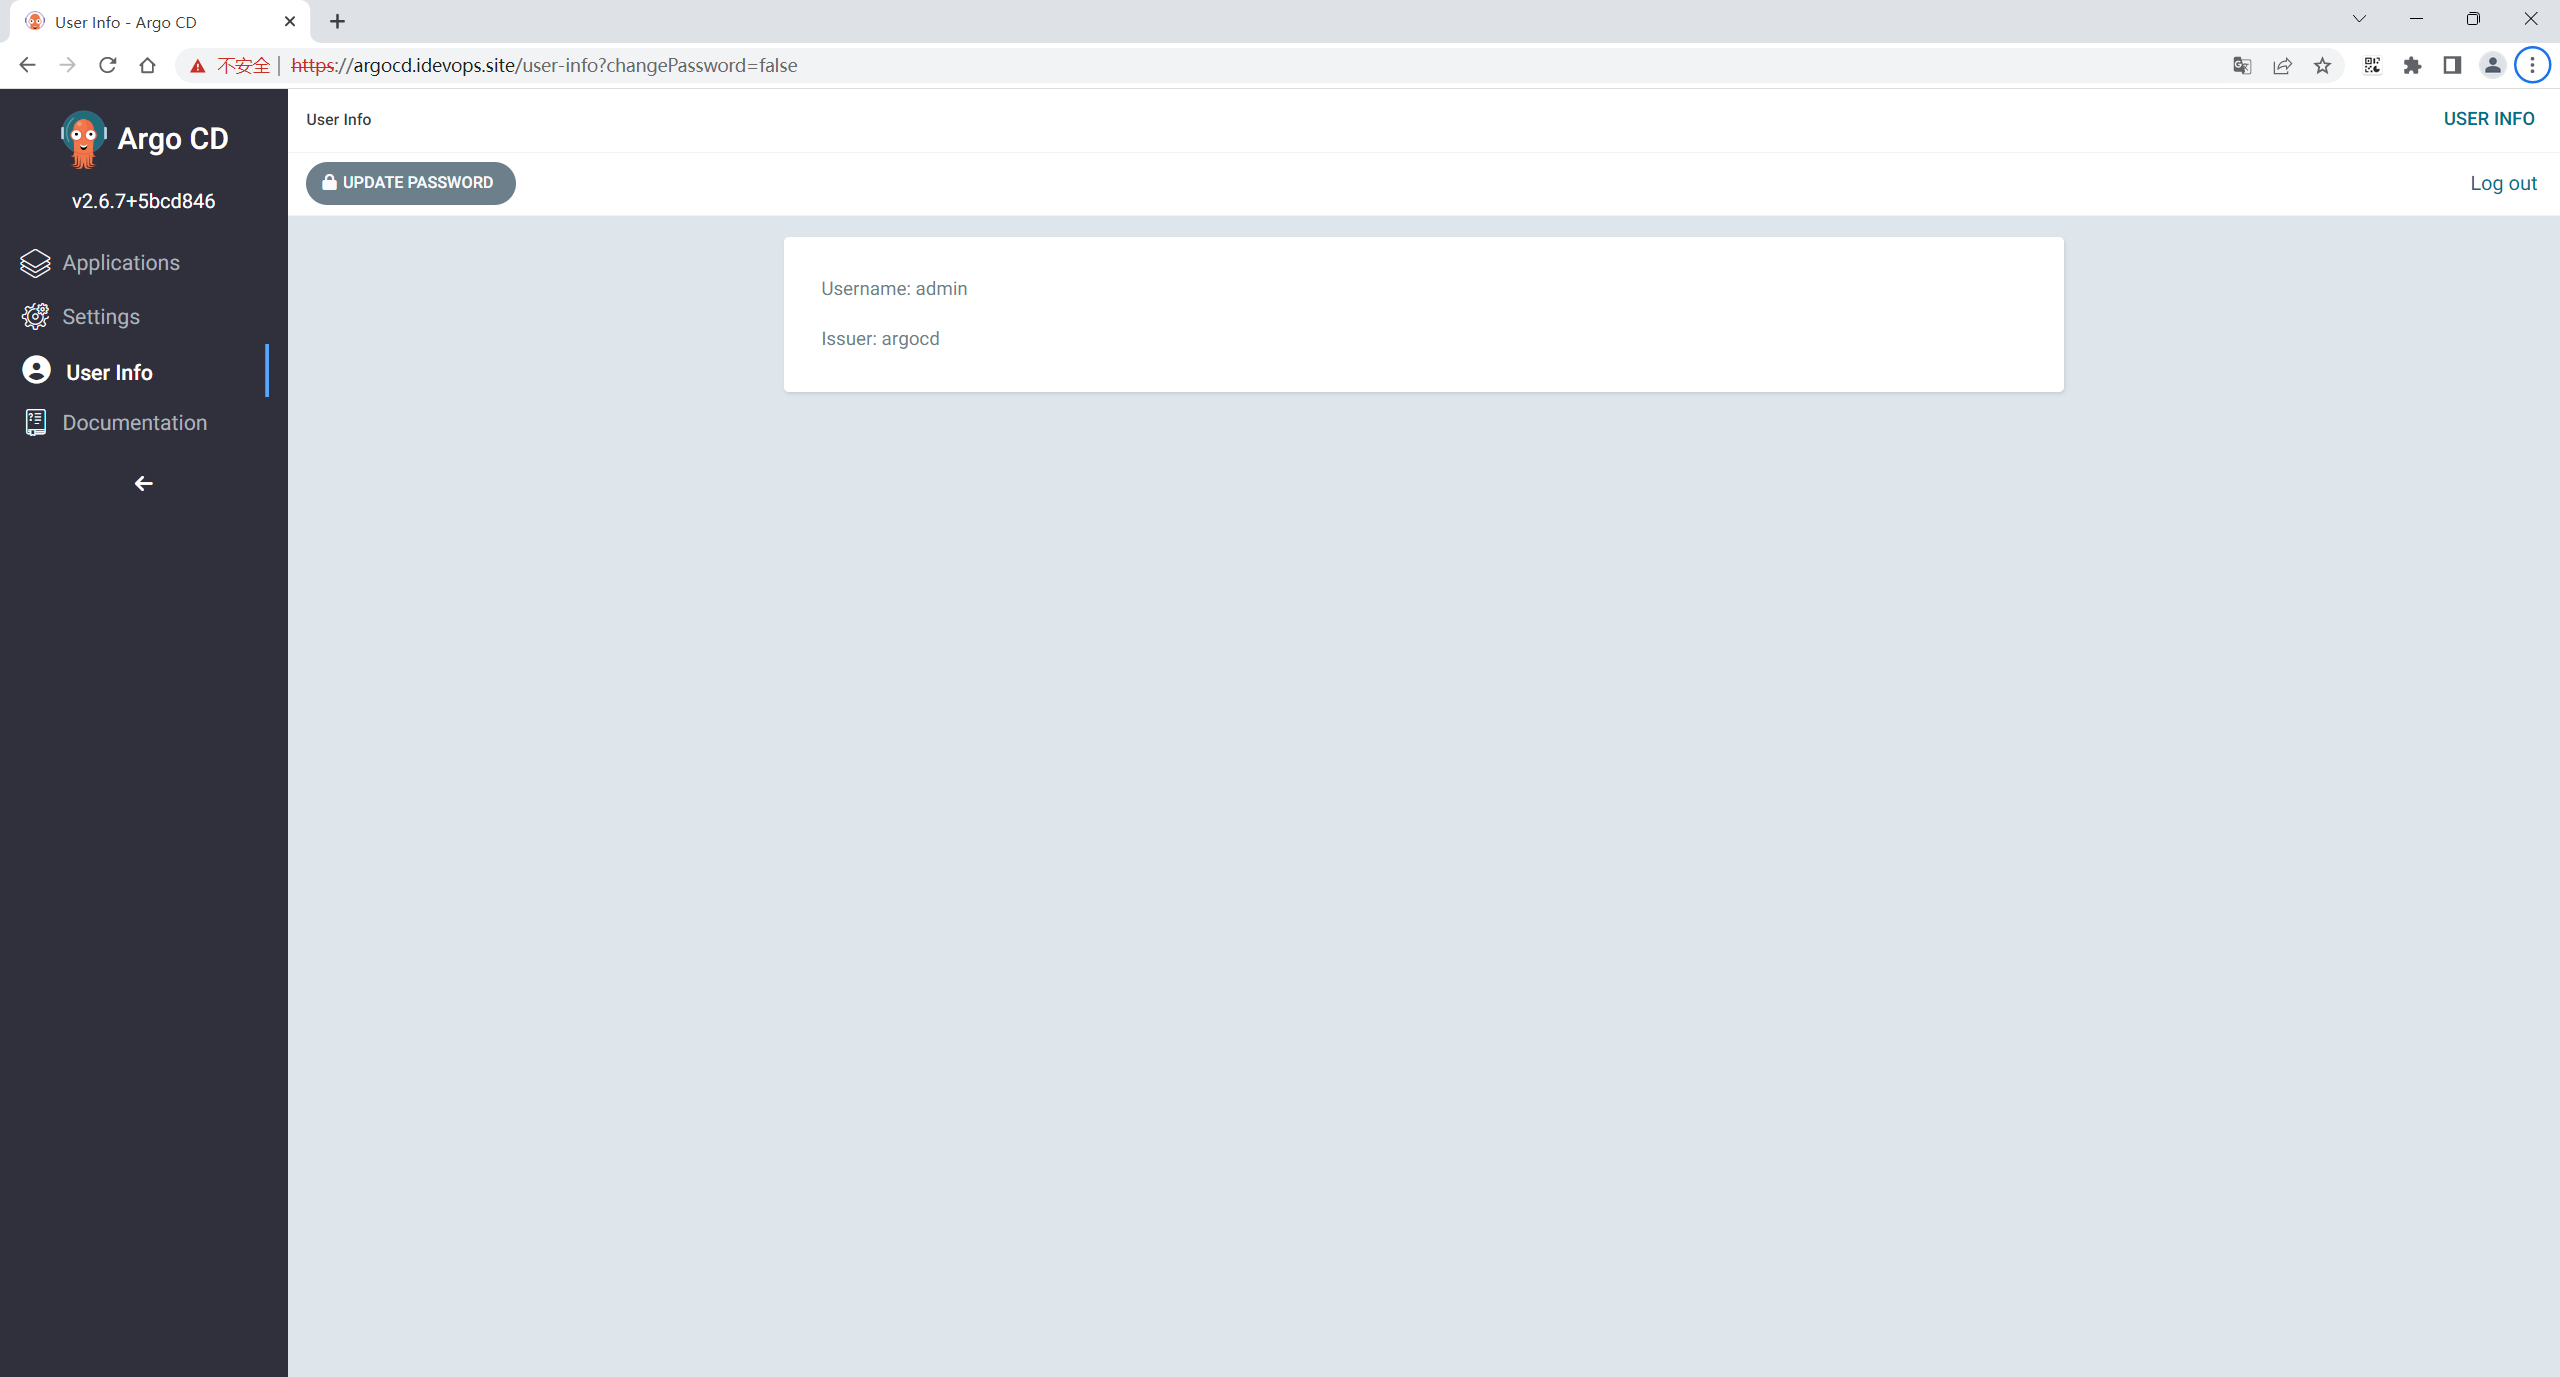
[root@devops8 argocd]#- 登录web改密码:
admin/5wSzTT6QqShzCwQA

原密码改为
admin/admin@123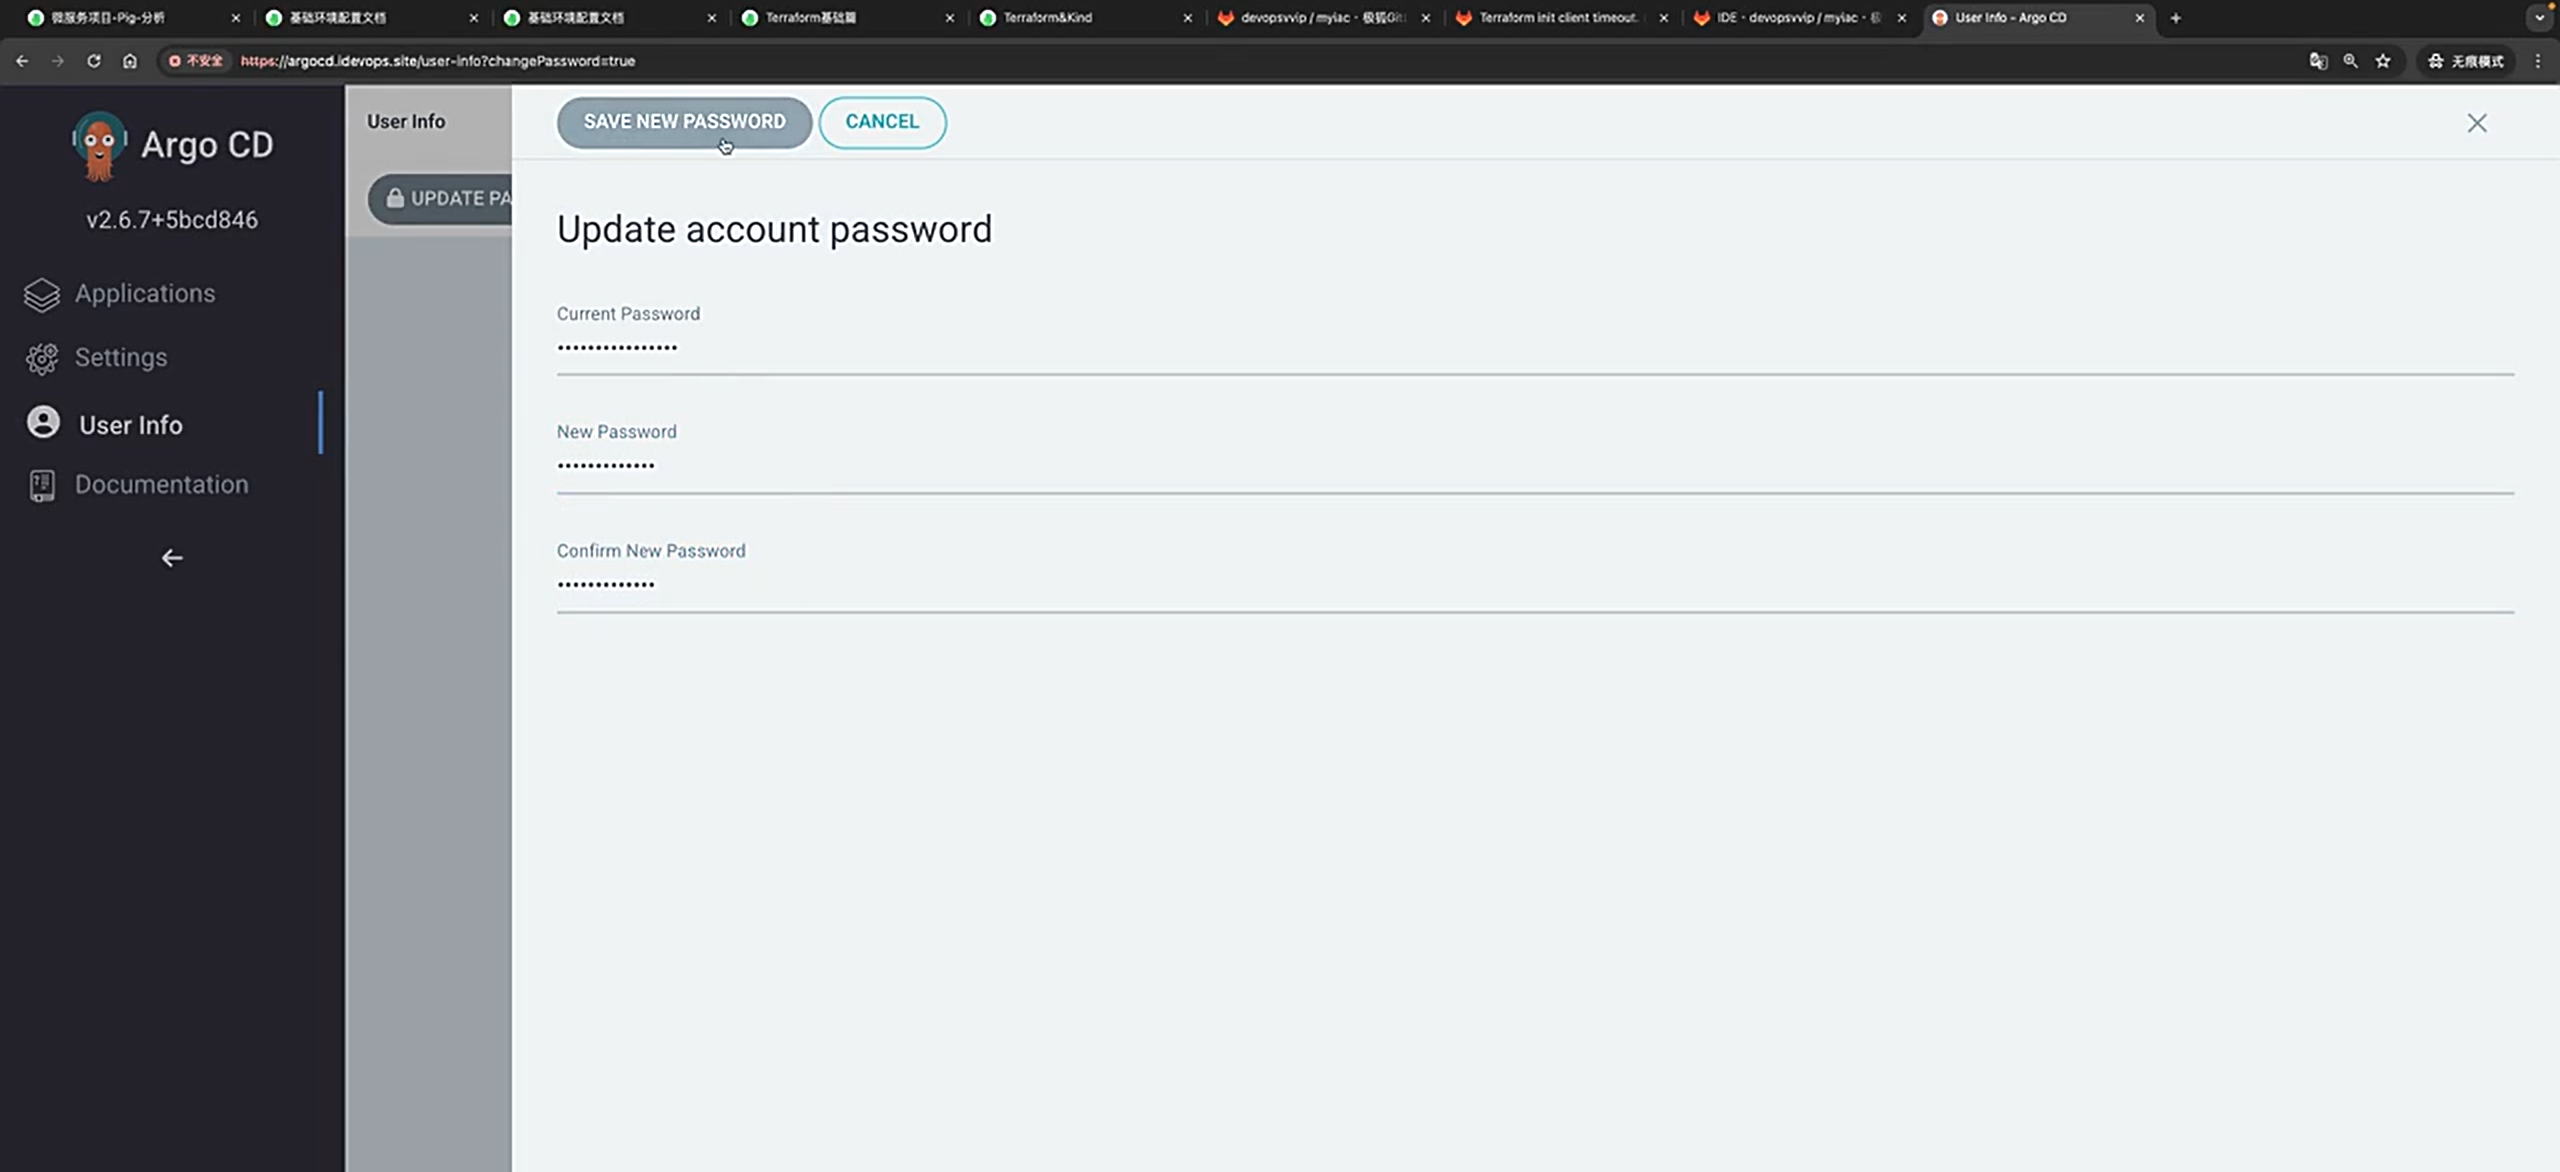
基础环境配置结束。
FAQ
本期密码
192.168.1.200 argocd.idevops.site jenkins.idevops.site
| 名称 | 链接 | 用户名 | 密码 |
|---|---|---|---|
| argocd | argocd.idevops.site | admin | 变化的 |
| jenkins | jenkins.idevops.site | admin | admin@123 |
| gitlab | gitlab.idevops.site | admin | nLU4eXA2YjRPjKZ |
销毁环境&重建
这个问题需要特别注意下。
- 遇到的问题

一键安装环境
- 淦,自己环境虚机重启后,==argocd一直无法登录==,但jenkins有问题,自己最后重新销毁了k8s集群,再次创建了,**此时发现原来的all数据(jenkins、gitlab)jenkins数据都是在的**哦。
1.销毁k8s集群命令
cd /root/myiac-gitee/k8s/
terraform init
terraform destroy --auto-approve

kind delete cluster --name devopscluster2.重新创建k8s集群命令
#拉取最新代码
# cd /root/myiac-gitee
# git pull
# git status
#####################################################

#创建k8s集群
cd /root/myiac-gitee/k8s/
rm -rf terraform.tfstate terraform.tfstate.backup
terraform init
terraform apply --auto-approve
#####################################################


#开始导入镜像
cd /root
kind load  docker-image cnych/nfs-subdir-external-provisioner:v4.0.2 --name devopscluster

kind load  docker-image ghcr.io/dexidp/dex:v2.35.3 --name devopscluster
kind load  docker-image quay.io/argoproj/argocd:v2.6.7 --name devopscluster
kind load  docker-image redis:7.0.8-alpine --name devopscluster

kind load  docker-image jenkins/jenkins:2.415-jdk11 --name devopscluster
kind load  docker-image jenkins/inbound-agent:latest --name devopscluster

kind load  docker-image gitlab/gitlab-ce:16.2.2-ce.0 --name devopscluster

kind load  docker-image uhub.service.ucloud.cn/onedayxyy/metrics-server:v0.7.0 --name devopscluster

kind load  docker-image ccr.ccs.tencentyun.com/devopsvip/custom-build-agent:v2 --name devopscluster
#####################################################


##安装metrics-server
cd ~
kubectl apply -f components.yaml

#helm安装nfs存储
helm upgrade --install nfs-subdir-external-provisioner ./nfs-subdir-external-provisioner --set nfs.server=192.168.1.200 --set nfs.path=/data/storage/kubernetes --set image.repository=cnych/nfs-subdir-external-provisioner  -n kube-system
kubectl get po -A
#####################################################


#安装argocd
cd myiac-gitee/devops/argocd/
kind load  docker-image ghcr.io/dexidp/dex:v2.35.3 --name devopscluster
kind load  docker-image quay.io/argoproj/argocd:v2.6.7 --name devopscluster
kind load  docker-image redis:7.0.8-alpine --name devopscluster
sh -x run.sh
#拷贝argocd登录密码,手动登录argocd


#安装jenkins
cd /root/myiac-gitee/devops/jenkins/
#kind load  docker-image jenkins/jenkins:2.415-jdk11 --name devopscluster
#kind load  docker-image jenkins/inbound-agent:latest --name devopscluster
sh -x run.sh

#安装jenkins-agent
cd /root/myiac-gitee/devops/jenkins/
kubectl -n argocd apply -f jenkins-agent-argoapp.yaml


#部署gitlab
#mkdir -p /data/storage/kubernetes/gitlab/{config,logs,data}
#chmod 777 -R /data/storage/kubernetes/gitlab/
#kind load  docker-image gitlab/gitlab-ce:16.2.2-ce.0 --name devopscluster
kubectl -n argocd apply -f /root/myiac-gitee/devops/gitlab/gitlab-argoapp.yaml
#####################################################


#查看那argocd密码
kubectl -n argocd get secret argocd-initial-admin-secret -o 'jsonpath={.data.password}'|base64  -d;echo

#查看gitlab密码
#cd /data/storage/kubernetes/gitlab/config
#cat initial_root_password
##The end
#####################################################
1
参考文档
关于我
我的博客主旨:
- 排版美观,语言精炼;
- 文档即手册,步骤明细,拒绝埋坑,提供源码;
- 本人实战文档都是亲测成功的,各位小伙伴在实际操作过程中如有什么疑问,可随时联系本人帮您解决问题,让我们一起进步!
🍀 微信二维码
x2675263825 (舍得), qq:2675263825。

🍀 微信公众号
《云原生架构师实战》

🍀 个人博客站点

🍀 csdn
https://blog.csdn.net/weixin_39246554?spm=1010.2135.3001.5421
🍀 知乎
https://www.zhihu.com/people/foryouone
最后
好了,关于本次就到这里了,感谢大家阅读,最后祝大家生活快乐,每天都过的有意义哦,我们下期见!
